How to Install Trafficmaster Allure Plank Flooring
Trafficmaster Allure plank flooring is a popular choice for homeowners due to its durability, ease of installation, and stylish appearance. If you're planning to install Trafficmaster Allure plank flooring in your home, here's a step-by-step guide to help you get the job done right.
Materials You'll Need:
- Trafficmaster Allure plank flooring
- Underlayment (optional)
- Tape measure
- Pencil
- Utility knife
- Tapping block
- Pull bar
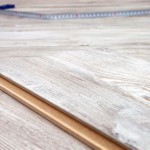
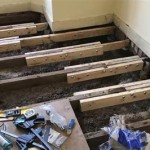
Step 1: Prepare the Subfloor
Before you begin installing the flooring, it's important to make sure the subfloor is clean, dry, and level. If the subfloor is not level, you may need to use a self-leveling compound to smooth it out.
Step 2: Install the Underlayment (Optional)
While not required, installing an underlayment can help to reduce noise and provide additional cushioning underfoot. If you choose to use an underlayment, simply roll it out over the subfloor and tape the seams together.
Step 3: Measure and Cut the Planks
Measure the length and width of the room and cut the planks accordingly. Use a utility knife to score the planks and then snap them apart. Be sure to cut the planks slightly shorter than the actual length of the room to allow for expansion.
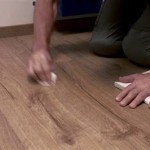
Step 4: Start Installing the Planks
Start installing the planks in a corner of the room. Place the first plank along the wall, leaving a small gap for expansion. Tap the plank into place using a tapping block and hammer. Continue installing the planks row by row, staggering the joints for strength.
Step 5: Lock the Planks Together
Once you have installed the first row of planks, you can start locking the planks together. To do this, simply insert the tongue of one plank into the groove of the next plank. Use a tapping block and hammer to tap the planks together until they are locked securely.
Step 6: Continue Installing the Planks
Continue installing the planks until you reach the opposite wall. If you need to cut the last plank to fit, measure the remaining space and cut the plank accordingly. Tap the plank into place and lock it into the previous plank.
Step 7: Install the Baseboards
Once the flooring is installed, you can install the baseboards. Baseboards help to cover the gap between the flooring and the wall, and they also add a finished look to the room.
Step 8: Enjoy Your New Flooring!
Congratulations! You have now successfully installed Trafficmaster Allure plank flooring. Enjoy the beauty and durability of your new flooring for years to come.

How To Install Luxury Vinyl Plank Trafficmaster Allure

How To Install Vinyl Flooring Traffic Master Moonstone Rigid Core Plank Diy

Allure By Traffic Master Flooring Install

Trafficmaster Ceramica 12 X 24 Vinyl Tile Floor Installation

Trafficmaster Allure Gripstrip Vinyl Plank Flooring

How To Install Allure Flooring

Trafficmaster Allure Vinyl Plank Flooring Installation

Trafficmaster Allure Ultra Resilient Flooring Installation Review

Trafficmaster White Maple 4 Mil X 6 In W 36 L Grip Strip Water Resistant Luxury Vinyl Plank Flooring 24 Sqft Case 97011 The Home Depot

Trafficmaster Floor Installation Budget Friendly Home Remodeling
Related Posts