How to Install Plank Flooring on Stairs
Installing plank flooring on stairs can be a great way to update the look of your home and increase its value. While it may seem like a daunting task, it's actually quite manageable with the right tools and materials. Here are the essential steps to help you achieve a professional-looking finish:Materials:
- Plank flooring - Underlayment - Stair treads - Stair risers - Adhesive - Nails - Trim moldingTools:
- Measuring tape - Pencil - Circular saw - Miter saw - Nail gun - Hammer - Pry bar - LevelStep 1: Prepare the Stairs
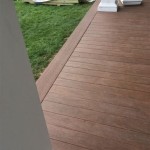
- Remove any existing flooring or carpet from the stairs. - Ensure that the stairs are level and smooth. If necessary, use a level and a pry bar to make any necessary adjustments.Step 2: Install the Underlayment
- Roll out the underlayment over the stairs, ensuring that it covers the entire surface. - Secure the underlayment with tape or staples.Step 3: Cut the Stair Treads
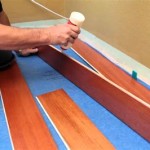
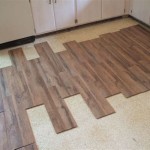
- Measure the width of each stair tread and mark the measurements on the plank flooring. - Use a circular saw to cut the treads to the correct length. - Ensure that the cuts are straight and precise.Step 4: Install the Stair Treads
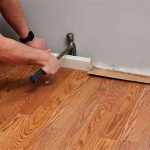
- Apply adhesive to the back of each stair tread. - Place the tread on the corresponding step and press firmly into place. - Use a nail gun to secure the tread to the underlayment.Step 5: Install the Stair Risers
- Measure the height of each stair riser and mark the measurements on the plank flooring. - Use a miter saw to cut the risers to the correct length. - Apply adhesive to the back of each riser and place it on the corresponding step. - Use a nail gun to secure the riser to the underlayment and the tread.Step 6: Install the Trim Molding
- Measure and cut the trim molding to fit around the edges of the stairs. - Apply adhesive to the back of the molding and press it into place. - Secure the molding with nails.Step 7: Finishing Touches
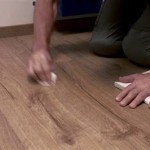
- Once the flooring is installed, you can apply a finish to protect it. This could be a polyurethane or a water-based finish. - Allow the finish to dry completely before walking on the stairs. By following these steps carefully, you can ensure that your plank flooring installation on stairs is successful. With a little planning and effort, you can create a beautiful and durable new look for your home.
How To Install Vinyl Plank Flooring On Stairs In 6 Steps Inc

How To Install Laminate Flooring On Staircase Step By Guide

How To Install Vinyl Plank Flooring On Stairs In 6 Steps Inc

How To Install Laminate Flooring On Stairs Direct Wood

How To Install Laminate On Stairs Follow Our Essential Guide Laying And Costing For

How To Install Vinyl Plank Flooring On Stairs

How To Install Laminate Flooring On Stairs 13 Steps

How To Install Vinyl Plank Flooring On Stairs Diy

How To Install Laminate Flooring On Stairs Direct Wood

How To Install Laminate Flooring On Stairs 13 Steps
Related Posts