Essential Aspects of Installing Nail Down Wood Flooring
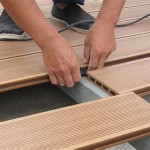
Installing nail down wood flooring requires careful planning and execution to ensure a durable and visually appealing result. This guide provides a comprehensive overview of the essential steps involved in this process.
1. Preparation:
Before starting the installation, it is crucial to prepare the subfloor by leveling and smoothing it to create a solid base for the flooring. Make sure to remove any existing floor coverings, nails, or debris.
2. Moisture Control:
Wood is susceptible to moisture damage, so controlling moisture levels is essential. Install a vapor barrier between the subfloor and the wood flooring to prevent moisture from rising and damaging the wood. Ensure proper ventilation and avoid installing wood flooring in areas with high humidity.
3. Installing Underlayment:
An underlayment layer provides cushioning and sound insulation between the subfloor and the wood flooring. Choose an underlayment designed specifically for nail down wood flooring and lay it out according to the manufacturer's instructions.
4. Starting the Installation:
Begin installing the flooring in a corner of the room, starting with a full plank. Secure the first row of planks securely with nails, ensuring they are spaced evenly apart.
5. Nail Placement:
Use galvanized nails appropriate for the thickness of the flooring. Drive the nails at a 45-degree angle through the tongue of each plank into the subfloor. Space the nails evenly apart and sink them below the surface of the wood.
6. Acclimation:
Allow the wood flooring to acclimate to the room's temperature and humidity for several days before installing it. This minimizes the risk of the wood expanding or contracting after installation.
7. Trimming and Fitting:
As you progress with the installation, you will encounter areas where the wood needs to be trimmed to fit. Use a sharp handsaw or circular saw to make precise cuts and ensure a snug fit.
8. Expansion Gap:
Leave a small expansion gap around the perimeter of the room to allow the wood to expand and contract without buckling. Use spacers or a pry bar to maintain the gap during installation.
9. Finishing:
Once the flooring is installed, you can apply a finish such as polyurethane or wax to protect and enhance its appearance. Allow the finish to dry and cure thoroughly before using the floor.
10. Maintenance:
Regular maintenance is essential to preserve the beauty and longevity of your nail down wood flooring. Sweep or vacuum the floor regularly to remove dust and debris. Avoid using harsh cleaning products or excessive moisture.

Floating Floor Vs Nail Down Slaughterbeck Floors Inc

How To Install Nail Down Hardwood Flooring Ll

How To Install Nail 2025 Down Engineered Wood Flooring

How To Nail Down An Engineered Wood Floor Reallyfloors Com Install Series

How To Install Hardwood Flooring Nail Down Home Renovation I Like Make Stuff

How To Install Nail Down Hardwood Flooring Ll

How To Nail Down Hardwood Flooring Builddirect

Floating Floor Vs Nail Down Slaughterbeck Floors Inc

Nail Or S Glue Hardwood Floor

How To Install A Glue Down Floor Diy Flooring
Related Posts


