How to Install Nail Down Hardwood Flooring: A Step-by-Step Guide
Installing nail down hardwood flooring is a rewarding home improvement project that can enhance the beauty and value of your home. While it requires some time and effort, it's a task that can be successfully completed by determined DIYers. Here's a comprehensive guide to assist you in every step of the process:
1. Preparation
Before you begin, it's crucial to prepare the subfloor thoroughly. Ensure it is level, dry, and free from any imperfections. Consider adding a moisture barrier if necessary. You'll also need to calculate the square footage of your room to determine the amount of flooring materials required.
2. Acclimation
Hardwood flooring must acclimate to the environmental conditions of your home before installation. Unpack the planks and spread them out on the subfloor for several days. This process allows the wood to adjust to the temperature and humidity levels, preventing potential warping or buckling later on.
3. Layout and Dry Fit
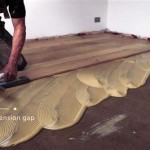
Start by determining the center point of the room. Begin laying the first row of planks parallel to the longest wall, leaving a small expansion gap around the perimeter. Dry fit the planks together without nailing them down to ensure a proper fit and reveal any potential issues.
4. Nailing
Once the layout is satisfactory, start nailing down the planks. Use a flooring nailer or a hammer and flooring cleats to secure the planks firmly to the subfloor. Drive the nails at a 45-degree angle through the tongue of the plank, ensuring they are flush with the surface.
5. Subsequent Rows
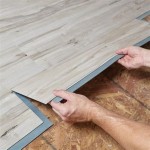
Continue installing subsequent rows of planks, alternating the starting end of each row to create a staggered pattern. Interlock the tongue and groove ends of the planks for a secure connection. Trim the last plank in each row to fit snugly against the wall.
6. Thresholds and Transitions
When transitioning from one room to another or connecting different types of flooring, install thresholds or transitions. These moldings conceal the joint between the two surfaces, providing a smooth and professional finish.
7. Baseboards
Once the flooring is installed, attach baseboards around the perimeter of the room. Baseboards conceal the expansion gap and create a finished look. Secure them using nails or a brad nailer.
8. Refinishing (Optional)
If desired, you can refinish the hardwood flooring by sanding it and applying a protective finish. This step is recommended for new installations or to restore the beauty of existing flooring.
Conclusion
Installing nail down hardwood flooring requires careful preparation, attention to detail, and a desire to achieve a professional result. By following the steps outlined in this guide, you can create a beautiful and long-lasting hardwood floor that will enhance your home's appearance for years to come.

Advantages Of Nail Down Floor Installation Wood Fitting

How To Install Nail Down Hardwood Flooring Ll

Is Nail Down Installation The Best Unique Wood Floor

Gluing Nail Down And Floating Floor Installation Choosing The Best One

How To Install Hardwood Flooring Nail Down Home Renovation I Like Make Stuff

Hardwood Floor Installation Nail Down Like A Pro

How To Nail Down An Engineered Wood Floor Reallyfloors Com Install Series

Nail Down Installation Csflooring 7

Hardwood Flooring Installation Diaz Floors

Wood Nail Down Method Installation
Related Posts


