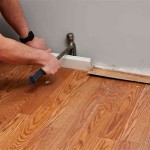
How to Install LVT Flooring
Luxury vinyl tile (LVT) flooring is a popular choice for homeowners and businesses alike. It is durable, easy to maintain, and available in a wide variety of styles. If you are considering installing LVT flooring, there are a few things you need to know.
1. Prepare the Subfloor
The first step is to prepare the subfloor. The subfloor should be level, smooth, and dry. If the subfloor is not level, you will need to level it using a self-leveling compound. If the subfloor is not smooth, you will need to sand it down. And if the subfloor is not dry, you will need to let it dry completely before installing the LVT flooring.
2. Install the Underlayment
Once the subfloor is prepared, you will need to install the underlayment. The underlayment will help to cushion the LVT flooring and reduce noise. There are a variety of underlayment products available, so be sure to choose one that is compatible with your LVT flooring.
3. Lay Out the LVT Flooring
The next step is to lay out the LVT flooring. Start by laying out the first row of tiles along one wall. Be sure to leave a small gap between the tiles and the wall. Once the first row is laid out, you can start laying out the rest of the tiles. Be sure to stagger the joints between the tiles to create a more durable floor.
4. Cut the LVT Flooring
You will need to cut the LVT flooring to fit around obstacles such as walls, doorways, and cabinets. To cut the LVT flooring, you will need a utility knife or a circular saw. Be sure to use a sharp blade to get a clean cut.
5. Install the LVT Flooring
Once the LVT flooring is cut, you can start installing it. Start by applying a bead of adhesive to the back of the tile. Then, press the tile into place. Be sure to apply even pressure to the entire tile. Once the tile is in place, you can use a roller to help bond the tile to the subfloor.
6. Grout the LVT Flooring
Once the LVT flooring is installed, you can grout the joints between the tiles. Grouting the joints will help to seal the floor and prevent moisture from seeping in. To grout the joints, you will need a grout float and a bucket of grout. Apply the grout to the joints using the grout float. Then, use a damp sponge to remove any excess grout. Be sure to let the grout dry completely before walking on the floor.
7. Enjoy Your New LVT Flooring
Once the grout is dry, you can enjoy your new LVT flooring. LVT flooring is durable, easy to maintain, and beautiful. With proper care, your LVT flooring will last for many years to come.

Installing Vinyl Plank Flooring How To Fixthisbuildthat

How To Install Vinyl Plank Flooring In A Bathroom Fixthisbuildthat

How To Install Vinyl Plank Flooring As A Beginner Home Renovation

Installing Vinyl Floors A Do It Yourself Guide The Honeycomb Home

How To Install Lvt Lvp Flooring 4 Easy Steps America

10 Beginner Mistakes Installing Vinyl Plank Flooring

How To Install Vinyl Plank Flooring As A Beginner Home Renovation

A Beginner S Guide To Installing Vinyl Plank Flooring Dumpsters Com

How To Install Luxury Vinyl Plank Flooring Quick And Simple Casa Watkins Living

How To Install Luxury Vinyl Plank Flooring Wood
Related Posts


