How to Install Laminate Flooring Tiles Like a Pro
Transforming your home with the elegance of laminate flooring is a rewarding project that can be tackled with the right preparation and technique. Laminate tiles offer a durable and cost-effective alternative to hardwood, and installing them yourself can save you a significant sum of money. Here's a comprehensive guide to help you achieve professional-looking results.
Materials and Tools You'll Need
Before you start, gather the following materials and tools:
- Laminate flooring tiles
- Underlayment (optional but recommended)
- Expansion spacers
- Cutting tool (circular saw, jig saw, or utility knife)
- Hammer or mallet
- Tap block or pulling bar
- Tape measure and pencil
- Safety glasses
Preparing the Subfloor
The success of your laminate floor installation largely depends on the condition of the subfloor. Ensure that it is:
- Flat and level (no more than 1/8 inch deviation over 10 feet)
- Clean and free of debris
- Dry and moisture-resistant (install a vapor barrier if necessary)
If the subfloor requires leveling, you can use self-leveling compound or plywood underlayment.
Installing the Underlayment
Installing an underlayment provides added cushioning, sound absorption, and moisture protection. Cut the underlayment to fit the room and lay it down perpendicular to the direction of the floorboards.
Positioning the Starting Row
Decide on the direction you want the floorboards to run. Place expansion spacers around the perimeter of the room to allow for expansion and contraction. Lay down the first row of tiles along the longest wall, ensuring that the tongue side is facing the wall.
Locking the Tiles Together
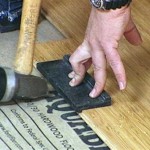
Align the tongue of the next tile with the groove of the first tile. Angle the tile slightly and tap it gently into place using a hammer or mallet and tap block. Continue locking tiles together in this manner, row by row.
Cutting and Fitting
When you reach walls or obstacles, you'll need to cut tiles to fit. Measure the necessary length and mark it on the tile. Use a cutting tool to cut along the line and gently tap the tile into place.
Installing the Last Row
The last row may require additional trimming. Measure and cut the tiles to fit snugly against the wall. Use a pulling bar to gently coax the last row into place.
Trimming and Accessories
Once the floor is installed, trim around the edges using baseboards or quarter rounds. You can also add transition strips where different flooring materials meet.
Finishing Touches
Clean the floor thoroughly to remove any debris or dust. Apply a sealant to the edges of the tiles to enhance durability.
Conclusion
Installing laminate flooring tiles is a manageable project with proper preparation and attention to detail. By following these steps and investing in quality materials, you can create a beautiful and long-lasting floor that will enhance the aesthetics of your home for years to come.

How To Install Laminate Flooring For Beginners

Can You Put Laminate Flooring Over Tile Twenty Oak

Can You Lay Laminate Flooring Over Tile

How To Install Parquet Tile The Home Depot

How To Install A Laminate Floor

How To Install L And Stick Vinyl Tiles Houseful Of Handmade

How To Install Vinyl Plank Flooring In A Bathroom

Step By Installation Guide For Wood Floor Tiles
:strip_icc()/SCF_152_05-5c4b3003e6a34d78ab843eab12000116.jpg?strip=all)
How To Lay L And Stick Tile Floors

How To Install Wood Look Tile
Related Posts


