How To Install Laminate Flooring In Kitchen - A Step-By-Step Guide
Laminate flooring is a popular choice for kitchens due to its durability, ease of maintenance, and affordability. Here's a step-by-step guide on how to install laminate flooring in your kitchen:
Materials You'll Need:
- Laminate flooring
- Underlayment
- Moisture barrier
- Tapping block
- Pull bar
- Circular saw or miter saw
- Tape measure
- Pencil or chalk
Step 1: Prepare the Subfloor
Begin by removing any existing flooring and cleaning the subfloor. Ensure the subfloor is level, dry, and free of any debris or imperfections. If necessary, level the subfloor using a self-leveling compound.
Step 2: Install an Underlayment and Moisture Barrier
Lay down the underlayment over the prepared subfloor. This will provide cushioning and sound insulation. Next, install a moisture barrier, such as plastic sheeting, over the underlayment to protect the flooring from moisture.
Step 3: Determine the Starting Point
Choose a starting point for laying the laminate flooring. It's typically recommended to start from the center of the room and work outward.
Step 4: Install the First Row
Place the first plank along the starting point and tap it into place using a tapping block. Ensure the plank is flush against the wall and other planks. Continue installing the first row, tapping each plank together securely.
Step 5: Install Subsequent Rows
For the second and subsequent rows, use the pull bar to pull the planks together and tap them into place. Use the tapping block to align the planks and ensure a tight fit.
Step 6: Cut Planks for Corners and Obstacles
Use a circular saw or miter saw to cut planks to fit around corners, obstacles, or appliances. Measure and mark the cuts carefully.
Step 7: Install Transition Moldings
If you're transitioning to another type of flooring in the kitchen, install transition moldings to cover the seams and create a smooth transition.
Step 8: Secure the Flooring
Once the flooring is installed, secure it by tapping it into place with a tapping block. Ensure the planks are firmly locked together and there are no gaps.
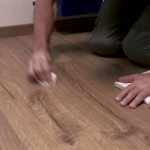
Step 9: Clean and Seal
Clean the newly installed flooring with a damp mop. You can also seal the flooring with a laminate flooring sealant to protect it from wear and moisture.
Tips:
- Always leave a small expansion gap around the perimeter of the room to allow for movement.
- Use caution when cutting planks near walls or obstacles.
- Stagger the end joints of the planks in adjacent rows to create a more stable floor.
- Allow the flooring to acclimate to the room for at least 48 hours before installation.
- Follow the manufacturer's instructions for the specific type of laminate flooring you're using.

How To Install Laminate Flooring Diy Tips And Tricks

Diy Laminate Flooring Installation

How To Install Laminate Flooring For A Kitchen Mgm Timber

6 Tips For Installing Laminate Flooring

Do You Install Floating Floor Under Cabinets Wood Flooring

Is There A Special Way To Install Laminate Flooring In The Kitchen

Do You Install Floating Floor Under Cabinets Wood Flooring

How To Install Laminate Flooring Guide 2024

How To Install Laminate Flooring Around Doors And Cabinets

Laminate Flooring In The Kitchen
Related Posts