How to Install Laminate Flooring Around Stairs
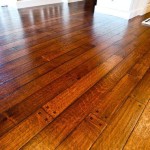
Installing laminate flooring presents a cost-effective and aesthetically pleasing way to upgrade a home's interior. While the main floor areas are relatively straightforward, tackling the installation of laminate flooring around stairs requires a higher degree of precision and skill. This article provides a detailed guide to navigating the complexities of this process, ensuring a professional and durable finish.
The primary challenges involved in installing laminate around stairs stem from the non-uniform shapes and the need to transition seamlessly between the horizontal treads and the vertical risers. Achieving a visually appealing result necessitates careful planning, accurate measurements, and the use of specialized tools and techniques. This guide will cover the essential steps, from preparation to final finishing, to help minimize errors and maximize the longevity of the installation.
Preparing the Staircase for Laminate Installation
Before commencing the laminate flooring installation, thorough preparation of the staircase is paramount. This stage involves assessing the existing structure, addressing any structural deficiencies, and ensuring a clean and level surface for the new flooring. Neglecting this preparatory phase can lead to uneven floors, instability, and a compromised final appearance.
Begin by inspecting the existing stairs for any signs of damage, such as loose treads, cracked risers, or protruding nails. Loose components should be securely fastened or replaced. Protruding nails or staples should be hammered down or removed completely to avoid interference with the underlayment and laminate planks. Furthermore, examine the stair stringers, the supporting structures on either side of the staircase, for any signs of rot or weakness. Damaged stringers may necessitate professional repair or replacement to ensure the overall structural integrity of the staircase.
Following the structural assessment, cleaning the staircase is the next critical step. Remove all dirt, debris, and existing flooring materials, such as carpet or vinyl. Use a scraper to remove any adhesive residue and a vacuum cleaner to eliminate loose particles. A clean surface is essential for proper adhesion of the underlayment and laminate planks.
Leveling the staircase treads is crucial for a smooth and even laminate floor surface. Use a level to identify any unevenness or dips in the treads. Minor imperfections can be addressed using leveling compound, applied in thin layers and allowed to dry completely according to the manufacturer's instructions. For more significant discrepancies, shims can be employed to raise the lower areas of the treads before applying the leveling compound. Precise leveling is essential for preventing future squeaks and instability.
Finally, consider the existing stair noses, the rounded edges of the treads. Depending on the desired aesthetic and the type of laminate flooring being used, these noses may need to be modified or replaced. Some stair noses can be carefully removed using a chisel and hammer, while others may need to be trimmed using a saw. If replacing the stair noses, ensure that the new noses are compatible with the laminate planks and provide a secure and visually appealing transition. It is important to select a stair nose that is designed for laminate flooring to ensure a proper fit and a durable, aesthetically pleasing finish.
Accurate Measurement and Cutting Techniques
Accurate measurements and precise cutting are fundamental to achieving a seamless and professional-looking laminate floor installation around stairs. Even minor discrepancies can accumulate and result in visible gaps, misaligned planks, and an overall compromised aesthetic. Meticulous attention to detail in this phase is essential for a successful outcome.
Begin by taking precise measurements of each tread and riser individually. Since staircases are rarely perfectly uniform, it is crucial to treat each step as a unique entity. Use a high-quality measuring tape and record the dimensions accurately, paying particular attention to the width and depth of the treads and the height of the risers. It is recommended to measure each step at multiple points to account for any variations.
When cutting the laminate planks, employ a high-quality saw, such as a circular saw or a miter saw, equipped with a fine-tooth blade designed for laminate flooring. A fine-tooth blade will minimize chipping and splintering, resulting in clean and precise cuts. When cutting the planks, err on the side of being slightly too large rather than too small. Excess material can always be trimmed away, but a piece that is too short necessitates starting again.
For complex cuts around stair stringers or other obstructions, use a contour gauge to transfer the shape onto the laminate plank. A contour gauge consists of a series of closely spaced pins that conform to the shape of the object being measured. By tracing the outline of the contour gauge onto the laminate plank, you can create an accurate template for cutting. Intricate cuts can be made using a jigsaw, ensuring that the blade follows the traced line precisely.
When installing laminate along the edge of the stairs where it meets the wall, account for expansion gaps. Laminate flooring expands and contracts with changes in temperature and humidity, and expansion gaps allow for this movement without causing buckling or warping. Typically, a gap of approximately ¼ inch should be left between the laminate and the wall. This gap can be concealed using baseboards or quarter-round molding.
Before permanently installing any laminate planks, always perform a dry fit to ensure a proper fit and alignment. This involves placing the planks in their intended positions without adhesive or fasteners to verify that they conform to the shape of the stairs and fit snugly against adjacent surfaces. Any necessary adjustments can be made before committing to the final installation.
Securing the Laminate Flooring to the Stairs
Properly securing the laminate flooring to the stairs is critical for ensuring stability, durability, and safety. The method of attachment will depend on the type of laminate flooring being used and the specific requirements of the installation. However, regardless of the method chosen, it is essential to follow the manufacturer's instructions carefully and use appropriate adhesives and fasteners.
One common method of securing laminate flooring to stairs is through the use of construction adhesive. Apply a generous bead of construction adhesive to the back of the laminate plank, ensuring that it is evenly distributed across the entire surface. Position the plank carefully on the stair tread or riser and press firmly into place. Use weights or clamps to hold the plank in position until the adhesive has fully cured, typically for 24 to 48 hours. It is important to select a construction adhesive that is specifically designed for bonding laminate to wood or other substrates common in stair construction.
In addition to construction adhesive, some laminate flooring systems utilize interlocking mechanisms that provide a secure and seamless connection between planks. These systems typically involve tongue-and-groove connections that snap or click together, creating a tight and durable bond. When using an interlocking system, it is essential to follow the manufacturer's instructions carefully to ensure proper alignment and engagement of the interlocking components. Use a tapping block and a rubber mallet to gently tap the planks into place, ensuring a tight and secure fit. Avoid using excessive force, as this can damage the interlocking mechanism.
For added security, particularly on stair treads, consider using fasteners such as nails or screws in conjunction with construction adhesive. Countersink the fasteners slightly below the surface of the laminate plank and fill the holes with wood filler that matches the color of the laminate. This will conceal the fasteners and create a smooth and seamless finish. Be mindful of the type of fasteners used; select fasteners that are appropriately sized for the thickness of the laminate and the substrate to which it is being attached. Using fasteners that are too long can penetrate through the bottom of the tread or riser, while fasteners that are too short may not provide adequate holding power.
When installing laminate around stair noses, ensure that the noses are securely fastened to the treads. Use construction adhesive and fasteners as needed to create a strong and stable connection. Pay particular attention to the alignment of the stair noses, ensuring that they are flush with the surface of the laminate planks and that they provide a smooth and safe transition between the treads and risers. Consider using specialized stair nose profiles that are designed to accommodate laminate flooring, providing a professional and aesthetically pleasing finish.
Throughout the installation process, regularly check the alignment and level of the laminate planks using a level and a straightedge. Make any necessary adjustments before the adhesive has fully cured. Once the adhesive has set, it is difficult to make corrections, so it is important to ensure that everything is properly aligned and secured before proceeding to the next step. Patience and attention to detail are crucial for achieving a successful and long-lasting laminate floor installation around stairs.

How To Install Laminate Flooring On Staircase Step By Guide

Install Laminate Flooring Around Stair Wood Banister Railing Baer Skirt Trim

How To Install Laminate Flooring On Stairs Direct Wood

How To Install Laminate On Stairs Step By For Beginners

How To Install Laminate Flooring On Stairs Direct Wood

How To Install Laminate Flooring On Floating Stairs

Fitting Flooring Around Stair Rail Spindles

Faq Installing Laminate Around Curved Staircase

Fitting Flooring Around Stair Rail Spindles

Tips How To Pass Round Stairs Mryoucandoityourself
Related Posts