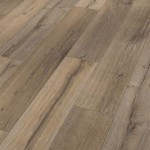
How to Install Hardwood Flooring Over Cement
Installing hardwood flooring over cement is a great way to add warmth and beauty to your home. It is a relatively simple project that can be completed in a few days with the right tools and materials.
Before you begin, you will need to gather the following materials:
* Hardwood flooring - Determine the square footage of the area you want to cover and purchase enough flooring to cover it, plus 10% for waste. * Underlayment - This will help to protect the hardwood flooring from moisture and provide a smooth surface for installation. * Vapor barrier - This will help to prevent moisture from seeping up from the cement. * Adhesive - Choose an adhesive that is specifically designed for installing hardwood flooring over cement. * Nails or screws - These will be used to secure the hardwood flooring to the underlayment. * Hammer or nail gun - Use a hammer or nail gun to drive the nails or screws into the underlayment. * Circular saw or miter saw - These will be used to cut the hardwood flooring to size. * Measuring tape - Use a measuring tape to measure and mark the area where you will be installing the hardwood flooring. * Level - Use a level to ensure that the hardwood flooring is installed level. * Trowel - Use a trowel to spread the adhesive on the underlayment.Once you have gathered your materials, you can begin installing the hardwood flooring.
1. Prepare the cement subfloor. The cement subfloor should be clean, dry, and level. If the subfloor is not level, you will need to level it using a self-leveling compound. 2. Install the vapor barrier. The vapor barrier should be installed over the entire surface of the cement subfloor. Overlap the seams of the vapor barrier by at least 6 inches and tape them together with duct tape. 3. Install the underlayment. The underlayment should be installed over the vapor barrier. Overlap the seams of the underlayment by at least 6 inches and staple them together. 4. Spread the adhesive. Use a trowel to spread the adhesive on the underlayment. Be sure to apply the adhesive evenly and in a thin layer. 5. Install the hardwood flooring. Begin installing the hardwood flooring in a corner of the room. Work your way out from the corner, row by row, until the entire floor is covered. 6. Secure the hardwood flooring. Use a hammer or nail gun to drive the nails or screws into the underlayment. Be sure to nail or screw the hardwood flooring every 6 inches to 8 inches. 7. Trim the hardwood flooring. Use a circular saw or miter saw to trim the hardwood flooring to size. Be sure to miter the corners of the hardwood flooring so that they fit together seamlessly. 8. Sand and finish the hardwood flooring. Once the hardwood flooring is installed, you will need to sand it and finish it. Sand the hardwood flooring using a sanding block or a power sander. Start with a coarse grit sandpaper and work your way up to a fine grit sandpaper. Once the hardwood flooring is sanded, you can apply a finish of your choice, such as polyurethane or wax.
Installing hardwood flooring over cement is a relatively simple project that can be completed in a few days with the right tools and materials. By following these steps, you can add warmth and beauty to your home with a new hardwood floor.

Installing Wood Flooring Over Concrete Diy

Installing Hardwood Floors On Concrete Subfloors

Getting It Right Wood Flooring Over A Concrete Subfloor Page 2 Of 3 Construction Specifier

How To Install A Wood Subfloor Over Concrete Rona

Installing Engineered Hardwood On Concrete Twenty Oak

Installing Engineered Hardwood On Concrete Twenty Oak

Q A Solid Wood Floors Over Concrete Slabs Jlc

Installing A Hardwood Floor Over Concrete Slab American Information Center

Installing Wood Subfloors Over Concrete Hardwood Floors

How To Install A Wood Subfloor Over Concrete Rona
Related Posts


