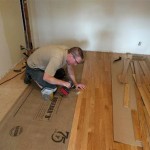
How To Install Hardwood Flooring: A Comprehensive Guide
Installing hardwood flooring is a significant home improvement project that can enhance the aesthetic appeal and value of a property. While professional installation is often recommended, homeowners with intermediate DIY skills can successfully install hardwood flooring if they possess the right tools, preparation, and understanding of the process. This article provides a detailed guide on how to install hardwood flooring, covering essential steps from subfloor preparation to the final finishing touches.
Before embarking on the installation process, it is crucial to understand the different types of hardwood flooring available. Solid hardwood flooring is made from a single piece of wood, offering durability and longevity. Engineered hardwood flooring consists of multiple layers of wood veneer bonded together, providing greater stability and resistance to moisture. The choice between solid and engineered hardwood depends on factors such as the location of the installation, the existing subfloor, and the desired aesthetic.
Acclimation is a critical step in hardwood flooring installation, often overlooked but vital for preventing warping, cupping, or gapping after installation. Hardwood flooring needs to adjust to the temperature and humidity levels of the installation environment. Typically, this involves storing the flooring in the room where it will be installed for several days, or even weeks, depending on the environmental conditions. Refer to the manufacturer's instructions for specific acclimation guidelines.
Key Point 1: Preparing the Subfloor
The subfloor is the foundation upon which the hardwood flooring will be installed. Proper subfloor preparation is essential for ensuring a level, stable, and secure surface. The subfloor must be free of debris, moisture, and any irregularities that could affect the performance of the finished floor. Common subfloor materials include plywood, oriented strand board (OSB), and concrete.
For wood subfloors (plywood or OSB), begin by inspecting the surface for any loose or damaged areas. Replace any sections that are rotted, delaminated, or otherwise compromised. Secure loose boards with screws or nails, ensuring they are flush with the surrounding surface. Sand down any high spots or uneven areas to create a smooth and level plane. Use a self-leveling compound to fill in any low spots or imperfections.
Check the subfloor for moisture content using a moisture meter. Wood subfloors should have a moisture content of 12% or less. If the moisture level is too high, allow the subfloor to dry thoroughly before proceeding with the installation. Consider using a moisture barrier underlayment to further protect the hardwood flooring from moisture migration.
For concrete subfloors, the preparation process is slightly different. Start by cleaning the surface thoroughly to remove any dust, dirt, or debris. Use a concrete grinder or scarifier to remove any high spots or uneven areas. Fill in any cracks or holes with a concrete patching compound. Allow the patching compound to dry completely according to the manufacturer's instructions.
Similar to wood subfloors, it is essential to check the moisture content of concrete subfloors. Use a concrete moisture meter or perform a calcium chloride test to determine the moisture vapor emission rate (MVER). The MVER should be within the acceptable range specified by the hardwood flooring manufacturer. If the MVER is too high, apply a moisture barrier specifically designed for concrete subfloors.
Regardless of the subfloor material, it is crucial to ensure that it is structurally sound and capable of supporting the weight of the hardwood flooring. If the subfloor is weak or unstable, it may be necessary to reinforce it with additional support beams or subfloor materials.
Key Point 2: Installing the Hardwood Flooring
Once the subfloor is properly prepared, the next step is to begin installing the hardwood flooring. The installation method will depend on the type of hardwood flooring being used and the manufacturer's recommendations. Common installation methods include nailing, gluing, and floating.
Nailing is the most common method for installing solid hardwood flooring. This involves using a flooring nailer or pneumatic stapler to attach the flooring planks directly to the wood subfloor. Start by laying down a layer of underlayment to provide cushioning and reduce noise transmission. The underlayment should overlap the edges of the subfloor by a few inches.
Begin installing the first row of flooring planks along the longest straight wall in the room. Leave a small expansion gap (typically ¼ inch to ½ inch) between the flooring planks and the wall to allow for expansion and contraction due to changes in temperature and humidity. Use shims to maintain a consistent expansion gap. Fasten the first row of planks securely to the subfloor using the flooring nailer or stapler. Angle the fasteners at a 45-degree angle into the tongue of the plank.
Continue installing subsequent rows of flooring planks, staggering the end joints to create a more visually appealing and structurally sound floor. Use a tapping block and mallet to gently tap the planks into place, ensuring a tight and seamless fit. Check the alignment of the planks regularly to ensure that they are straight and even. Use a pull bar to tighten the last few rows of planks against the wall.
Gluing is another method for installing hardwood flooring, particularly engineered hardwood flooring. This involves applying a layer of adhesive to the subfloor and then pressing the flooring planks into the adhesive. Use a trowel to spread the adhesive evenly and in accordance with the manufacturer's instructions. Start by installing the first row of planks along the longest straight wall in the room, leaving an expansion gap as before.
Press the flooring planks firmly into the adhesive, ensuring full contact between the plank and the subfloor. Use a roller to further press the planks into the adhesive and remove any air pockets. Continue installing subsequent rows of flooring planks, staggering the end joints and maintaining the expansion gap. Wipe away any excess adhesive with a damp cloth.
Floating is a method commonly used for engineered hardwood flooring and some laminate flooring. This involves installing the flooring planks without directly attaching them to the subfloor. Instead, the planks are connected to each other using a tongue-and-groove locking system. A layer of underlayment is typically installed beneath the flooring to provide cushioning and reduce noise transmission.
Begin installing the first row of flooring planks along the longest straight wall in the room, leaving an expansion gap. Connect the planks by angling the tongue of one plank into the groove of the adjacent plank and then snapping them together. Continue installing subsequent rows of flooring planks, staggering the end joints and maintaining the expansion gap. Use a tapping block and mallet to gently tap the planks into place, ensuring a tight and seamless fit.
Key Point 3: Finishing Touches and Maintenance
After the hardwood flooring has been installed, there are several finishing touches that need to be completed to ensure a professional and long-lasting result. These include installing baseboards, trim, and transition strips, as well as applying a protective finish to the floor.
Baseboards are installed along the perimeter of the room to cover the expansion gap between the flooring and the wall. Choose baseboards that complement the style of the flooring and the room. Cut the baseboards to the appropriate length using a miter saw, and then attach them to the wall using nails or screws. Fill any nail holes with wood filler and then paint or stain the baseboards to match the surrounding trim.
Trim, such as shoe molding or quarter round, can be installed along the baseboards to further conceal the expansion gap and add a decorative touch. Cut the trim to the appropriate length and angle, and then attach it to the baseboards using nails or adhesive. Fill any nail holes with wood filler and then paint or stain the trim to match the baseboards.
Transition strips are used to seamlessly connect the hardwood flooring to other types of flooring, such as tile or carpet. Choose transition strips that are designed for the specific type of flooring being used. Cut the transition strips to the appropriate length and then attach them to the subfloor using nails or adhesive. Ensure that the transition strips are level and flush with the adjacent flooring surfaces.
Applying a protective finish to the hardwood flooring is essential for protecting it from wear and tear, scratches, and moisture damage. The type of finish to use will depend on the type of hardwood flooring and the desired aesthetic. Common finishes include polyurethane, varnish, and oil-based finishes. Apply the finish in accordance with the manufacturer's instructions, ensuring that the floor is clean and dry before application. Allow the finish to dry completely before walking on the floor.
Maintaining hardwood flooring is essential for preserving its beauty and extending its lifespan. Regular maintenance includes sweeping or vacuuming the floor to remove dust and debris, as well as mopping the floor with a damp cloth and a mild cleaning solution. Avoid using harsh chemicals or abrasive cleaners, as these can damage the finish of the floor. Place mats at entrances to trap dirt and debris, and use furniture pads under the legs of furniture to prevent scratches.

How To Install Hardwood Flooring Step By Forbes Home

How To Install Hardwood Flooring The Home Depot
:strip_icc()/101206837-1dd14e2eaebe404e9c0e3fd1494b7c77.jpg?strip=all)
How To Install Hardwood Floors

How To Install Hardwood Flooring For Beginners

How To Install Hardwood Flooring Young House Love

How Long Does It Take To Install Hardwood Floors Cameron The Sandman Wood Flooring Contractor

How To Install A Hardwood Floor Build This Weekend

How To Install Oak Hardwood Floors Young House Love

How To Install Hardwood Flooring The Home Depot

Hardwood Floor Installations
Related Posts


