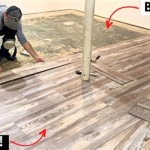
How to Install Glue Vinyl Plank Flooring: A Step-by-Step Guide
Glue vinyl plank flooring is a popular and durable choice for homeowners and commercial spaces alike. Its ability to withstand moisture and heavy foot traffic makes it ideal for areas such as kitchens, bathrooms, and entryways. Installing glue vinyl plank flooring can be a DIY project, but it requires careful planning and attention to detail. Here's a comprehensive step-by-step guide to help you achieve a successful installation.
Step 1: Prepare the Subfloor
A properly prepared subfloor is essential for a solid flooring installation. Remove any existing flooring, baseboards, and quarter rounds. Clean the subfloor thoroughly to remove any dirt, debris, or contaminants. Ensure the subfloor is level and smooth by using a level and filling in any uneven areas with self-leveling compound.
Step 2: Plan the Layout
Before applying the glue, plan the layout to determine how the planks will be placed. Start by measuring the room's width and length, then decide the direction in which you want the planks to run. If you choose to stagger the joints, make sure to cut the planks accordingly.
Step 3: Apply the Adhesive
Spread the adhesive evenly over a small section of the subfloor using a trowel. Follow the manufacturer's instructions for the type and amount of adhesive to be used. Allow the adhesive to dry for the recommended time, usually around 15-30 minutes.
Step 4: Install the First Plank
Position the first plank on the adhesive, aligning it with the reference line you marked earlier. Tap the plank firmly into place using a rubber mallet or tapping block. Use a spacer to maintain equal gaps between the plank and the walls.
Step 5: Continue Installing Planks
Continue installing the planks one at a time, overlapping the short ends and tapping them into place. Ensure there are no gaps between the planks and that they are level with each other. Use a tapping block and mallet to avoid damaging the edges of the planks.
Step 6: Install Edge Pieces
Once the main field is installed, cut edge pieces to fit the perimeter of the room. Use a utility knife or table saw to make precise cuts. Apply adhesive to the subfloor and press the edge pieces into place, ensuring they are flush with the main planks.
Step 7: Install Baseboards and Quarter Rounds
Install baseboards and quarter rounds around the perimeter of the room to hide the expansion gap and give the flooring a finished look. Use a miter saw to cut the pieces at 45-degree angles for a seamless transition.
Step 8: Clean Up and Protect
Clean up any excess adhesive from the floor using a damp cloth. Protect the newly installed flooring by avoiding heavy foot traffic or moving furniture for the recommended curing time specified by the adhesive manufacturer.
Tips for a Successful Installation
* Use a level throughout the installation process to ensure the floor is level and there are no dips or humps. * Allow the adhesive to dry for the recommended time before installing the planks. * Tap the planks firmly into place, but avoid using excessive force that could damage the edges. * Clean up any excess adhesive immediately to prevent it from hardening and becoming difficult to remove. * Protect the newly installed flooring from heavy foot traffic and furniture until it has fully cured.
How To Install Glue Down Vinyl Plank

How To Install Glue Down Vinyl Plank

Post Nbl Express Eco Flooring

How To Install Glue Down Vinyl Plank

How To Install Glue Down Vinyl Plank Flooring Bathroom Concrete Floor

How To Install Glue Down Vinyl Plank

How To Install Glue Down Luxury Vinyl Plank Flooring On Osb Sub Floor

Ivc Lvt Igrip Glue Down Installation With Trowel Full

How To Install Lock Vinyl Flooring Step By 99cent Floor

How To Install Gluedown Flooring
Related Posts


