How To Install Floating Engineered Hardwood Flooring On Concrete
Installing floating engineered hardwood flooring on concrete is a relatively simple and straightforward process that can be completed in a few hours. By following these steps, you can achieve a beautiful and durable floor that will last for many years to come.
Materials You Will Need:
- Floating engineered hardwood flooring
- Underlayment
- Moisture barrier
- Expansion gap spacers
- Tap block
- Hammer or mallet
- Saw
- Measuring tape
- Pencil
Before you begin, it is important to ensure that your concrete subfloor is level and smooth. Any unevenness or imperfections can cause the flooring to buckle or warp over time.
Step 1: Prepare the Subfloor
The first step is to prepare the concrete subfloor by cleaning it thoroughly and removing any dirt, debris, or oil. Once the subfloor is clean, you will need to install a moisture barrier to protect the flooring from moisture damage. The moisture barrier should be a polyethylene sheet that is at least 6 mils thick.
Step 2: Install the Underlayment
The next step is to install the underlayment. The underlayment will help to reduce noise and provide a cushion for the flooring. There are a variety of underlayment products available, so be sure to choose one that is appropriate for your needs. Once the underlayment is installed, you will need to cut it to fit the room.
Step 3: Install the Flooring
Now you are ready to install the flooring. Start by placing a row of flooring along one wall, leaving a small expansion gap between the wall and the flooring. You can use expansion gap spacers to ensure that the gap is consistent. Once the first row is in place, you can start to install the second row. To do this, simply click the tongues of the flooring planks into the grooves of the first row. Continue installing the flooring in this manner until you reach the opposite wall.
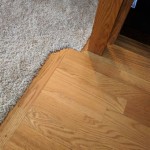
Step 4: Trim the Flooring
Once the flooring is installed, you will need to trim it to fit the room. To do this, measure the distance from the last row of flooring to the wall. Then, use a saw to cut the flooring to the correct length. You may also need to trim the flooring around any obstacles, such as doorways or pipes.
Step 5: Install the Baseboards
The final step is to install the baseboards. The baseboards will help to hide the expansion gap between the flooring and the wall. You can use a variety of baseboard styles, so be sure to choose one that matches the décor of your room.
Congratulations! You have now successfully installed floating engineered hardwood flooring on concrete.

Installing Wood Flooring Over Concrete Diy

Installing Engineered Hardwood On Concrete Twenty Oak

Floating Engineered Hardwood

Installing Engineered Hardwood On Concrete Villagio Guide

How To Install An Engineered Hardwood Floating Floor With Finishing Tips

How To Install A Hardwood Floating Floor

How To Install Lock Engineered Hardwood Flooring

Installing Engineered Hardwood On Concrete Twenty Oak

How To Install Lock Engineered Hardwood Flooring

Engineered Hardwood Floors Installation Floor Refinishing New Jersey Repair Sanding
Related Posts