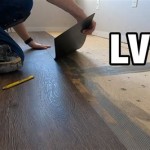
How to Install the First Row of Laminate Flooring
Installing laminate flooring can be a rewarding and satisfying DIY project. By following these step-by-step instructions, you can ensure that your laminate flooring installation is successful and looks great.
The first step in installing laminate flooring is to prepare the subfloor. This involves removing any existing flooring, leveling the subfloor, and installing an underlayment. Once the subfloor is prepared, you can begin installing the laminate flooring.
The first step in installing the laminate flooring is to install the first row. The first row is the most important row, as it sets the foundation for the rest of the flooring. If the first row is not installed correctly, the rest of the flooring will not be installed correctly either.
To install the first row of laminate flooring, you will need the following tools and materials:
- Laminate flooring planks
- Laminate flooring spacers
- Hammer or tapping block
- Tapping block
- Pull bar
- Tape measure
- Pencil
- Safety glasses
Once you have gathered your tools and materials, you can begin installing the first row of laminate flooring.
1. Start by measuring and marking the starting point for the first row. The starting point should be the longest wall in the room.
2. Place a laminate flooring spacer along the starting point. The spacer will help to ensure that there is a consistent gap between the laminate flooring and the wall.
3. Place the first laminate flooring plank on the spacer. Make sure that the plank is oriented correctly and that the tongue of the plank is facing the wall.
4. Tap the plank into place using a hammer or tapping block. Be sure to tap the plank gently so that you do not damage it.
5. Continue installing the laminate flooring planks in the same manner. Be sure to stagger the joints of the planks to create a more durable floor.
6. Once you have installed all of the laminate flooring planks in the first row, you can remove the spacers.
7. Check the first row of laminate flooring to make sure that it is level and that there are no gaps between the planks.
8. If the first row of laminate flooring is not level or if there are gaps between the planks, you can adjust the planks using a pull bar.
Once you have installed the first row of laminate flooring, you can continue installing the rest of the flooring in the same manner.

Installing The First Row Of Laminate

Guide To Installing Laminate Flooring Diy Family Handyman

How To Install Laminate Flooring The Home Depot

How To Install The First Row Of Laminate Flooring

How To Install Laminate Flooring For Beginners

Step 1 How To Install The First Row Of Laminate

How To Install Laminate Flooring With Realock Angle Tap System Rw Supply Design

Crooked Planks Continue A Laminate Flooring Installation

Laminate Floor Installation For Beginners 9 Clever Tips

Laminate Flooring Installation Tutorial How To Install Your First Row Diy Http Installing Floor
Related Posts