How to Install Engineered Wood Flooring Nail Down
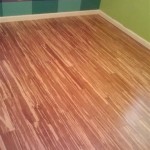
Engineered wood flooring offers a durable and attractive alternative to traditional hardwood flooring. It's made from a combination of plywood and a thin layer of real wood veneer, which gives it the look and feel of solid wood but with added stability and moisture resistance. Nail-down engineered wood flooring is one of the most common installation methods, providing a secure and long-lasting result.
Installing nail-down engineered wood flooring requires some basic tools and materials, including a flooring nailer, nails, a tapping block, and a pry bar. The process involves preparing the subfloor, laying out the flooring, and nailing it into place. Here's a step-by-step guide to help you get started:
Step 1: Preparation
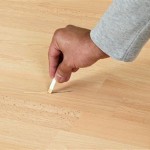
Before you begin installing the flooring, it's important to prepare the subfloor. Make sure the subfloor is level and free of any debris or irregularities. If necessary, level the subfloor using a self-leveling compound or plywood underlayment.
Step 2: Laying Out the Flooring
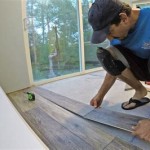
Start by laying out the first row of flooring along the longest wall in the room. Use spacers to maintain a consistent gap between the flooring and the wall. Stagger the joints between the planks to prevent alignment issues in subsequent rows.
Step 3: Nailing the Flooring
Use a flooring nailer to nail the first row of flooring into place. Drive the nails at a 45-degree angle through the tongue of the plank and into the subfloor. Space the nails evenly, approximately 6-8 inches apart.
Step 4: Installing Subsequent Rows
Continue installing subsequent rows of flooring by tapping the tongue of each plank into the groove of the previous row. Use a tapping block and a hammer to gently tap the planks together. Nail the planks into place using the same method as the first row.
Step 5: Cutting and Fitting
As you reach the end of each row, you may need to cut the last plank to fit. Measure the remaining space and cut the plank accordingly. Use a saw or a flooring cutter to make precise cuts.
Step 6: Finishing Touches
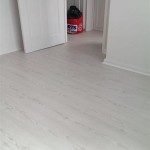
Once all the flooring is installed, remove the spacers and install baseboards to cover any gaps between the flooring and the walls. Sand any rough edges or irregularities and apply a finish of your choice, such as polyurethane or wax.
By following these steps, you can successfully install nail-down engineered wood flooring, adding beauty and durability to your home.

Floating Floor Vs Nail Down Slaughterbeck Floors Inc

Which Method Should I Use To Install My Engineered Wood Floor Tesoro Woods

Advantages Of Nail Down Floor Installation Wood Fitting

Engineered Hardwood Floors Installation Floor Refinishing New Jersey Repair Sanding

Is Nail Down Installation The Best Unique Wood Floor

Installing Engineered Hardwood Flooring In The Not So Tiny House

Nailing Down Meritage Engineered Flooring With A Glue Assist

Engineered Hardwood Floors Installation Floor Refinishing New Jersey Repair Sanding

Floating Floor Vs Nail Down Slaughterbeck Floors Inc

Which Method Should I Use To Install My Engineered Wood Floor Tesoro Woods
Related Posts