How to Install Engineered Flooring
Engineered flooring has grown in popularity due to its durability, stability, and attractive appearance. It offers a realistic wood look while being more resistant to moisture and warping than solid hardwood. Installing engineered flooring is a manageable DIY project for homeowners with basic carpentry skills and a willingness to learn. This guide provides a step-by-step process for successfully installing engineered flooring in your home.
Prepare the Subfloor
The subfloor forms the foundation for your engineered flooring, so it is crucial to ensure it is level, clean, and free from imperfections. Uneven subfloors can lead to squeaks, uneven flooring, and premature wear. The following steps are essential for preparing the subfloor:
- Evaluate the Existing Subfloor: Inspect the subfloor for any signs of damage, such as cracks, gaps, or soft spots. Use a level to check for unevenness.
- Repair or Replace Damaged Subfloor: Repair damaged areas with wood filler or replace severely damaged sections entirely.
- Level the Subfloor: If the subfloor is uneven, use a leveling compound or plywood shims to create a flat surface.
- Clean the Subfloor: Remove dust, debris, and any residue from the subfloor to ensure a clean surface for installation.
Lay the Underlayment
Underlayment provides a buffer between the subfloor and the engineered flooring, reducing noise, and adding insulation. It also helps to create a smoother surface and protect the flooring from moisture.
- Choose the Right Underlayment: Select an underlayment that is compatible with your engineered flooring. Options include foam, cork, and felt.
- Install the Underlayment: Follow the manufacturer's instructions for installing the underlayment. Typically, it involves rolling out the underlayment and securing it with staples or tape.
- Check for Smoothness: After installing the underlayment, ensure it is smooth and free from wrinkles or bumps.
Install the Engineered Flooring
The installation process for engineered flooring varies depending on the type of flooring you have chosen. The most common methods include click-lock, glue-down, and nail-down.
- Click-Lock Installation: This method involves interlocking planks together. The planks typically have a tongue and groove system that allows them to click together without the need for adhesives or nails.
- Glue-Down Installation: This method requires applying a special adhesive to the subfloor and then adhering the flooring planks to the adhesive.
- Nail-Down Installation: This method involves nailing the flooring planks to the subfloor using a specialized nailing tool.
Regardless of the installation method, follow these general steps:
- Start at a Wall: Begin installing the flooring planks from a wall.
- Stagger the Joints: Avoid placing seams in the same position in adjacent rows to create a more visually appealing and stable floor.
- Leave Expansion Space: Leave a small expansion gap between the flooring and walls to allow for movement due to temperature fluctuations.
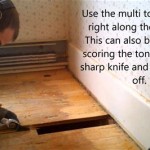
- Cut and Trim Planks: Use a circular saw or a flooring saw to cut the planks to fit around obstacles and corners.
- Secure the Planks: Follow the manufacturer's instructions for securing the planks according to your chosen installation method.
Finishing Touches
After installing the engineered flooring, you may need to apply finishing touches to complete the project.
- Install Baseboards: Cover the expansion gap between the flooring and walls with baseboards.
- Clean the Floor: Remove any dust or debris from the floor. You should also clean up any excess adhesive or sealant to keep your floor looking its best.
- Apply Finish: If your engineered flooring requires a finish, apply it according to the manufacturer's instructions.

How To Install Laminate Flooring For Beginners

How To Install Lock Engineered Hardwood Flooring

How To Install Hardwood Flooring Step By Forbes Home

How To Install Lock Engineered Hardwood Flooring

How To Install An Engineered Hardwood Floor

How To Install Hardwood Flooring The Home Depot

Installing Engineered Hardwood On Concrete Twenty Oak

How To Install Hardwood Flooring The Home Depot

How To Install A Hardwood Floor Build This Weekend

Installing Wood Flooring Over Concrete Diy
Related Posts