How to Install Cork Flooring Over Ceramic Tile
Cork flooring offers numerous benefits, including warmth, comfort, and noise reduction. Installing cork flooring over existing ceramic tile can be a cost-effective way to achieve a fresh and updated look. The process involves careful preparation, accurate measurements, and meticulous installation techniques. This article will guide you through the necessary steps to successfully install cork flooring over ceramic tile.
Preparation: The Foundation of a Successful Installation
Before embarking on the installation process, it's crucial to ensure the ceramic tile surface is adequately prepared. Begin by thoroughly cleaning the tile floor to remove any dirt, grease, or debris. Use a high-quality cleaner designed for ceramic surfaces and allow the floor to dry completely. Next, inspect the tiles for any loose or cracked areas. Secure any loose tiles and repair any cracks using a suitable adhesive.
For a smooth and level surface, you will need to address any unevenness in the existing tile floor. If the tile floor has significant unevenness or lippage, it may be necessary to use a self-leveling compound to create a smooth surface. For smaller imperfections, a thin-set mortar can be used to fill in gaps and create a more level base. Once the mortar or compound has dried, it's essential to sand the surface smooth to ensure a consistent base for the cork flooring.
Choosing the Right Cork Flooring and Tools
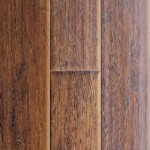
The type of cork flooring you choose will depend on your preferences and the desired aesthetic. Cork flooring comes in various thicknesses, finishes, and styles, including planks, tiles, and sheets. Consider the thickness of the cork flooring to determine the height difference it will create in your space. If you're installing cork flooring over existing tile, a thinner option may be best to avoid significant transitions.
For a successful installation, you will need the following tools:
- Measuring tape
- Chalk line
- Utility knife
- Saw (circular saw or jigsaw)
- Tapping block
- Rubber mallet
- Cork flooring adhesive
- Safety glasses
- Gloves
- Knee pads
Laying the Cork Flooring: Precision and Patience
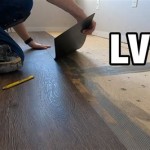
Once the preparation is complete, you can begin installing the cork flooring. Start by laying out the first row of cork flooring planks or tiles, making sure they are aligned with the room's edges. Use a chalk line to create a straight guideline for the first row. When installing cork flooring over tile, it's crucial to leave expansion gaps around the perimeter of the room and between the planks or tiles to prevent buckling.
Apply a generous amount of cork flooring adhesive to the tile surface, using a notched trowel to ensure even coverage. Carefully position the first row of cork flooring planks or tiles on the adhesive, making sure they are aligned with the chalk line. Use a tapping block and rubber mallet to gently tap the planks or tiles into place, ensuring they are flush with each other. Continue laying each row of planks or tiles, ensuring they are properly aligned and pressed into the adhesive.
When cutting planks or tiles to fit around obstructions, use a sharp utility knife or saw. Be careful not to damage the finished surfaces. Once all the planks or tiles have been installed, allow the adhesive to fully cure before applying any additional finishing touches, such as molding or trim.

How To Install A Cork Floor Young House Love

How To Install A Cork Floor Young House Love

Complete Guide To Cork Flooring Installation Deerfoot Carpet

Advantages Of A Cork Floating Floor Over Glue Down Tiles Cancork

Complete Guide To Cork Flooring Installation Deerfoot Carpet

How To Install Cork Flooring

How To Install A Cork Floor Young House Love

Structures Of Cork Flooring And Tile Cancork Floor Inc

How To Install Cork Floor Forna Floating Flooring Icork

How To Install A Cork Floor Young House Love
Related Posts


