How to Install CoreLuxe Vinyl Plank Flooring
CoreLuxe vinyl plank flooring is a popular choice for homeowners due to its durability, water resistance, and stylish appearance. It offers a realistic wood-look aesthetic without the high maintenance of real hardwood. Installing CoreLuxe vinyl plank flooring is a relatively straightforward process that most DIY enthusiasts can handle. This article will guide you through the steps involved in installing CoreLuxe vinyl plank flooring.
1. Preparing the Subfloor
A smooth and even subfloor is crucial for a successful CoreLuxe vinyl plank installation. Before laying down the planks, inspect your subfloor for any irregularities, such as dips, bumps, or cracks. If necessary, repair any imperfections using a leveling compound or plywood patches. Ensure that the subfloor is clean and free of debris. If your subfloor is made of wood, it’s recommended to use a moisture barrier to prevent water damage.
2. Determining the Installation Method
CoreLuxe vinyl plank flooring can be installed using two primary methods: glue-down or floating.
*
Glue-down method:
Involves adhering the planks directly to the subfloor using a specialized vinyl flooring adhesive. This method is best suited for stable subfloors and offers a more permanent installation.*
Floating method:
This method involves laying the planks over a layer of underlayment, which provides cushioning and soundproofing. Floating installation allows for expansion and contraction of the planks due to temperature changes and is ideal for subfloors that may not be perfectly level.Choose the installation method that best suits your subfloor conditions and personal preference.
3. Acclimating the Flooring
Before installation, it’s essential to acclimate the CoreLuxe vinyl plank flooring to the room's temperature and humidity. This allows the planks to adjust to their surroundings and prevents warping or buckling after installation. Store the unopened boxes of flooring inside the room where it will be installed for at least 48 hours.
4. Measuring and Cutting the Planks
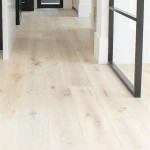
Begin by measuring the room accurately and determining the starting point for the first row of planks. Mark the starting point on the floor with a pencil or chalk. Since most CoreLuxe vinyl plank flooring is sold in random widths, a staggered pattern is recommended for a more natural look. You can use a utility knife or a specialized flooring cutter to cut the planks to size.
5. Installing the First Row
Start by installing the first row of planks along the wall, leaving a ¼ inch expansion gap between the planks and the wall. This gap allows for expansion and contraction of the flooring. Use a spacer or wood shims to maintain the expansion gap. Secure the first row of planks to the subfloor using adhesive or underlayment clips, depending on your chosen installation method.
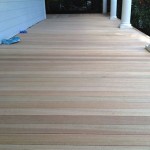
6. Installing Subsequent Rows
Once the first row is securely in place, install the rest of the planks, ensuring that each row is staggered to create a random pattern. Be sure to maintain the ¼ inch expansion gap along the walls and between the planks. Using a tapping block and rubber mallet, tap the planks into place, ensuring that they are tight and flush with each other.
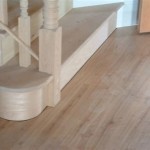
7. Installing Around Obstacles
When encountering obstacles such as door frames, cabinets, or pipes, measure the area carefully and cut the planks to size using a utility knife or flooring cutter. Use a jigsaw to cut intricate shapes for curves or angles. Ensure that the planks fit snugly around the obstacles and maintain the expansion gap.
8. Completing the Installation
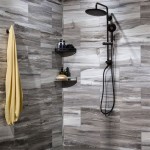
Once all the planks are installed, trim any excess planks along the walls using a utility knife or flooring cutter. Install transition strips or moldings to create a smooth transition between the flooring and other surfaces, such as carpeting or tile.

Diy How To Corelux Vinyl Installation Tips And Tricks Lumber Liquidators Lvp Plank Flooring Install

Diy How To Corelux Vinyl Installation Tips And Tricks Lumber Liquidators Lvp Plank Flooring Install

Diy How To Corelux Vinyl Installation Tips And Tricks Lumber Liquidators Lvp Plank Flooring Install

Coreluxe Ultra Review Install Tips Rocky Coast Pine W Pad

How To Install Vinyl Plank Flooring Coreluxe Urban Loft Ash Tips And Tricks

Diy How To Corelux Vinyl Installation Tips And Tricks Lumber Liquidators Lvp Plank Flooring Install

Easy Rigid Core Vinyl Plank Flooring Installation How To Install Luxury

Coreluxe Vinyl Plank Flooring Ll

Coreluxe Vinyl Plank Flooring Ll

How To Install Vinyl Or Laminate Flooring Angle Instructions
Related Posts