How to Install Allure Vinyl Flooring in a Bathroom
Allure vinyl flooring, known for its durability, water resistance, and ease of installation, is a popular choice for bathroom renovations. Its interlocking or glue-down design allows for a relatively straightforward installation process, even for those with limited DIY experience. However, proper preparation and adherence to installation guidelines are crucial for achieving a professional and long-lasting result. This article provides a comprehensive guide on how to install Allure vinyl flooring in a bathroom, covering everything from initial assessment to final finishing touches.
Before embarking on the installation, it is essential to gather the necessary tools and materials. This ensures a smooth and efficient workflow, minimizing delays and potential errors. The required tools typically include a measuring tape, utility knife with sharp blades, straight edge or T-square, rubber mallet, pencil, safety glasses, knee pads, and a tapping block or pull bar (depending on the Allure flooring type being installed). Materials will include the Allure vinyl flooring itself, any necessary underlayment (as specified by the manufacturer), moisture barrier (if applicable and recommended), spacers (if needed), and seam sealer (for added water protection in high-moisture areas).
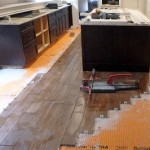
The success of any flooring installation hinges on proper subfloor preparation. The subfloor must be clean, level, and dry. Any imperfections, such as cracks, holes, or unevenness, need to be addressed before laying the Allure vinyl flooring. Neglecting this step can lead to premature wear and tear, uneven surfaces, and potential water damage in the long run. A thorough assessment of the existing subfloor condition is therefore paramount.
Key Point 1: Subfloor Preparation is Paramount
Subfloor preparation is the foundational step that directly impacts the quality and longevity of the Allure vinyl flooring installation. The existing subfloor must be meticulously inspected and prepared to ensure a smooth, level, and moisture-free surface. This process involves several distinct phases:
Inspection and Assessment: Begin by thoroughly inspecting the subfloor for any signs of damage, such as cracks, holes, loose boards, or water stains. Pay close attention to areas around the toilet, shower, and sink, as these are prone to moisture exposure. Identify any unevenness or high/low spots.
Cleaning: Remove all existing flooring materials, including old vinyl, tile, or carpet. Scrape away any residual adhesive or debris. Thoroughly vacuum the entire subfloor to remove dust, dirt, and small particles. A clean surface ensures proper adhesion if using glue-down Allure vinyl flooring or prevents debris from interfering with the interlocking mechanism of floating floors.
Leveling: Address any unevenness in the subfloor. Small imperfections can be smoothed out using a self-leveling compound. For larger discrepancies, consider using plywood or cement board to build up low areas. Ensure the leveling compound or patching material is completely dry and cured before proceeding.
Repairing: Repair any cracks or holes in the subfloor. Use a concrete patching compound for concrete subfloors and wood filler for wooden subfloors. Allow the patching material to dry completely and sand it smooth to ensure a seamless transition with the surrounding surface.
Moisture Testing: Prior to installation, conduct a moisture test to ensure the subfloor is adequately dry. Excessive moisture can lead to mold growth and damage the vinyl flooring. Use a moisture meter to measure the moisture content of the subfloor. The acceptable moisture level will vary depending on the Allure vinyl flooring product and manufacturer recommendations, so refer to the product specifications.
Moisture Barrier Installation (If Required): If the moisture test indicates elevated moisture levels or if the manufacturer recommends it, install a moisture barrier. This is typically a polyethylene film or specialized underlayment designed to prevent moisture from migrating from the subfloor to the vinyl flooring. Overlap the seams of the moisture barrier by several inches and tape them securely to create a continuous barrier.
Proper subfloor preparation is not just about aesthetics; it is about protecting the investment and ensuring the longevity of the Allure vinyl flooring. By taking the time to properly prepare the subfloor, one can avoid costly repairs and replacements down the line.
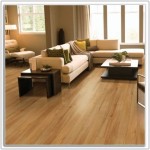
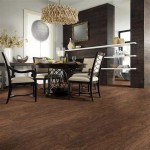
Once the subfloor is adequately prepared, the next step is to plan the layout of the Allure vinyl flooring. Careful planning ensures minimal waste, aesthetically pleasing patterns, and proper alignment with the room's features. Consider the direction of the flooring planks or tiles and how they will interact with doorways, fixtures, and walls. A well-planned layout minimizes the need for complicated cuts and ensures a professional-looking final result.
Before starting the installation, it is crucial to allow the Allure vinyl flooring to acclimate to the bathroom's temperature and humidity for at least 48 hours. This allows the material to expand or contract, preventing issues such as buckling or gapping after installation. Store the flooring in the bathroom, laying the boxes flat and ensuring adequate airflow. Refer to the manufacturer's instructions for specific acclimation guidelines.
Key Point 2: Precise Cutting and Fitting are Essential
The precise cutting and fitting of Allure vinyl flooring are crucial for achieving a seamless and professional-looking installation. This process requires careful measurement, accurate cutting techniques, and patience. Taking the time to cut and fit each piece correctly prevents gaps, overlaps, and misaligned patterns, resulting in a durable and visually appealing final product.
Accurate Measurement: Before cutting any flooring, carefully measure the area where the piece will be installed. Use a measuring tape and straight edge to mark the cutting lines on the back of the vinyl flooring. Account for any irregularities in the walls or fixtures. Double-check all measurements before making any cuts to avoid errors.
Straight Cuts: For straight cuts, use a utility knife with a sharp blade and a straight edge or T-square to guide the blade. Score the surface of the vinyl flooring multiple times with moderate pressure, gradually deepening the cut until the material separates cleanly. Avoid trying to cut through the material in a single pass, as this can result in a jagged or uneven edge.
Complex Cuts: When cutting around pipes, toilets, or other irregular shapes, use a combination of techniques. Create a template using cardboard or paper to match the shape of the object. Trace the template onto the back of the vinyl flooring and carefully cut along the lines with a utility knife. For tight curves, consider using a jigsaw or coping saw for greater precision.
Undercutting Door Casings: To achieve a professional finish around door casings, use a jamb saw or oscillating multi-tool to undercut the casing slightly. This allows the vinyl flooring to slide underneath the casing, creating a clean and seamless transition. Ensure the undercut is deep enough to accommodate the thickness of the flooring.
Seam Placement: Carefully plan the placement of seams to minimize their visibility. Stagger the seams between rows to create a more natural and less conspicuous appearance. Avoid placing seams in high-traffic areas or in areas prone to moisture exposure. Use seam sealer (if recommended by the manufacturer) to create a waterproof barrier along the seams.
Trial Fitting: Before permanently installing any piece of vinyl flooring, perform a trial fit to ensure it fits properly and aligns with the surrounding pieces. This allows one to identify and correct any errors before it's too late. Make any necessary adjustments to the cuts until the piece fits snugly and seamlessly.
Sharp Blades: Always use sharp blades when cutting vinyl flooring. Dull blades can tear the material and create uneven edges. Replace the blade frequently to maintain optimal cutting performance.
The installation process varies slightly depending on whether the Allure vinyl flooring is a click-lock or glue-down type. For click-lock flooring, start along a straight wall, ensuring a small expansion gap (typically ¼ inch) is maintained using spacers. Engage the interlocking edges of the planks or tiles, using a rubber mallet and tapping block to gently tap them together. Continue laying the flooring row by row, staggering the seams for a more visually appealing appearance. For glue-down flooring, apply adhesive to the subfloor according to the manufacturer's instructions. Carefully position the vinyl flooring onto the adhesive, ensuring proper alignment and contact. Use a roller to firmly press the flooring into the adhesive, removing any air pockets.
When installing around toilets, vanities, and other fixtures, precise cutting and fitting are essential. Create a template of the fixture's base using cardboard or paper. Transfer the template to the vinyl flooring and carefully cut out the shape using a utility knife or jigsaw. Ensure a snug fit around the fixture, leaving a small gap for expansion. Use caulk to seal any gaps and prevent water from seeping underneath the flooring.
Key Point 3: Sealing and Finishing Touches for Durability
Proper sealing and finishing touches are essential for maximizing the durability and longevity of Allure vinyl flooring, particularly in a moisture-prone environment like a bathroom. Sealing seams, caulking around fixtures, and installing transition strips not only enhance the aesthetic appeal but also provide crucial protection against water damage, mold growth, and premature wear.
Seam Sealing: In bathrooms, where moisture exposure is high, sealing the seams of Allure vinyl flooring is crucial. Use a seam sealer specifically designed for vinyl flooring. Apply the sealer according to the manufacturer's instructions, typically along the edges of the seams. Wipe away any excess sealer immediately to prevent discoloration or residue buildup. Seam sealing creates a waterproof barrier, preventing water from seeping between the planks or tiles and damaging the subfloor.
Caulking Around Fixtures: Apply a bead of caulk around the base of toilets, vanities, showers, and bathtubs where the vinyl flooring meets these fixtures. Use a high-quality, mildew-resistant caulk specifically formulated for bathroom use. Smooth the caulk with a wet finger or a caulking tool to create a clean and professional finish. Caulking prevents water from penetrating underneath the flooring and causing damage to the subfloor or promoting mold growth.
Transition Strips: Install transition strips where the Allure vinyl flooring meets other flooring types, such as tile, carpet, or hardwood. Transition strips provide a smooth and safe transition between different floor heights, preventing tripping hazards and protecting the edges of the flooring. Choose transition strips that complement the color and style of the vinyl flooring and the adjacent flooring. Secure the transition strips with adhesive or screws, depending on the type of transition strip and the subfloor material.
Baseboards and Trim: Replace or reinstall baseboards and trim to cover the edges of the vinyl flooring and create a finished look. Baseboards and trim protect the walls from damage and conceal any gaps between the flooring and the walls. Choose baseboards and trim that complement the style of the bathroom and the vinyl flooring. Secure the baseboards and trim with nails or adhesive.
Cleaning and Maintenance: After completing the installation, clean the Allure vinyl flooring with a damp mop and a mild detergent. Avoid using harsh chemicals or abrasive cleaners, as these can damage the surface of the flooring. Regularly sweep or vacuum the floor to remove dirt and debris. Place mats or rugs in high-traffic areas to protect the flooring from wear and tear. Proper cleaning and maintenance will help prolong the life of the Allure vinyl flooring and keep it looking its best.
Regular Inspections: Periodically inspect the Allure vinyl flooring for any signs of damage, such as scratches, dents, or water stains. Address any issues promptly to prevent them from worsening. Repair any scratches or dents with a vinyl flooring repair kit. Clean up any spills immediately to prevent staining or water damage.
After the installation is complete, allow the adhesive (if used) to fully cure according to the manufacturer's instructions. Avoid heavy foot traffic on the newly installed flooring for at least 24 hours. Once the adhesive is fully cured, clean the floor thoroughly with a damp mop and a mild detergent. Inspect the installation for any imperfections and address them promptly. With proper installation and maintenance, Allure vinyl flooring can provide a durable, water-resistant, and aesthetically pleasing flooring solution for any bathroom.

How To Install Vinyl Plank Flooring Allure Isocore Tile Installation Tutorial

How To Install Vinyl Plank Flooring Tutorial Sustain My Craft Habit

How To Install Vinyl Plank Flooring Allure Gripstrip

How To Install Vinyl Plank Flooring Tutorial Sustain My Craft Habit

Installing Vinyl Floors A Do It Yourself Guide The Honeycomb Home

How To Install Vinyl Plank Flooring In A Bathroom As Beginner Home Renovation

How To Install A Lock Vinyl Floor

Trafficmaster Ceramica 12 X 24 Vinyl Tile Floor Installation

Installing Vinyl Floors A Do It Yourself Guide The Honeycomb Home

Installing Vinyl Floors A Do It Yourself Guide The Honeycomb Home
Related Posts