How to Effortlessly Install 3/4 Engineered Hardwood Flooring
Transforming your space with the timeless elegance of 3/4 engineered hardwood flooring is a rewarding endeavor. By understanding the essential steps and employing precise techniques, you can achieve a professional-looking installation that will elevate the ambiance of your home.
Before embarking on this project, gather the necessary tools: a pry bar, a circular saw or miter saw, a nail gun, a flooring nailer, a tape measure, a level, a chalk line, a utility knife, and safety glasses. Ensure you have ample flooring materials, factoring in cuts and waste.
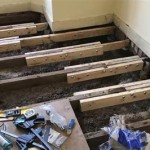
Commence the installation by preparing the subfloor. Remove any existing flooring and baseboards. Inspect the subfloor for levelness; if necessary, use a self-leveling compound to smooth out any irregularities. Allow ample time for the compound to dry.
Determine the direction in which you want to lay the flooring. Typically, planks are installed parallel to the longest wall of the room. Snap a chalk line to guide the placement of your first row of planks.
Begin installing the planks from a corner of the room. Apply a thin layer of flooring adhesive to the subfloor and place the first plank. Ensure the groove side faces the wall. Secure the plank using a flooring nailer, driving nails at an angle through the tongue. Avoid nailing too close to the short ends of the plank.
Continue installing planks row by row, staggering their joints for added strength. When reaching the end of a row, measure and cut the last plank to fit. Use the utility knife to score and snap the plank along the cut line.
Fit the cut plank into place and secure it with nails. When encountering obstacles like doorways or cabinets, make precise cuts using a circular saw or miter saw. Measure and mark the plank, ensuring the cut is at a 90-degree angle for a seamless fit.
After completing the installation, allow the flooring to settle for 24 hours before walking on it. Install the baseboards to conceal any gaps around the perimeter of the room.
To maintain the beauty of your engineered hardwood flooring, follow recommended cleaning and maintenance instructions. Sweep or vacuum regularly to remove dirt and debris. Use a damp mop with manufacturer-approved cleaning solutions to clean the floor. Avoid excessive moisture, as it can damage the flooring.
By following these steps and employing meticulous attention to detail, you can successfully install 3/4 engineered hardwood flooring that will enhance the aesthetic appeal and value of your home for years to come.

How To Install Lock Engineered Hardwood Flooring

3 Methods For How To Install Engineered Hardwood Flooring

How To Install Lock Engineered Hardwood Flooring

3 Methods For How To Install Engineered Hardwood Flooring

How To Install An Engineered Hardwood Floor

Engineered Hardwood Floor Installation Part 1

How To Install Hardwood Flooring The Home Depot

Hardwood Floor Installation Nail Down Like A Pro

How To Install Hardwood Flooring The Home Depot

Install Faq The Hardwood Flooring Experts Petes Floors
Related Posts


