How to Glue Down Engineered Wood Flooring: A Comprehensive Guide
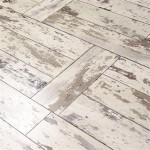
Engineered wood flooring is a highly durable and versatile flooring option that combines the aesthetic appeal of natural wood with the stability and affordability of a composite material. Gluing down engineered wood flooring is a relatively straightforward process that can be completed by DIY enthusiasts with the right tools and materials.
Materials You'll Need:
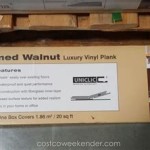
- Engineered wood flooring
- Adhesive specifically designed for engineered wood flooring
- Trowel
- Spacers
- Tap block
- Hammer or mallet
- Safety glasses and gloves
Step 1: Prepare the Subfloor
A smooth, level, and dry subfloor is essential for a successful glue-down flooring installation. Remove any existing flooring or carpet and ensure the subfloor is in good condition. Repair any damaged areas, remove nails or screws, and sand any uneven surfaces.
Step 2: Determine the Starting Point
Plan the layout of the flooring before starting the installation. Determine the center point of the room and snap a chalk line perpendicular to the wall where the first row of planks will be installed.
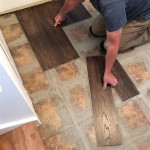
Step 3: Apply the Adhesive
Using a notched trowel, spread a thin, even layer of adhesive onto the subfloor. Follow the manufacturer's instructions for the specific type of adhesive being used. Start by applying the adhesive in a small area and work your way outward.
Step 4: Install the First Row
Place the first plank along the chalk line, ensuring there is a small gap (approximately 1/4 inch) between the plank and the wall. Use spacers to maintain the gap. Tap the plank into place using a tap block and hammer or mallet.
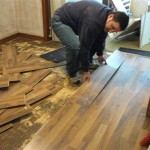
Step 5: Continue Laying the Planks
Continue laying the planks row by row, using spacers to maintain the gap between planks and the wall. Stagger the joints between rows to ensure a more stable and durable floor.
Step 6: Trim the Planks
As you reach the end of the room, you may need to trim the planks to fit. Measure and mark the plank, then use a saw to cut it to the desired length.
Step 7: Clean the Floor
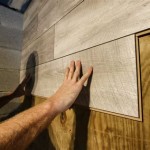
Once the flooring is installed, clean any excess adhesive from the surface using a damp cloth. Avoid using harsh chemicals or abrasive cleaners.
Additional Tips
- Ensure the room temperature is between 65 and 80 degrees Fahrenheit during installation.
- Allow the adhesive to cure for at least 24 hours before walking on the floor.
- Leave a gap of approximately 1/2 inch around the perimeter of the room for expansion.
- Use a moisture barrier underlayment if installing the flooring in a humid environment.
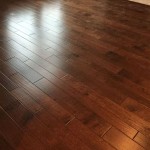
By following these steps carefully, you can successfully glue down engineered wood flooring and enjoy its beauty and durability for years to come.

How To Glue Down Engineered Wood Flooring Direct

How To Install Diy Glue Down Engineered Hardwood Flooring

How To Install An Engineered Hardwood Floor

Can You Glue Down Solid Wood Flooring Hardwood Guide Reallyfloors America S Est

How To Install Prefinished Hardwood Floor Glue Down Technique Diy Mryoucandoityourself

Pros Cons Of Glue Down Flooring Installation Floorset

Installation Methods For Wooden Floor Craftedforlife

Engineered Hardwood Floors Installation Floor Refinishing New Jersey Repair Sanding

Glue Down Vs Floating Wood Floor Installation Finfloor

How To Install Engineered Hardwood Flooring Glue Down Time Lapse
Related Posts