How to Change the Direction of Wood Flooring in The Sims 4
The Sims 4, a life simulation game, offers a wide range of customization options for players to design and build their virtual homes. Among these options is the ability to lay down various floor coverings, including wood flooring. These floors come in numerous styles and colors, allowing for personalization of each room. However, sometimes the default direction of the wood flooring planks does not align with the player's aesthetic preference or the desired design. Understanding how to change the direction of wood flooring in The Sims 4 is crucial for achieving the desired look and feel of a virtual space.
The absence of a straightforward, in-game tool specifically designed for rotating individual floor tiles or selections presents a unique challenge. The game's building mechanics operate on a grid-based system, and flooring is typically applied across entire rooms or pre-defined areas. This means that rotating a section of flooring requires utilizing existing game mechanics and manipulating the flooring placement to achieve the desired effect. Several methods can be employed to overcome this limitation, each with its own advantages and disadvantages. The most suitable method will depend on the specific design goals, the size of the area requiring adjustment, and the player's familiarity with the game's building tools.
Mastering these techniques allows players to create more nuanced and visually appealing interiors, enhancing the overall realism and cohesiveness of their Sim's homes. It also provides greater control over the flow of the design, emphasizing certain architectural features or creating visual interest through deliberate pattern variations. Without the ability to alter the direction of wood flooring, players would be limited to the default orientation, potentially hindering their creative vision and resulting in less visually satisfying designs.
Using the Sledgehammer Tool and Re-application
The most common and perhaps the most intuitive method involves using the Sledgehammer tool to remove the existing floor and reapplying the flooring in the desired direction. This approach is typically effective for small areas or entire rooms, where a consistent directional change is desired. The process begins by selecting the Sledgehammer tool from the build mode interface, located in the "Tools" section usually alongside the design tool. The player must then carefully click on the floor tiles they wish to remove. It is important to exercise caution to avoid accidentally deleting walls or other architectural elements. Once the undesired flooring is removed, the player can then re-select the desired wood flooring from the catalogue and apply it to the empty space. When applying the new flooring, the game will typically align the planks in a default direction. If this is still not the desired orientation, the flooring can be removed and reapplied until the desired direction is achieved.
This method, while simple, can become repetitive and time-consuming, especially for larger areas or when attempting to achieve a specific pattern. Furthermore, using the sledgehammer tool can be disruptive if the room is furnished, as any objects placed on the affected floor tiles will be moved to the Sim's inventory. Therefore, it is advisable to remove furniture and décor before removing and reapplying flooring. Despite these drawbacks, this method offers a reliable and straightforward way to control the direction of wood flooring, particularly for those new to the game's building mechanics. The simplicity and directness of the technique make it an accessible option for all players, regardless of their building experience.
Moreover, this method also allows for the introduction of variations within the same room. For instance, a player could choose to have the flooring run horizontally in one section of the room and vertically in another, creating a visual separation or highlighting specific design elements. This level of control is particularly useful for creating open-plan living spaces, where subtle changes in flooring direction can define different functional areas within a larger room.
Utilizing Room Dividers and Multiple Room Creation
Another effective strategy involves creating separate rooms or using room dividers to manipulate the flooring direction. This technique is particularly useful when aiming to achieve different flooring directions in adjacent areas without disrupting the existing layout. By strategically placing walls or room dividers, the player can essentially trick the game into treating each area as a distinct room, allowing for independent flooring application and orientation. The process begins by carefully planning the desired flooring layout and identifying the areas where the flooring direction needs to be altered. Walls or room dividers are then placed along the boundaries between these areas, effectively separating them into distinct rooms. Once the rooms are defined, the desired wood flooring can be applied to each room individually, with the planks oriented as desired. After the flooring is applied and the desired effect is achieved, the room dividers can be carefully removed, leaving behind the desired flooring direction in each area.
This method requires a bit more planning and precision than simply using the Sledgehammer tool, but it offers several advantages. First, it allows for more controlled transitions between different flooring directions. By using room dividers, the player can ensure that the flooring planks align seamlessly along the boundaries between the areas, creating a more polished and professional look. Second, this method can be less disruptive to the existing furniture and décor. By isolating the areas where the flooring is being changed, the player can minimize the need to move objects around, saving time and effort. Third, this technique is particularly useful for creating complex flooring patterns or incorporating different types of flooring in the same room. By dividing the room into smaller sections, the player can experiment with different flooring materials and orientations, creating visually interesting and unique designs.
However, it is important to note that removing the room dividers after applying the flooring can sometimes cause minor visual glitches or imperfections. In some cases, the flooring planks may not align perfectly along the edges, or there may be slight gaps between the tiles. These imperfections can usually be corrected by carefully adjusting the placement of the tiles or using the Sledgehammer tool to remove and reapply individual tiles. Despite these potential drawbacks, this method offers a powerful and flexible way to control the direction of wood flooring in The Sims 4, allowing players to create more sophisticated and visually appealing designs.
Employing Foundation Techniques for Alignment
For more advanced builders, manipulating the foundation levels of a structure can provide a degree of control over flooring alignment. This technique necessitates a solid understanding of the game’s building mechanics and how different foundation heights influence the application of flooring. The principle involves creating subtle variations in foundation height to force the game into applying the flooring in a specific orientation. This method typically works best when planning a build from the ground up, as retroactively altering foundation levels can be disruptive and require significant adjustments to the existing structure.
The process starts by establishing a base foundation level. Then, in the area where the flooring direction needs to be changed, the foundation can be slightly raised or lowered. This change in height, even if minimal, can sometimes influence the direction in which the game lays down the flooring. Once the flooring is applied in the desired direction, the foundation can be adjusted back to the original level, if necessary. This technique can be particularly useful for creating patterned flooring or mimicking the look of wood flooring laid in a herringbone or chevron pattern.
However, this method does come with certain caveats. Altering foundation levels can affect the appearance of walls and other structural elements, potentially creating unwanted visual effects. Furthermore, Sims may have difficulty navigating areas with significant foundation height variations. Therefore, it’s essential to carefully consider the practical implications of this technique before implementing it. This method requires experimentation and a willingness to troubleshoot potential issues, but it can provide a greater level of control over flooring alignment than the simpler methods described above.
Ultimately, the choice of method depends on the player’s skill level, the complexity of the desired design, and the willingness to experiment with different building techniques. Mastering these techniques allows players to create more unique and personalized homes for their Sims, enhancing the overall gameplay experience.

Sims 4 Floor Rotation How To Vegas Mae

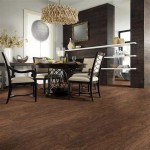
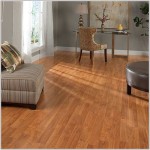
Changing Direction Of Flooring

Changing Direction Of Flooring

Reply To No Clue17 Htfdydt Rotating Floor Tiles Simtok Simtoks S Tiktok

Mod The Sims Hexagon Wood Floor 11 Swatches

So Easy Half Wall Trim Tutorial Emmysims Sims4 Sims4build Sim Tiktok

A Complete List Of Every Cheat And You Need For Build Mode In The Sims 4 Tiktok

Mask Material For Photodome Questions Babylon Js

Tile Tip Straight And Square Walls Are A Must Have Floor Trends Installation

How To Change Your Sim S Traits And Appearance In The Sims 4
Related Posts