How to Build a Van Floor: A Step-by-Step Guide for Beginners
Building a van floor is an essential step in converting a van into a livable space. It provides a solid foundation for your bed, furniture, and other belongings, ensuring a comfortable and durable living experience on the road. Here's a comprehensive guide to help you build a van floor from start to finish.
1. Plan Your Layout
Before you start building, plan your van's interior layout. Determine the location of your bed, kitchen, storage areas, and any other features you want to incorporate. This plan will guide the size and shape of your floor.
2. Remove Existing Flooring
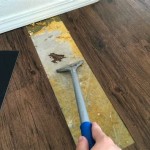
If your van has existing flooring, remove it carefully. Use a pry bar or floor scraper to loosen the flooring material, taking care not to damage the van's body or subfloor.
3. Prepare the Subfloor
Clean and inspect the subfloor, which is the metal or wooden base of the van's floor. If there are any rust spots, clean them with a wire brush and apply a rust-resistant coating. If the subfloor is uneven or damaged, it may need to be replaced or repaired.
4. Install Insulation (Optional)
Insulating the floor is optional but recommended for comfort and energy efficiency. Use foam board insulation or rigid fiberglass panels to cover the subfloor, ensuring there are no gaps. Secure the insulation with adhesive or screws.
5. Install the Floor Base
The floor base provides a solid support for the flooring material. It can be made of plywood, oriented strand board (OSB), or other durable materials. Cut the base to the desired shape and size, and secure it to the subfloor using screws.
6. Install the Flooring Material
Choose a flooring material that meets your preferences and needs. Vinyl flooring is a popular option due to its durability and ease of cleaning. Wood flooring or carpet tiles can also be used for a more homey feel. Cut the flooring material to size and lay it over the floor base, securing it with adhesive or nails.
7. Seal and Finish
To prevent moisture damage and enhance the floor's appearance, apply a sealant to the flooring material. You can choose from various sealants, such as polyurethane or epoxy coatings. Allow the sealant to cure completely before using the floor.
8. Trim and Moldings
Once the floor is installed, add trim and moldings around the edges and corners to finish the look. This step not only enhances the aesthetics but also prevents moisture from seeping under the flooring.
Tips for Success
* Use high-quality materials to ensure durability and longevity. * Measure twice, cut once to avoid mistakes. * Seal all seams and joints thoroughly to prevent water damage. * Allow ample time for adhesives and sealants to cure before using the floor. * If you encounter any difficulties, don't hesitate to seek professional help.
How I Installed Laminate Flooring In My Cargo Van

How To Prep The Floor For A Diy Camper Van Conversion Explorist Life

Camper Van Flooring Options Installation Tips The Whole World Or Nothing

Van Build Series Prep Subfloor

Chevy Astro Camper Van Build Vinyl Plank Flooring Seeking Lost Thru Hiking Backng Adventures

How To Install A Floor In Van Ep2 Build

How To Install Your Camper Van Floor Insulation Plywood Subfloor

Chevy Astro Camper Van Build Vinyl Plank Flooring Seeking Lost Thru Hiking Backng Adventures

How To Not Install A Subfloor In Van Conversion Ford Transit Build 1

Motorhome Floor Part 1 Self Build Van Boat
Related Posts


