How to Install Vinyl Plank Flooring on Concrete
Vinyl plank flooring is a popular choice for homeowners because it is durable, waterproof, and easy to maintain. It is also relatively easy to install, even for beginners. If you are thinking about installing vinyl plank flooring on concrete, here are the steps you need to follow:
1. Prepare the concrete subfloor
The first step is to prepare the concrete subfloor. This means making sure that the subfloor is level, smooth, and free of any debris or imperfections. If the subfloor is not level, you will need to level it using a self-leveling compound. If the subfloor is not smooth, you will need to sand it down until it is smooth. And if the subfloor is not clean, you will need to sweep or vacuum it until it is free of any debris or imperfections.
2. Install an underlayment
Once the subfloor is prepared, you will need to install an underlayment. An underlayment is a thin layer of material that is placed between the subfloor and the vinyl plank flooring. It helps to cushion the flooring and reduce noise. There are many different types of underlayments available, so you will need to choose one that is appropriate for your needs.
3. Lay out the vinyl plank flooring
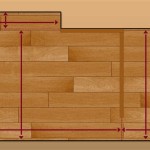
Once the underlayment is installed, you can start laying out the vinyl plank flooring. Start by laying out a few planks in the center of the room. Once you have the center planks in place, you can start working your way out towards the edges of the room. As you lay out the planks, be sure to stagger the joints so that they do not line up directly with each other.
4. Cut the vinyl plank flooring
As you lay out the vinyl plank flooring, you will need to cut some of the planks to fit around obstacles such as walls, doorways, and cabinets. To cut the planks, you can use a utility knife or a circular saw. Be sure to measure the planks carefully before you cut them, and always wear safety glasses when cutting.
5. Install the vinyl plank flooring
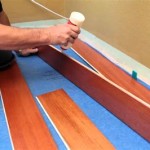
Once you have cut all of the planks, you can start installing them. To install the planks, simply peel off the backing and press the plank into place. Be sure to press down on the planks firmly to ensure that they are securely attached to the subfloor.
6. Trim the excess vinyl plank flooring
Once all of the planks are installed, you will need to trim the excess vinyl plank flooring around the edges of the room. To do this, you can use a utility knife or a circular saw. Be sure to measure the excess flooring carefully before you cut it, and always wear safety glasses when cutting.
7. Clean the vinyl plank flooring
Once the excess vinyl plank flooring is trimmed, you can clean the floor. To clean the floor, simply sweep or vacuum it. You can also mop the floor with a damp mop and a mild detergent. Be sure to wring out the mop well before mopping the floor, and never use harsh chemicals or abrasive cleaners on the floor.

Easy Ways To Install Vinyl Plank Flooring On Concrete

Easy Ways To Install Vinyl Plank Flooring On Concrete

How To Prepare A Concrete Floor For Vinyl Flooring Parrys

Tips For Installing Vinyl Plank Over Concrete Floors Lemon Thistle

How To Install Vinyl Or Laminate Floors In A Basement Over Concrete Slab

How To Install Vinyl Plank Flooring On Concrete Step By Guide

How To Install Vinyl Plank Flooring As A Beginner Home Renovation

Tips And Tricks For Installing Vinyl Plank Over Concrete Floors Riverbend Interiors

Easy Ways To Install Vinyl Plank Flooring On Concrete

Floor Prep On Concrete For A Vinyl Plank Installation
Related Posts


