Essential Aspects of House Hardwood Flooring Install
Installing hardwood flooring in your home can be a rewarding and worthwhile project, adding both beauty and value to your space. However, it's important to approach the installation process carefully, paying attention to essential aspects to ensure a successful and long-lasting result.
1. Subfloor Preparation
A solid subfloor is crucial for a stable and durable hardwood floor. Uneven or damaged subfloors can cause creaks, squeaks, and warping in the hardwood planks over time. Therefore, it's essential to thoroughly inspect the subfloor and make necessary repairs or reinforcements before installing the hardwood.
2. Moisture Control
Hardwood floors are susceptible to moisture damage, so it's critical to control moisture levels in the space before and after installation. Use a moisture meter to check the moisture content of the subfloor and hardwood planks. If the readings are too high, consider using a moisture barrier or dehumidifier to regulate moisture levels.
3. Acclimation
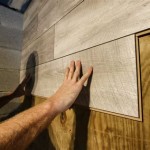
Hardwood planks need time to adjust to the temperature and humidity levels of their environment before installation. This process, known as acclimation, allows the planks to expand or contract slightly to minimize gaps and buckling later on. Typically, planks should be acclimated for several days in the space where they will be installed.
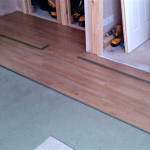
4. Expansion Gaps
Hardwood floors naturally expand and contract with changes in temperature and humidity. To prevent buckling or damage, it's important to leave expansion gaps around the perimeter of the room and around obstacles such as walls, fireplaces, and cabinets. These gaps allow the floor to move freely without causing damage.
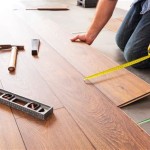
5. Nail or Glue Down
Depending on the type of hardwood flooring you choose, you will either need to nail or glue the planks down. Nailing is a traditional method that requires a nail gun and specialized nails. Glue-down installation involves using a strong adhesive to bond the planks directly to the subfloor. Both methods have their advantages, so it's best to consult with a flooring professional to determine the best approach for your project.
6. Finishing Touches
Once the hardwood flooring is installed, it needs to be finished to protect it from wear and tear. This typically involves sanding, staining, and applying a protective coating such as polyurethane or oil. Sanding removes any imperfections and smoothes the surface, while staining allows you to customize the color and appearance of the floor. The protective coating adds durability and resistance to scratches and stains.
By paying attention to these essential aspects, you can ensure a successful and professional-looking hardwood flooring installation. Remember that proper preparation, moisture control, acclimation, expansion gaps, and careful installation are key to a long-lasting and beautiful hardwood floor.

How To Install Hardwood Flooring Step By Forbes Home

How To Install Hardwood Flooring For Beginners

How To Install Lock Engineered Hardwood Flooring

How To Install Oak Hardwood Floors Young House Love

Hardwood Floor Installation Refinish The Navage Patch

How To Install Hardwood Flooring The Home Depot

Top Tips For Preparing To Install Hardwood Flooring Diaz Floors

Cost To Install Hardwood Floors The Home Depot

Types Of Hardwood Flooring Forbes Home

After Your Hardwood Installation H J Martin And Son
Related Posts