Essential Aspects of Home Legend Hardwood Flooring Installation Instructions
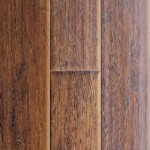
Installing hardwood flooring can be a rewarding home improvement project that enhances the beauty and value of your home. Home Legend hardwood flooring offers a wide range of stylish and durable flooring options, and the installation process is straightforward with the right tools and instructions.
1. Preparation and Subfloor Requirements
Before installing hardwood flooring, it's crucial to ensure that the subfloor is level, flat, and moisture-free. Any unevenness or moisture issues can compromise the stability and longevity of the flooring. If necessary, perform any subfloor repairs or leveling before proceeding with the installation.
2. Acclimation and Moisture Control
Hardwood flooring planks need to acclimate to the temperature and humidity of the room where they will be installed. Follow the manufacturer's instructions for the recommended acclimation period, typically several days. This step ensures the planks won't buckle or shrink after installation.
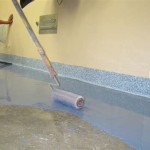
3. Underlayment Installation
An underlayment is a thin layer of material that provides cushioning, sound reduction, and moisture resistance between the subfloor and hardwood flooring. Install the underlayment according to the manufacturer's instructions, ensuring that the joints are tightly sealed and the entire area is covered.
4. Choosing the Installation Method
Home Legend hardwood flooring can be installed using several methods, including nail-down, staple-down, and glue-down. Consider the specific flooring type, subfloor conditions, and personal preferences when selecting the installation method.
5. Nail-Down Installation
For nail-down installation, use flooring nails that are specifically designed for hardwood flooring. Start by driving nails into the tongue of each plank, then countersink the nails slightly using a nail set. Position the next plank and align the tongue and groove, then nail the plank into place. Continue the process until the entire floor is covered.
6. Staple-Down Installation
Staple-down installation is similar to nail-down, but instead of nails, you'll use a flooring stapler. Position the staples over the tongue and drive them into the subfloor at an angle. This method is commonly used with engineered hardwood flooring or when the subfloor is a plywood or OSB underlayment.
7. Glue-Down Installation
Glue-down installation involves applying adhesive directly to the subfloor. Carefully follow the manufacturer's instructions for the specific adhesive being used. Position the planks and press them firmly into the adhesive. Use spacers to maintain consistent spacing between the planks.
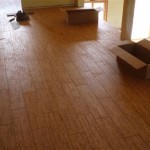
8. Finishing Touches
Once the hardwood flooring is installed, it's time to add the finishing touches. This includes installing any molding or baseboards around the perimeter of the room. You may also want to apply a sealant or finish to protect the flooring and enhance its appearance.
Conclusion
By following these essential aspects of Home Legend hardwood flooring installation instructions, you can achieve a beautiful and durable hardwood floor that will enhance your home's ambiance and value. Remember to carefully follow the manufacturer's instructions, use high-quality materials, and take your time during the installation process.

How To Install Lock Engineered Hardwood Flooring

Home Legend Hl324h Gunstock Oak 3 8 In Thick X 5 Wide Varying Length

How To Install Lock Engineered Hardwood Flooring

Home Legend Inc S Limited Twenty Five Year Finish And Wear

Drop Lock Variable Length Laminate Using Our Legend Series

Home Legend Eagle Creek Transition Moldings Onflooring

How To Install Lock Engineered Hardwood Flooring

How To Install Hardwood Flooring The Home Depot

How To Install Engineered Hardwood Flooring

How To Install Lock Engineered Hardwood Flooring
Related Posts