Essential Aspects of Hardwood Flooring on Stairs DIY
Transforming your stairs with hardwood flooring can significantly enhance the aesthetic appeal of your home while increasing its value. However, installing hardwood flooring on stairs is a meticulous task that requires careful planning and precise execution.
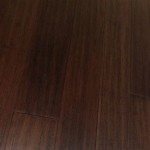
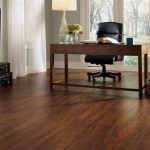
Understanding the Materials
Selecting the right hardwood species is crucial. Oak, maple, and walnut are popular choices for stairs due to their durability and timeless elegance. Consider the existing decor of your home and choose a wood that complements the overall style.
Planning the Layout
Plan the layout of the hardwood flooring on your stairs carefully. Determine the tread width, riser height, and nosing overhang. Use a tape measure and level to ensure accurate measurements.
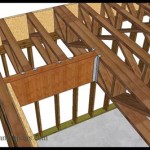
Preparing the Subfloor
Before installing the hardwood flooring, the subfloor must be prepared properly. It should be level, secure, and free from any gaps or unevenness. If necessary, level the subfloor using self-leveling compound.
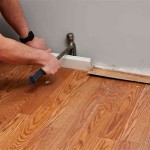
Installing the Hardwood Flooring
Start by installing the bottom tread. Apply a thin layer of wood glue to the subfloor and lay down the first tread. Secure it using nails or screws. Continue installing the remaining treads, one at a time, working your way up the stairs.
Adding the Risers
Once the treads are in place, install the risers. Measure and cut the risers to fit the height of the stairs. Use wood glue to adhere the risers to the treads and subfloor.
Installing the Nosing
The nosing is the protruding edge of the tread that covers the riser. Measure and cut the nosing to fit the width of the tread. Apply wood glue and secure it using nails or screws.
Sanding and Finishing
After completing the installation, sand the entire surface of the stairs to smooth out any imperfections. Use a fine-grit sandpaper and work with the grain of the wood. Once sanded, apply a sealant or finish to the hardwood flooring to protect it from wear and tear.
Tips for Success

Diy Hardwood Flooring On Stairs Flooret Silvan Line

How To Install Hardwood On Stairs

How To Make Stair Treads With Prefinished Flooring And Floormade Nosing Rw Supply Design

Hardwood Stairs Done Diy Home Improvement Part 2

How To Convert Carpeted Stairs Hardwood Lowe S

Can You Laminate Stairs The Pros Cons

Replaced The Carpet On Our Stairs With Wood Stair Treads Diy

How To Install Laminate Flooring On Stairs Direct Wood

Diy Wood Plank Stairs Staircase Flooring For

Best Paint For Stairs In A Basement
Related Posts