Glue Down Laminate Flooring on Concrete: A Comprehensive Guide
Laminate flooring has become a popular choice for homeowners and businesses alike, offering a durable, aesthetically pleasing, and cost-effective alternative to hardwood and tile. One common installation method for laminate flooring is the glue-down approach, particularly when installing over a concrete subfloor. This article provides a comprehensive overview of glue-down laminate flooring installation on concrete, covering preparation, materials, the installation process itself, and essential considerations for a successful project.
Concrete subfloors present both advantages and challenges for laminate flooring installation. Their inherent strength and stability are beneficial. However, concrete can also be porous and susceptible to moisture, which can damage laminate flooring if not properly addressed. Understanding the nuances of concrete subfloors is crucial for ensuring a long-lasting and trouble-free installation.
Key Point 1: Assessing and Preparing the Concrete Subfloor
The success of any glue-down laminate flooring project hinges on proper subfloor preparation. This involves a thorough assessment of the concrete's condition and addressing any issues that could compromise the bond between the laminate and the subfloor. The following steps are paramount:
Moisture Testing: Concrete is porous and can absorb moisture from the ground or ambient humidity. Excessive moisture can lead to adhesive failure, warping of the laminate planks, and the growth of mold and mildew. A moisture test is essential to determine the moisture content of the concrete. Several methods exist, including the calcium chloride test (also known as the anhydrous calcium chloride test), which measures the amount of moisture the concrete emits over a specific period. Another option is using an electronic moisture meter, which provides a relative humidity reading. Acceptable moisture levels typically vary based on the adhesive manufacturer's recommendations, but generally, a moisture vapor emission rate (MVER) below 3 lbs per 1000 sq ft per 24 hours (using the calcium chloride test) or a relative humidity reading below 75% (using an in-situ probe) is considered acceptable. If moisture levels exceed these thresholds, moisture mitigation strategies must be implemented.
Surface Cleaning and Repair: Before applying any adhesive, the concrete surface must be clean, dry, and free of debris. This includes removing any existing coatings, paint, sealers, adhesives, or other contaminants. Mechanical methods such as scraping, grinding, or shot blasting may be necessary to achieve a clean surface. A thorough vacuuming is also crucial to remove any residual dust or particles. Any cracks, holes, or uneven areas in the concrete must be repaired using a cement-based patching compound or self-leveling underlayment. These repairs should be allowed to fully cure according to the manufacturer’s instructions before proceeding.
Leveling the Subfloor: Laminate flooring requires a relatively level surface for proper installation. Significant variations in height can lead to uneven flooring, creaking, and potential damage to the locking mechanisms of the laminate planks. A self-leveling underlayment (SLU) is often used to create a perfectly level surface. SLU is a cement-based mixture that is poured onto the subfloor and allowed to flow and self-level. It requires proper surface preparation and priming to ensure adhesion. The manufacturer's instructions regarding mixing, pouring, and curing times must be strictly followed.
Priming the Subfloor: Applying a primer to the concrete subfloor is often recommended, especially when using certain types of adhesives or when dealing with porous concrete. Primers improve the adhesion of the adhesive to the concrete, prevent the adhesive from being absorbed into the concrete, and can also help to seal the surface and prevent moisture migration. The type of primer should be compatible with both the adhesive and the concrete. Always consult the adhesive manufacturer's recommendations regarding primer selection and application.
Key Point 2: Selecting the Right Adhesive and Laminate Flooring
Choosing the appropriate adhesive and laminate flooring is pivotal for achieving a durable and aesthetically pleasing result. Considerations for both materials are discussed below:
Adhesive Selection: Several adhesive types are suitable for gluing down laminate flooring to concrete, including acrylic adhesives, urethane adhesives, and modified silane polymer (MSP) adhesives. Acrylic adhesives are generally water-based and offer good initial tack and bond strength. Urethane adhesives provide excellent water resistance and are suitable for areas prone to moisture. MSP adhesives combine the benefits of both acrylic and urethane adhesives, offering excellent adhesion, water resistance, and flexibility. It is crucial to select an adhesive specifically designed for use with laminate flooring and concrete. The adhesive should also be compatible with any underlayment or primer that has been applied. Always consult the adhesive manufacturer's technical data sheet for specific recommendations regarding application, coverage, and curing times.
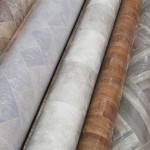
Laminate Flooring Selection: Laminate flooring is available in a wide variety of styles, colors, and thicknesses. The thickness of the laminate plank is an important factor, as thicker planks tend to be more durable and stable. The wear layer, which is the top layer of the laminate plank, determines its resistance to scratching, staining, and fading. A thicker wear layer will provide greater protection and extend the life of the flooring. Consider the intended use of the room and choose a laminate flooring that is appropriate for the level of traffic and potential for moisture exposure. Some laminate flooring is specifically designed for use in bathrooms or kitchens and features a water-resistant core. It is also important to check the laminate flooring manufacturer's recommendations regarding gluing down the product, as some laminate flooring is not suitable for this installation method.
Acclimation: Before installation, both the adhesive and the laminate flooring should be acclimated to the room's temperature and humidity for a minimum of 48-72 hours. This allows the materials to adjust to the environment and minimizes the risk of expansion or contraction after installation. Follow the manufacturer's recommendations regarding acclimation temperature and humidity levels. Storing the materials in the room where they will be installed is ideal.
Key Point 3: The Glue-Down Installation Process
The glue-down installation process requires careful attention to detail and adherence to the adhesive and laminate flooring manufacturer's instructions. The following steps outline the typical installation process:
Layout and Planning: Before starting the installation, it is essential to plan the layout of the laminate flooring. Consider the direction of the planks, the location of seams, and any potential obstructions. A dry layout, where the planks are positioned without adhesive, allows for visualization of the final result and helps to identify any potential issues. Planning the layout will minimize waste and ensure a visually appealing installation.
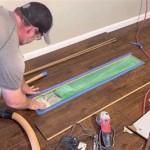
Adhesive Application: Apply the adhesive to the concrete subfloor using a notched trowel. The correct notch size and trowel angle are crucial for achieving the proper adhesive coverage. Follow the adhesive manufacturer's recommendations regarding trowel selection and application rate. Apply the adhesive in manageable sections, typically only enough for a few rows of planks at a time, to prevent the adhesive from drying out. Avoid applying adhesive to areas that will not be covered by planks within the recommended open time.
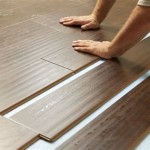
Plank Installation: Carefully position the laminate planks onto the adhesive, ensuring that they are properly aligned and tightly fitted. Use a tapping block and hammer to gently tap the planks together, creating a tight and seamless connection. Remove any excess adhesive from the surface of the planks immediately with a damp cloth. Some adhesives require rolling the installed planks with a heavy roller to ensure proper contact with the adhesive and a strong bond. Follow the adhesive manufacturer's recommendations regarding rolling requirements.
Cutting and Fitting: Accurate cuts are essential for achieving a professional-looking installation. Use a sharp laminate cutter or a saw with a fine-tooth blade to make clean and precise cuts. For intricate cuts around pipes or other obstructions, a jigsaw may be necessary. Take accurate measurements and double-check all cuts before installing the planks.
Expansion Gaps: Leave an expansion gap of approximately ¼ inch around the perimeter of the room and around any fixed objects, such as pipes or support posts. This allows the laminate flooring to expand and contract with changes in temperature and humidity without buckling or warping. The expansion gaps will be covered by baseboards or quarter-round molding after the installation is complete.
Curing and Clean Up: Allow the adhesive to fully cure according to the manufacturer's instructions before subjecting the flooring to heavy traffic. Avoid walking on the flooring during the curing process. Clean up any remaining adhesive residue with a damp cloth and a mild detergent. Install baseboards or quarter-round molding to cover the expansion gaps and provide a finished look.
Properly installed glue-down laminate flooring on concrete can provide a durable, beautiful, and long-lasting flooring solution. By carefully assessing and preparing the subfloor, selecting the right adhesive and laminate flooring, and following the installation process diligently, homeowners and professionals can achieve a successful and satisfying project.

How To Install Glue Down Vinyl Plank Flooring Bathroom Concrete Floor

Pros Cons Of Glue Down Flooring Installation Floorset

How To Install A Glue Down Floor Diy Flooring

Lvt Vs Glue Down Flooring Comparison Or

How To Prepare A Concrete Floor For Vinyl Flooring Parrys

Lvp Flooring Installation Over Concrete Subfloor Full Instructional Builds By Maz Flooret

Glue Down Vinyl Flooring A Guide To The Benefits And Installation Instructions

A Complete Guide On How To Install Laminate Flooring Concrete

Fitting Hardwood Floor To Concrete Wood And Beyond Blog

How To Install Tongue Groove Hardwood Floors Over Concrete
Related Posts