Floating Tongue And Groove Flooring Installation: A Step-by-Step Guide
Installing floating tongue and groove flooring is a relatively straightforward process that can be completed in a weekend. By following these instructions, you can ensure a professional-looking installation that will last for years to come.
Tools and Materials
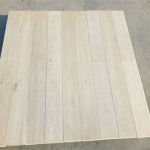
* Floating tongue and groove flooring * Underlayment * Moisture barrier * Tape measure * Pencil * Circular saw or miter saw * Pry bar * Hammer * Tapping block * SpacersStep 1: Prepare the Subfloor
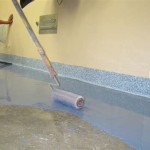
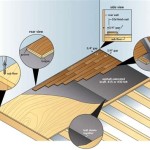
* Remove any existing flooring and baseboards. * Clean the subfloor thoroughly and make sure it is level and smooth. * Install a moisture barrier over the subfloor to protect the flooring from moisture damage.Step 2: Install the Underlayment
* Roll out the underlayment over the moisture barrier. * Overlap the seams by 6 inches and tape them together. * Trim the excess underlayment around the edges of the room.Step 3: Start the First Row
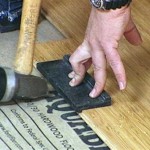
* Measure and mark the center of the room. * Start installing the flooring planks by placing the first plank in the center of the room. * Tap the plank into place using a tapping block and hammer. * Continue installing the first row of planks, working from the center outward.Step 4: Install the Subsequent Rows
* Stagger the joints in the subsequent rows by at least 6 inches. * Angle the tongue of the plank into the groove of the previous row. * Tap the plank into place using a tapping block and hammer. * Use spacers to maintain a consistent gap between the planks and the wall.Step 5: Cut the Planks to Fit
* Measure and mark the length of the last plank in each row. * Cut the plank to length using a circular saw or miter saw. * Tap the plank into place using a tapping block and hammer.Step 6: Finish the Installation
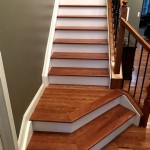
* Remove the spacers and install the baseboards. * Trim the excess flooring around the edges of the room using a utility knife. * Clean the floor and enjoy your new flooring!Tips
* Make sure the subfloor is level and smooth before installing the flooring. * Use a moisture barrier to protect the flooring from moisture damage. * Stagger the joints in the subsequent rows by at least 6 inches. * Use spacers to maintain a consistent gap between the planks and the wall. * Trim the excess flooring around the edges of the room using a utility knife.
All You Need To Know About Tongue And Groove Flooring Installation Reallyfloors America S Est Hardwood

How To Lay Floating Tongue And Groove Flooring Doityourself Com

5 Essential Tips For Tongue And Groove Flooring District Floor Depot

Floating Floor Vs Nail Down Slaughterbeck Floors Inc

Installing Laminate Engineered Wood Floating Floors Home Improvement Stack Exchange Blog

Which Method Should I Use To Install My Engineered Wood Floor Tesoro Woods

Floating A Wood Floor Hardwood Floors

How To Float Install A Tongue And Groove Engineered Floor Reallyfloors Com Series

What Is A Floating Floor Pros And Cons 50floor

How To Install A Hardwood Floor Build This Weekend