Fitting Hardwood Flooring On Floorboards: Essential Considerations
Enhancing your home's aesthetics with hardwood flooring is undoubtedly a worthwhile endeavor. However, achieving a seamless and durable installation requires careful attention to key aspects when working with existing floorboards. By embracing these essential considerations, you can ensure a successful hardwood flooring project.
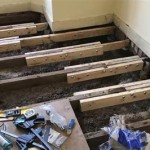
1. Floorboard Preparation
The condition of your existing floorboards plays a crucial role in the success of your hardwood flooring installation. Inspect the floorboards thoroughly for any signs of damage, rot, or unevenness. Address any issues by repairing or replacing damaged boards and leveling uneven surfaces. Ensure the floorboards are clean and free of debris before proceeding further.
2. Moisture Barrier
Installing a moisture barrier between the floorboards and hardwood flooring is essential to prevent moisture from seeping into the hardwood and causing damage. Choose a moisture barrier specifically designed for hardwood flooring and install it according to the manufacturer's instructions, ensuring complete coverage. This barrier will protect your hardwood flooring from moisture and extend its lifespan.
3. Underlayment
Using an underlayment between the moisture barrier and hardwood flooring provides additional cushioning, reduces sound transmission, and helps level the surface. Choose an underlayment compatible with your chosen hardwood flooring and follow the manufacturer's recommendations for installation. Proper underlayment will enhance the comfort, durability, and longevity of your hardwood floor.
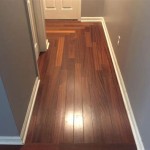
4. Installation Method
Two primary methods are used for installing hardwood flooring on floorboards: nailing or floating. Nailing involves securing the hardwood planks to the floorboards using nails or screws. This method is suitable for solid hardwood flooring. Floating, on the other hand, involves gluing or locking the hardwood planks together without attaching them to the floorboards. Floating installations are commonly used for engineered hardwood flooring.
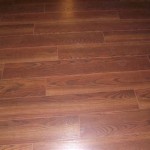
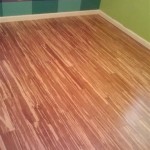
5. Finishing Touches
After the hardwood flooring is installed, apply the appropriate finishing touches to protect and enhance its appearance. Sand the floor to smooth out any imperfections, fill any nail or screw holes, and apply stain or sealant according to the manufacturer's instructions. These finishing touches will enhance the aesthetic appeal of your hardwood flooring and protect it from wear and tear.
Conclusion
By following these essential considerations, you can approach the installation of hardwood flooring on floorboards with confidence. Proper preparation, the use of a moisture barrier, underlayment, and the appropriate installation method are key to achieving a durable and aesthetically pleasing result. Remember to consult with professionals if you encounter any challenges during the installation process. With meticulous attention to detail and the right materials, you can transform your living space with the timeless elegance of hardwood flooring.
:strip_icc()/101206836-29035ec5a7c34a12a4c00cd5101818d4.jpg?strip=all "How To Install Hardwood Floors")
How To Install Hardwood Floors

How To Install Hardwood Flooring The Home Depot

How To Install Hardwood Flooring Step By Forbes Home
:strip_icc()/101206833-2e499ef612434b6b8ab6e5b62422a78f.jpg?strip=all "How To Install Hardwood Floors")
How To Install Hardwood Floors

How To Install Hardwood Flooring For Beginners

How To Lay Engineered Timber Floor Guide Fantastic Handyman Au

How To Install Hardwood Flooring The Home Depot

Fitting Hardwood Flooring To Existing Floorboards Wood And Beyond Blog

How To Install Lock Engineered Hardwood Flooring

Laying New Wood Flooring Over Original Uneven Floorboards Le Arthur Wells
Related Posts