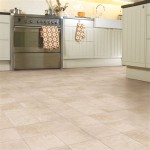
Finishing Utility Grade Oak Flooring: A Guide to Achieving a Professional Finish
Utility grade oak flooring, renowned for its durability and affordability, requires proper finishing techniques to enhance its appearance and protect it from wear and tear. Here's a comprehensive guide to help you achieve a professional-looking finish on your utility grade oak flooring.
1. Preparation: Leveling and Sanding
Before applying any finish, ensure the floor is level and smooth. Use a leveling compound to fill any depressions or uneven areas. Once dry, sand the floor using an orbital sander, starting with coarse grit (80-100) and gradually progressing finer grits (120-220). This process removes surface imperfections, creates a uniform surface, and enhances adhesion for the finish.
2. Choosing the Right Finish
Various finish options are available for utility grade oak flooring, each with unique characteristics. Consider the desired appearance and durability you want to achieve. Polyurethane finishes provide excellent durability and water resistance, while oil-based finishes penetrate the wood and create a rich, natural patina. Hardwax oils offer a combination of protection and ease of maintenance.
3. Applying the First Coat
Start by applying a thin, even coat of the chosen finish. Use a brush or roller, ensuring the finish penetrates into the grain of the wood. For oil-based finishes, allow the first coat to dry for 24-48 hours before proceeding. Polyurethane and hardwax oils typically dry faster, but check the manufacturer's instructions for specific drying times.
4. Intermediate Sanding
After the first coat has dried, lightly sand the floor with a fine-grit sandpaper (220-320). This step removes any raised wood fibers or imperfections, creating a smooth surface for subsequent coats.
5. Second and Third Coats
Apply a second coat of finish, sanding lightly in between coats as needed. This process ensures even coverage and builds up the desired thickness and protection. Apply a third coat if necessary, especially in high-traffic areas or for increased durability.
6. Final Sanding and Touch-ups
After the final coat has dried, lightly sand the floor again with a very fine-grit sandpaper (400-600). This step removes any remaining imperfections and creates a smooth, polished finish. Touch up any areas where scratches or imperfections may have occurred during sanding or application.
7. Maintenance and Care
Maintaining the finish on utility grade oak flooring is crucial for its longevity. Sweep or vacuum regularly to remove dust and debris. Use a damp mop occasionally to clean the floor, avoiding excessive moisture. Apply a refresher coat of finish periodically, as per the manufacturer's recommendations, to preserve the appearance and protection of your flooring.
Tips for Success
* Ensure the room temperature is between 60-80 degrees Fahrenheit during the finishing process. * Use a tack cloth to remove dust before applying each coat of finish. * Allow ample drying time between coats for proper adhesion and curing. * Wear a dust mask and safety glasses during sanding and finishing. * Consider hiring a professional flooring contractor if you lack the experience or time to complete the task.Our Utility Grade Oak Floors Myrtle House Elizabeth Burns Design Raleigh Nc Interior Designer

White Oak Utility Grade Prefinished Solid Hardwood Flooring Floor Depot

Our Utility Grade Hardwood Oak Floors Facts And S Beneath My Heart

White Oak 3 Common Utility Grade Unfinished Solid Hardwood Flooring Floor Depot

Our Utility Grade Hardwood Oak Floors Facts And S Beneath My Heart

Our Utility Grade Hardwood Oak Floors Facts And S Beneath My Heart

Our Utility Grade Hardwood Oak Floors Facts And S Beneath My Heart

Our Utility Grade Hardwood Oak Floors Facts And S Beneath My Heart

White Oak Character Grade Unfinished Solid Hardwood Flooring 2 10 Random Lengths Floor Depot

How To Install Hardwood Flooring Tips Tricks Making Maanita
Related Posts


