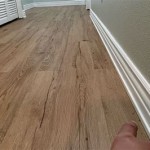
Engineered Wood Flooring Installation On Concrete
Engineered wood flooring offers a balance of aesthetic appeal, stability, and cost-effectiveness, making it a popular choice for residential and commercial spaces. Installing it over a concrete subfloor is a common practice, but it requires careful preparation and adherence to specific installation guidelines to ensure a long-lasting and visually appealing result. This article provides a comprehensive overview of the key considerations and steps involved in installing engineered wood flooring on concrete.
Concrete, while durable, presents unique challenges as a subfloor. Its inherent rigidity means any imperfections or unevenness will directly translate to the finished floor's surface. Furthermore, concrete can wick moisture from the ground, potentially causing warping and damage to wood flooring if the appropriate moisture barrier is not implemented. Success hinges on meticulous preparation and an understanding of the materials and methods best suited for this type of installation.
I. Assessing the Concrete Subfloor
The initial step in any successful engineered wood flooring installation on concrete is a thorough assessment of the subfloor's condition. This assessment includes checking for flatness, moisture content, and structural integrity. Addressing any issues discovered during this stage is crucial for preventing problems down the line.
Flatness: Concrete floors are rarely perfectly level. Deviations in flatness, even small ones, can lead to uneven flooring, squeaks, and potential damage to the locking mechanisms of the engineered wood planks. A long straightedge (typically a 6-10 foot level) is used to identify high and low spots. According to industry standards, acceptable flatness typically falls within a tolerance of 3/16 inch over a 10-foot span or 1/8 inch over a 6-foot span. Any deviations exceeding these tolerances must be corrected.
Moisture Content: Concrete is porous and can absorb moisture from the surrounding environment, including the ground beneath it. Excessive moisture can cause engineered wood flooring to warp, buckle, or develop mold. A moisture test is essential to determine the moisture content of the concrete slab. Several methods are available, including calcium chloride tests and electronic moisture meters. The calcium chloride test, often considered the most accurate, involves placing a pre-weighed dish of calcium chloride on the concrete, sealing it with a plastic dome, and measuring the weight gain after a specified period (typically 72 hours). Electronic moisture meters provide a more immediate reading but may be less accurate than the calcium chloride test. The acceptable moisture content will vary depending on the manufacturer’s specifications for the chosen flooring product, but generally, it should be below 3 lbs per 1000 sq ft per 24 hours for a calcium chloride test or within the range specified by the flooring manufacturer for moisture meter readings.
Structural Integrity: Inspect the concrete for cracks, crumbling, or other signs of damage. Small, hairline cracks are generally not a major concern, but larger cracks or areas of significant damage need to be addressed. Repairing these areas ensures a stable and even surface for the flooring installation. Self-leveling concrete compounds or patching compounds can be used to repair cracks and fill in damaged areas.
II. Preparing the Concrete Subfloor
Once the concrete subfloor has been assessed, the next step is to prepare it for the engineered wood flooring installation. This involves cleaning, leveling, and applying a moisture barrier to prevent moisture-related issues.
Cleaning: Thoroughly clean the concrete subfloor to remove any dirt, dust, debris, or adhesives. Use a broom, vacuum cleaner, and scraper to remove loose particles. For stubborn adhesives, chemical adhesive removers may be necessary. Ensure the concrete surface is completely clean and dry before proceeding to the next step.
Leveling: Address any unevenness identified during the assessment phase. Self-leveling concrete compound is a common solution for leveling concrete subfloors. Follow the manufacturer’s instructions carefully when mixing and applying the compound. Pour the self-leveling compound over the uneven areas and allow it to spread and level out on its own. Use a gauge rake to help distribute the compound evenly. Allow the self-leveling compound to cure completely according to the manufacturer's instructions before proceeding.
Moisture Barrier: A moisture barrier is crucial to protect the engineered wood flooring from moisture migrating up from the concrete slab. Several types of moisture barriers are available, including polyethylene sheeting, liquid-applied membranes, and underlayment with integrated moisture barriers. Polyethylene sheeting is a cost-effective option, but it is essential to overlap the seams and tape them securely. Liquid-applied membranes provide a seamless barrier and are generally more effective at preventing moisture transmission. Underlayment with an integrated moisture barrier offers convenience and can also provide additional sound insulation. The choice of moisture barrier will depend on the specific moisture conditions and the recommendations of the flooring manufacturer. Ensure the chosen moisture barrier is compatible with the adhesive or installation method being used.
III. Installation Methods for Engineered Wood Flooring on Concrete
There are several methods for installing engineered wood flooring over concrete, each with its own advantages and disadvantages. The most common methods include gluing, floating, and nail-down installation (for specific types of engineered wood flooring).
Glue-Down Installation: Gluing the engineered wood flooring directly to the concrete subfloor provides a very stable and secure installation. This method is suitable for areas with high traffic or where dimensional stability is a concern. Select an adhesive specifically designed for engineered wood flooring and concrete. Apply the adhesive evenly to the concrete subfloor using a notched trowel, following the adhesive manufacturer’s instructions. Carefully position the engineered wood planks onto the adhesive, ensuring proper alignment and spacing. Use a roller to press the planks firmly into the adhesive, ensuring full contact. Allow the adhesive to cure completely before allowing heavy traffic on the floor.
Floating Installation: A floating installation involves installing the engineered wood flooring over an underlayment without attaching it directly to the concrete subfloor. This method is generally faster and easier than glue-down installation and allows for some movement of the flooring due to changes in humidity. Select an appropriate underlayment to provide cushioning, sound insulation, and moisture protection. Install the underlayment over the concrete subfloor, following the manufacturer’s instructions. Assemble the engineered wood planks according to the manufacturer’s instructions, typically by clicking or locking them together. Ensure there is an expansion gap around the perimeter of the room to allow for expansion and contraction of the flooring. Use spacers to maintain the expansion gap during installation.
Nail-Down Installation: While less common, certain types of engineered wood flooring can be nailed down to a concrete subfloor. This requires a specialized nail gun designed for concrete and may involve installing a plywood subfloor over the concrete first. Consult with the flooring manufacturer and a professional installer to determine if nail-down installation is appropriate for the chosen engineered wood flooring and concrete subfloor.
Regardless of the chosen installation method, it is essential to follow the manufacturer’s instructions carefully. Proper installation is critical for ensuring the longevity and performance of the engineered wood flooring. Before beginning the installation, acclimate the engineered wood flooring to the room's temperature and humidity for several days, as recommended by the manufacturer. This allows the wood to adjust to the environment and minimizes the risk of expansion or contraction after installation.
During the installation process, pay close attention to details such as proper alignment, spacing, and expansion gaps. Use tapping blocks and pull bars to ensure tight and even seams between the planks. Regularly check the level of the flooring to ensure it remains flat and even throughout the installation. Clean up any adhesive or debris immediately to prevent it from drying and becoming difficult to remove.
Once the installation is complete, allow the flooring to settle for several days before placing heavy furniture or appliances on it. This allows the adhesive to fully cure or the flooring to fully adjust to the environment. Install baseboards and trim to cover the expansion gaps around the perimeter of the room and provide a finished look. Follow the manufacturer's recommendations for cleaning and maintaining the engineered wood flooring to ensure its longevity and beauty.
Proper ventilation in the room during and after installation is critical, regardless of the installation method. This will aid in the drying of adhesives (if used) and help the wood equalize with the ambient humidity levels, minimizing potential cupping or buckling. Consider running a dehumidifier or air conditioner, especially in humid climates.
By carefully assessing and preparing the concrete subfloor, selecting the appropriate installation method, and following the manufacturer’s instructions, a successful engineered wood flooring installation can be achieved. A well-installed engineered wood floor will provide years of beauty, durability, and value to any space.

Installing Engineered Hardwood On Concrete Twenty Oak

Installing Wood Flooring Over Concrete Diy

Installing Engineered Hardwood On Concrete Twenty Oak

Installing Engineered Flooring On A Concrete Slab Fine Homebuilding

Installing Hardwood Floors On Concrete Subfloors

How To Install Engineered Wood Flooring On Concrete

How To Install Engineered Flooring On Concrete Adm

How To Install Engineered Wood Flooring On Concrete

Installing Engineered Hardwood On Concrete Villagio Guide

Hardwood Over Concrete Auten Wideplank Flooring
Related Posts

