Laying Vinyl Plank Flooring: A Step-by-Step Guide
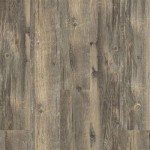
Transform your living space with the elegance and durability of vinyl plank flooring. This easy-to-install flooring option offers a hassle-free way to enhance your home's ambiance. Follow these essential steps to achieve a flawless installation:
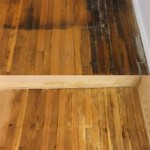
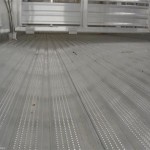
1. Subfloor Preparation
Ensure that your subfloor is level, dry, and free of irregularities. If necessary, use a self-leveling compound to create a smooth surface. Smooth out any bumps or gaps with a sander or scraper. Moisture can damage the flooring, so make sure your subfloor is moisture-free by installing a vapor barrier.
2. Expansion Gap
Allow for expansion and contraction of the flooring by leaving a 1/4-inch gap around the perimeter of the room and around any fixed objects like walls, door frames, and cabinets. Use spacers to maintain a consistent gap throughout the installation process.
3. Laying the First Row
Start laying the vinyl planks from the left-hand corner of the room. Cut the first plank lengthwise to fit against the wall, ensuring the groove side faces the wall. Apply flooring adhesive to the subfloor and press the plank firmly into place. Ensure the plank is level and aligned with the wall's edge.
4. Installing Subsequent Rows
For the subsequent rows, insert the tongue of the new plank into the groove of the previous one. Tap the plank gently using a tapping block and hammer to lock it in place. Continue this process across the row, ensuring that the planks are tightly joined.
5. Interlocking the Planks
To connect the planks along the length, insert the tongue of one plank into the groove of the adjacent one. Angling the plank slightly, push it down until it clicks into place. Make sure the planks are level and securely connected.
6. Cutting and Fitting
When you reach an obstacle or the end of the row, measure and cut the plank accordingly. Use a utility knife or a flooring cutter to ensure precise cuts. Carefully insert the cut plank into place and tap it down to secure it.
7. Transitions and Moldings
For areas where the flooring transitions to another type of flooring or meets a wall, use transition strips or moldings to cover the gap and provide a smooth transition. Secure these elements with adhesive or nails, depending on the manufacturer's instructions.
8. Finishing Touches
Once the flooring is complete, remove the spacers and fill the expansion gaps with a flexible caulk or a gap-filling compound. This will prevent moisture from penetrating and maintain the integrity of the installation.
Tips:
* Use a level throughout the installation process to ensure the flooring is level and even. * Handle the planks gently to avoid scratching or breaking them. * Allow the adhesive to dry completely before walking on the new flooring. * Regularly clean and maintain the vinyl plank flooring to preserve its appearance and longevity.
Installing Vinyl Plank Flooring For Beginners Anika S Diy Life

Installing Vinyl Plank Flooring How To Fixthisbuildthat

A Beginner S Guide To Installing Vinyl Plank Flooring Dumpsters Com

How To Install Floating Vinyl Plank Flooring In 5 Easy Steps Riverbend Interiors

How To Install Vinyl Plank Flooring As A Beginner Home Renovation

Installing Vinyl Floors A Do It Yourself Guide The Honeycomb Home

Laying Vinyl Planks The Right Way Expert Guide By Fantastic Handyman

Easy Ways To Install Vinyl Plank Flooring On Concrete

How To Install Vinyl Plank Flooring In A Bathroom Fixthisbuildthat

How To Install Vinyl Flooring Planks
Related Posts