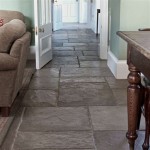
Easy Do It Yourself Laminate Flooring
Laminate flooring has gained immense popularity as a cost-effective and durable option for homeowners seeking to upgrade their floors. Its realistic wood-look finish, ease of maintenance, and affordability make it a desirable choice for various spaces. The installation process of laminate flooring is relatively straightforward, allowing many homeowners to tackle the project themselves, saving on professional labor costs.
Essential Tools and Materials
Before embarking on your DIY laminate flooring project, it's crucial to gather the necessary tools and materials. This will ensure a smooth and efficient installation process. Here's a list of essential items:
- Laminate Flooring: Calculate the required amount based on the area you plan to cover, factoring in waste and potential mistakes.
- Underlayment: This layer provides insulation and a buffer against uneven subfloors, enhancing the overall comfort and sound absorption of the flooring.
- Measuring Tape: Accurately measure the room to determine the flooring requirements and cut lengths.
- Utility Knife: Used for precise cutting of laminate planks to fit around obstacles and corners.
- Circular Saw with a Laminate Cutting Blade: Provides clean and precise cuts for straight lines and larger sections.
- Tapping Block: Used to tap the planks into place securely, ensuring a tight fit.
- Pull Bar: A lever-like tool used to pull planks together and create a tight seam.
- Spacer Blocks: Ensure consistent spacing between planks, allowing for expansion and contraction due to temperature changes.
- Pencil: Mark cutting lines on planks for accurate measurements.
- Safety Gear: Wear eye protection, gloves, and dust masks to protect yourself during the project.
Step-by-Step Installation Guide
Once you have gathered the necessary tools and materials, you can begin the installation process. Follow these steps carefully for a successful outcome:
- Prepare the Subfloor: Ensure the subfloor is clean, level, and free from any debris or loose materials. Existing flooring should be removed, and any unevenness should be addressed using leveling compound or shims.
- Install the Underlayment: Unroll the underlayment across the subfloor, making sure it's smooth and free from wrinkles. Secure it using staples or tape depending on the type of underlayment.
- Lay the First Row: Begin at the furthest point from the entrance, leaving an expansion gap along the walls. Cut the first plank to fit the width of the room, using a circular saw or utility knife.
- Connect Subsequent Planks: Use the tongue-and-groove system to connect planks together, aligning the grooves with the tongues. Tap the planks together using the tapping block.
- Maintain Expansion Gaps: Leave expansion gaps between the planks and the walls using spacer blocks. This allows for movement due to temperature changes without causing warping or buckling.
- Cut Around Obstacles: Carefully measure and cut planks using a utility knife or circular saw to fit around existing fixtures, such as doorframes, radiators, or columns.
- Install Transition Strips: If transitioning to a different flooring type, such as tile, use transition strips to create a smooth and seamless transition.
- Apply Baseboards: Install baseboards along the walls to cover the expansion gaps and complete the flooring installation.
Tips for a Successful DIY Laminate Flooring Project
While laminate flooring installation appears relatively straightforward, there are a few tips to consider for a successful project:
- Plan and Measure: Carefully measure the room and plan the layout of the planks to minimize waste. Consider the direction of the planks and how you want them to flow.
- Acclimate the Flooring: Allow the flooring to acclimate to the room temperature for at least 24 hours before installation. This helps prevent expansion or contraction issues.
- Practice Cutting: If you're new to using a circular saw or utility knife, practice cutting on scrap pieces of laminate before working on the actual floor.
- Maintain a Consistent Tapping Force: Apply even pressure using the tapping block when connecting planks to avoid damaging them or creating uneven seams.
- Clean Up Debris: Regularly sweep or vacuum up debris to prevent scratches or other damage to the flooring.
By following these steps and tips, you can successfully install laminate flooring in your home and enjoy a beautiful and durable floor. Remember to take your time, be patient, and seek professional assistance if you encounter any difficulties.

How To Install Laminate Flooring For Beginners

How To Install Laminate Flooring Easy Step By Beginners Guide

Installing Laminate Flooring For The First Time Home Renovation

Easiest 5 Diy Flooring Solutions Learn To Install On Your Own

Easy Steps To Install Laminate Flooring By Yourself

Installing Laminate Flooring For Beginners Full Diy Guide

How To Install Together Flooring Mitre 10 Easy As Diy

Diy Laminate Flooring Table Top Create Your Own Desk

Revamp Your Space Easy Do It Yourself Flooring Ideas

Laminate Floor Installation For Beginners 9 Clever Tips
Related Posts


