DIY Wooden Flooring: A Comprehensive Guide
Installing wooden flooring can significantly enhance the aesthetic appeal and value of a home. While professional installation offers convenience and guaranteed results, a do-it-yourself approach can be more cost-effective and provide a sense of accomplishment. This guide provides a detailed overview of the process, from planning and preparation to installation techniques and essential considerations for a successful DIY wooden flooring project.
The decision to install wooden flooring oneself should be based on an honest assessment of one's skills, available time, and inherent patience. It's a project that requires accurate measurements, careful cuts, and consistent attention to detail to achieve a professional finish. Before embarking on the project, acquire relevant knowledge and understanding of the various types of wooden flooring available, the necessary tools, and the appropriate installation methods.
Choosing the Right Type of Wooden Flooring
The first crucial step involves selecting the appropriate type of wooden flooring for the project. Solid hardwood, engineered hardwood, and laminate flooring are the three primary options, each with its own advantages and disadvantages. The specific choice will heavily depend on the budget, the subfloor conditions, the intended use of the room, and personal aesthetic preferences.
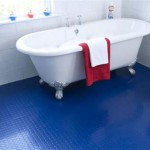
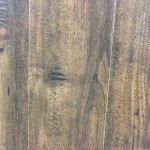
Solid hardwood flooring is made from a single piece of wood, providing a natural and timeless appearance. It is known for its durability and longevity, and it can be sanded and refinished multiple times to restore its original beauty. However, solid hardwood is susceptible to moisture damage and changes in humidity, making it less suitable for installation in bathrooms, basements, or areas with high moisture levels. It is also typically more expensive than other flooring options.
Engineered hardwood flooring consists of multiple layers of wood veneer bonded together, with a top layer of solid hardwood. This construction makes it more dimensionally stable than solid hardwood, offering greater resistance to warping and cupping in humid environments. Engineered hardwood can be installed in a wider range of locations, including basements, and it is often more affordable than solid hardwood while still providing a similar aesthetic appeal.
Laminate flooring is a synthetic product that mimics the appearance of wood using a photographic image layer protected by a durable wear layer. It is the most affordable option and is highly resistant to scratches, stains, and fading. Laminate flooring is relatively easy to install, making it a popular choice for DIY projects. However, it does not have the same natural look and feel as solid or engineered hardwood and cannot be refinished. Its moisture resistance varies depending on the product, so careful selection is necessary for areas prone to dampness.
Once the type of flooring is selected, determine the required quantity. Accurately measure the dimensions of the room, including any alcoves or irregular shapes. Add an extra 5-10% to the total square footage to account for waste during cutting and installation. This ensures sufficient material and avoids the frustration of running short during the project.
Preparing the Subfloor
The subfloor serves as the foundation for the wooden flooring, and its condition is critical to the success of the installation. A level, clean, and dry subfloor is essential for preventing unevenness, squeaks, and other problems. Before installing the flooring, thoroughly inspect the subfloor and address any issues that are identified.
For concrete subfloors, check for cracks, holes, and uneven areas. Fill any cracks or holes with a concrete patching compound and level any uneven areas with a self-leveling compound. Ensure the concrete is dry before proceeding with the installation. A moisture test kit can be used to measure the moisture content of the concrete. If the moisture level is too high, a moisture barrier may be necessary.
For wooden subfloors, inspect for loose boards, squeaks, and signs of water damage. Replace any damaged boards and secure any loose boards with screws. Sand down any high spots and fill any gaps with wood filler. Ensure the subfloor is clean and free of debris before installing the flooring. A layer of underlayment can be installed over the subfloor to provide additional cushioning, sound insulation, and moisture protection.
The type of underlayment to use depends on the type of flooring being installed and the subfloor conditions. For solid hardwood, a moisture barrier is typically recommended. For engineered hardwood and laminate flooring, a specific underlayment designed for those materials should be used. It is essential to consult the manufacturer's instructions for recommendations on the appropriate underlayment.
Installation Techniques
The specific installation technique will vary depending on the type of wooden flooring selected. Solid hardwood is typically nailed or glued to the subfloor, while engineered hardwood and laminate flooring can be installed using a floating method, where the planks are connected to each other but not directly attached to the subfloor.
For nail-down installations, use a flooring nailer to secure the boards to the subfloor at a consistent angle and spacing. Start at one wall and work across the room, leaving a small expansion gap along the walls to allow for natural expansion and contraction of the wood. This gap is typically covered with baseboards or quarter-round molding after the installation is complete.
For glue-down installations, apply a suitable adhesive to the subfloor using a trowel according to the manufacturer's instructions. Place the boards carefully onto the adhesive, ensuring they are properly aligned and pressed firmly into place. Use a rubber mallet to tap the boards into position and remove any excess adhesive immediately. Again, maintain an expansion gap along the walls.
Floating installations typically involve a click-lock system, where the planks are connected to each other using a tongue-and-groove joint. Start at one wall and work across the room, connecting the planks according to the manufacturer's instructions. Use a tapping block and a rubber mallet to ensure the planks are tightly locked together. A floating floor also requires an expansion gap along the walls.
When cutting the boards to fit around doorways, pipes, and other obstacles, use a saw to make precise cuts. It is advisable to use a jigsaw for curved cuts and a circular saw or miter saw for straight cuts. Always wear safety glasses and ear protection when using power tools.
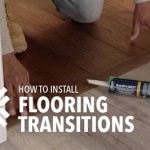
After the flooring is installed, install baseboards or quarter-round molding to cover the expansion gap along the walls. This gives the floor a finished appearance and protects the edges of the flooring. Nail or glue the molding to the wall, being careful not to nail or glue it to the flooring itself, as this can restrict the floor's ability to expand and contract.
Finally, clean the floor thoroughly to remove any dust, debris, or adhesive residue. Use a vacuum cleaner and a damp mop to clean the floor. Avoid using excessive water, as this can damage the flooring. Follow the manufacturer's instructions for cleaning and maintenance to ensure the longevity and beauty of the wooden floor.
Essential Considerations for a Successful Project
Several important considerations can influence the success of a DIY wooden flooring project. These include acclimation, tool selection, safety precautions, and the importance of patience and attention to detail.
Acclimation: Allow the wooden flooring to acclimate to the room's temperature and humidity for several days before installation. This helps the wood to expand or contract to its natural size, reducing the risk of warping or cupping after installation. Store the flooring in the room where it will be installed, ensuring proper ventilation.
Tool Selection: Invest in the necessary tools for the project. These may include a measuring tape, a level, a saw (circular, miter, or jigsaw), a flooring nailer (for nail-down installations), a trowel (for glue-down installations), a tapping block, a rubber mallet, safety glasses, ear protection, and a dust mask. Using the appropriate tools will make the job easier and more efficient.
Safety Precautions: Prioritize safety throughout the project. Wear safety glasses and ear protection when using power tools. Use a dust mask when sanding or cutting wood. Keep the work area well-ventilated. Follow the manufacturer's instructions for using adhesives and other chemicals. Avoid working when tired or distracted.
Patience and Attention to Detail: Installing wooden flooring is a time-consuming process that requires patience and attention to detail. Take your time and work carefully, ensuring each board is properly aligned and secured. Double-check measurements and cuts before proceeding. Don't rush the process, as this can lead to mistakes and a less-than-professional finish.
By carefully planning and preparing, selecting the appropriate materials, following proper installation techniques, and taking essential considerations into account, a DIY wooden flooring project can be a rewarding and cost-effective way to enhance the beauty and value of a home. While challenges may arise, a methodical approach and a commitment to quality will contribute to a successful and long-lasting result.

Make Your Own Plank Flooring Using 1 X 12 Lumber Hallstrom Home

Diy Hardwood Floors Under 1 50 Sq Ft The Harper House

Creating A Diy Pallet Wood Floor With Free 9 Steps S Instructables

Diy Wood Floors Flooring

Make Your Own Plank Flooring Using 1 X 12 Lumber Hallstrom Home

How To Install Beautiful Wood Floors Using Basic Unfinished Lumber The Creek Line House

Inexpensive Wood Floor That Looks Like A Million Dollars

Make Your Own Geometric Wood Flooring Manmadediy

Diy Laying Engineered Oak Parquet Flooring Swoon Worthy

How To Install Diy Glue Down Engineered Hardwood Flooring
Related Posts