DIY Plywood Flooring Over Concrete: A Comprehensive Guide
Installing plywood flooring over concrete is a viable and often cost-effective method for creating a warmer, more comfortable, and aesthetically pleasing surface. Concrete, while durable, can be cold, hard, and uninviting. Plywood provides a substrate that improves insulation, reduces noise transmission, and offers a suitable surface for installing a variety of top flooring options like hardwood, laminate, or even tile.
This article offers a detailed guide to installing plywood flooring over concrete, covering essential aspects such as preparation, materials selection, installation techniques, and considerations for moisture control. Following these steps carefully ensures a solid and long-lasting floor.
Key Point 1: Assessing the Concrete Slab and Preparing the Surface
The foundation of any successful flooring installation is a properly prepared subfloor. In this case, the concrete slab must be thoroughly inspected and prepared before any plywood is laid. This involves several critical steps.
Moisture Testing: Concrete is porous and can absorb moisture from the ground. Excess moisture trapped beneath the plywood can lead to mold growth, warping, and adhesive failure. Therefore, moisture testing is paramount. Several methods can be employed.
The plastic sheet test involves taping down a clear plastic sheet (approximately 18x18 inches) to several areas of the concrete with duct tape, sealing all edges. Leave the plastic in place for 24-72 hours. If condensation forms underneath the plastic, it indicates excessive moisture levels. Another method utilizes a calcium chloride test, which measures the rate of moisture vapor emission. This test is more accurate and often required by flooring manufacturers for warranty purposes. Follow the manufacturer's instructions for the specific calcium chloride test kit used.
Acceptable moisture levels depend on the type of flooring and adhesive being used. Generally, a moisture vapor emission rate of less than 3 lbs per 1000 sq ft per 24 hours is considered acceptable for many applications. Consult with flooring and adhesive manufacturers for their specific recommendations.
Surface Cleaning and Repair: The concrete surface must be clean, level, and free of debris. Start by sweeping or vacuuming the entire area thoroughly. Remove any loose paint, adhesives, or other contaminants. For stubborn residues, use a scraper or a chemical solvent appropriate for the material. Always follow the manufacturer's safety guidelines when using chemical solvents.
Inspect the concrete for cracks, holes, or unevenness. Small cracks (less than 1/8 inch) can be filled with a concrete crack filler. Larger cracks and holes require more substantial repair. Use a concrete patching compound to fill any significant imperfections. Allow the patching compound to dry and cure completely according to the manufacturer's instructions.
Leveling the Surface: An unlevel concrete slab can cause problems with the plywood installation, leading to uneven floors and potential squeaking. Use a self-leveling concrete compound to create a smooth, even surface. Apply the self-leveling compound according to the manufacturer's instructions. This typically involves mixing the compound with water and pouring it over the concrete surface. The compound will then flow and self-level, creating a flat, uniform surface. Allow the self-leveling compound to dry and cure completely before proceeding.
Key Point 2: Selecting Materials and Installation Techniques
Choosing the right materials and employing proper installation techniques are crucial for the success of a plywood floor over concrete. Factors such as plywood thickness, fastening methods, and ventilation should be carefully considered.
Plywood Selection: The type and thickness of plywood are essential for optimal performance. Exterior-grade plywood is recommended, as it is more resistant to moisture than interior-grade plywood. CDX plywood is a common choice, offering a good balance of affordability and durability. However, for higher-end installations or areas prone to moisture, consider using a marine-grade plywood. The thickness of the plywood should be at least 3/4 inch, and potentially thicker depending on the span between the furring strips or sleepers and the load requirements of the flooring system.
Furring Strips or Sleepers: Furring strips (also known as sleepers) are wooden strips that are attached to the concrete and provide a framework for the plywood. They create a space between the concrete and the plywood, allowing for ventilation and preventing moisture buildup. The furring strips are typically made of pressure-treated lumber to resist rot and decay. The size of the furring strips depends on the desired floor height and the thickness of the plywood. A common size is 2x4 inch lumber, laid flat. The spacing between the furring strips should typically be 12-16 inches on center, depending on the plywood thickness and intended use. Closer spacing provides greater support and reduces flexing.
Fastening Methods: There are several methods for fastening the furring strips to the concrete. One common method is to use construction adhesive in conjunction with concrete screws or powder-actuated fasteners. The adhesive provides a strong bond between the furring strip and the concrete, while the fasteners provide mechanical attachment. Pre-drill pilot holes through the furring strips into the concrete before installing the fasteners. This prevents the concrete from cracking and ensures a secure hold. Powder-actuated fasteners are driven into the concrete using a special tool and offer a fast and effective way to secure the furring strips.
Plywood Installation: Once the furring strips are securely attached, the plywood can be installed. Begin by laying out the plywood sheets, staggering the seams to create a stronger floor. Leave a small gap (approximately 1/8 inch) between the plywood sheets to allow for expansion and contraction. Attach the plywood to the furring strips using screws. Use screws that are long enough to penetrate at least 1 inch into the furring strips. Space the screws approximately 6-8 inches apart along the edges of the plywood sheets and 12 inches apart in the field. Ensure that the screw heads are flush with the surface of the plywood.
Ventilation Considerations: Proper ventilation is essential to prevent moisture buildup beneath the plywood floor. Consider installing vents along the perimeter of the floor to allow for airflow. These vents can be small holes drilled through the baseboards or specialized floor vents. Additionally, ensure that there is adequate ventilation in the crawl space or basement beneath the concrete slab.
Key Point 3: Addressing Moisture Control and Potential Issues
Moisture is the primary enemy of wood flooring installed over concrete. Therefore, meticulous attention must be paid to moisture control strategies during every phase of the installation.
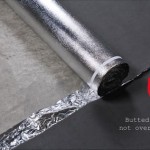
Moisture Barrier: Even with proper ventilation, a moisture barrier is a crucial element in preventing moisture migration from the concrete to the plywood. A polyethylene film (6 mil or thicker) is a common choice. The moisture barrier should be installed over the concrete before the furring strips are laid. Overlap the edges of the film by at least 6 inches and tape the seams with waterproof tape to create a continuous barrier. The moisture barrier should extend up the walls slightly, creating a "pan" effect to prevent water from wicking up the walls.
Pressure-Treated Lumber: Utilizating pressure-treated lumber for the furring strips significantly enhances resistance to rot and decay, especially in environments with potential moisture exposure. Ensure the lumber is properly dried before installation to minimize shrinkage and movement after installation.
Acclimation: Before installing the plywood, allow it to acclimate to the environment in which it will be installed. This involves storing the plywood in the room for several days to allow it to adjust to the temperature and humidity levels. Acclimation helps to prevent warping and shrinkage after installation.
Addressing Potential Issues: Even with careful planning and execution, some issues may arise during or after the installation. One common issue is squeaking. Squeaking can be caused by loose screws, uneven surfaces, or friction between the plywood and the furring strips. To address squeaking, try tightening the screws or adding shims between the plywood and the furring strips. If the squeaking persists, consider lubricating the areas where the plywood is rubbing with a dry lubricant.
Another potential issue is warping. Warping can be caused by excessive moisture or uneven drying. To prevent warping, ensure that the concrete is properly sealed and that the plywood is properly acclimated before installation. If warping occurs, try to flatten the plywood by adding weight or clamping it to a flat surface. In severe cases, the warped plywood may need to be replaced.
Mold growth is another concern, especially in areas with high humidity. To prevent mold growth, ensure that there is adequate ventilation and that the concrete is properly sealed. If mold growth occurs, clean the affected area with a mold cleaner and address the underlying moisture problem.
Installing plywood flooring over concrete requires careful planning, preparation, and execution. By following these guidelines and paying close attention to moisture control, a durable and comfortable floor can be achieved.

Installing Wood Flooring Over Concrete Diy

How To Install A Wood Subfloor Over Concrete Rona

How To Install A Wood Subfloor Over Concrete Rona

Breakfast Room Progress Plywood Subfloor Installed Over Concrete Slab For Nail Down Solid Hardwood Flooring Addicted 2 Decorating

Update Concrete Floors For A Rustic Look

Low Budget Diy Plywood Plank Floors Part 2 Diydork Com

Diy Concrete Floor Home Diys Design Mom

How To Install A Wood Subfloor Over Concrete Rona

How To Update Concrete Floors For A Rustic Look Diy Wood Plywood Flooring Plank

Plywood Over Concrete Diy Home Improvement Forum
Related Posts