DIY Outdoor Flooring: A Guide to Creating a Stunning and Durable Patio
Transforming an outdoor space into a beautiful and functional area is a popular home improvement project. Outdoor flooring plays a crucial role in achieving this goal, offering a durable and attractive surface for entertaining, relaxing, and enjoying the outdoors. While professional installation is an option, DIY outdoor flooring allows homeowners to personalize their space and save on costs. This article provides a comprehensive guide to the process of installing DIY outdoor flooring, covering essential considerations, materials, and step-by-step instructions.
Choosing the Right Materials for DIY Outdoor Flooring
The first step in any DIY project is choosing the right materials. Outdoor flooring options vary significantly in durability, aesthetics, and price. Understanding the different materials available will help you choose the best fit for your needs and budget. Here are some popular choices:
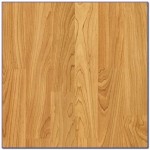
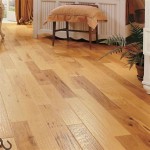
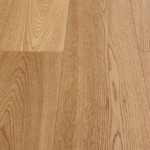
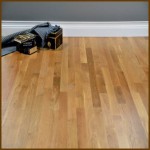
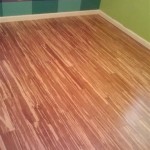
- Wood: Wood is a classic and naturally beautiful material that provides warmth and charm. However, it requires regular maintenance, including staining and sealing, to prevent rot and damage.
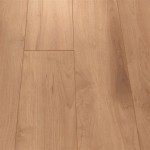
- Composite Decking: Composite decking combines wood fibers with recycled plastic, resulting in a low-maintenance and durable material. It offers a variety of wood-like colors and patterns, making it a popular choice for modern outdoor spaces.
- Concrete Pavers: Concrete pavers are highly durable and resistant to weather conditions. They come in various shapes, sizes, and colors, allowing for creative patterns and designs.
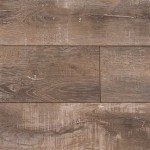
- Stone Tiles: Natural stone tiles, such as slate, sandstone, and granite, are known for their timeless elegance and durability. However, they can be more expensive than other options.
Planning and Preparation for DIY Outdoor Flooring Installation
Once you've chosen your materials, careful planning and preparation are essential for a successful DIY outdoor flooring installation. This includes:
- Determining the Area: Measure the area you intend to cover with flooring, ensuring it accounts for any existing structures or landscaping.
- Choosing a Layout: Decide on the pattern and arrangement of your flooring. Consider the shape of your space and the desired visual effect.
- Preparing the Subgrade: Clear the area of any debris or vegetation. Level the subgrade using gravel or sand to create a solid and even base for your flooring.
- Installing a Moisture Barrier: If you live in a humid climate or are dealing with a wet subgrade, install a moisture barrier to prevent water damage.
DIY Outdoor Flooring Installation: Step-by-Step Guide
With the materials and preparation in place, you can begin the installation process. The following steps outline the general process for DIY outdoor flooring:
- Layout and Spacing: Mark the area according to your chosen pattern and spacing. You can use string lines or a chalk line to create straight and accurate lines.
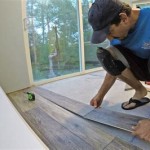
- Installation: Follow the manufacturer's instructions for installing your chosen materials. This may involve setting pavers on a bed of sand, fastening decking boards to joists, or laying tiles on adhesive.
- Cutting and Fitting: For areas with irregular shapes, you'll need to cut your flooring materials to fit. This may require a saw or other tools depending on the material.
- Finishing Touches: Once your flooring is installed, you may need to seal or stain the surface to protect it from weather and wear.
Remember to work carefully and accurately at every step, ensuring the surface is level and flush. Pay attention to details, such as proper spacing and alignment, for a professional finish.
Tips for DIY Outdoor Flooring Success
Here are some additional tips for ensuring a successful outdoor flooring project:
- Start Small: If you're new to DIY projects, start with a small area to gain experience before tackling a larger project.
- Seek Guidance: Consult with experts at local home improvement stores or online resources for specific instructions and advice on your chosen materials.
- Consider the Weather: Install outdoor flooring on dry days with moderate temperatures to ensure proper adhesion and drying time.
- Plan for Maintenance: Understand the maintenance requirements of your chosen material and schedule routine upkeep to keep your flooring looking its best.
DIY outdoor flooring offers a rewarding and cost-effective way to enhance your outdoor space. With careful planning, the right materials, and a little effort, you can create a stunning and durable patio that complements your home and provides a haven for enjoying the outdoors.

9 Diy Cool Creative Patio Flooring Ideas Backyard

Inexpensive Outdoor Diy Flooring Option

9 Diy Cool Creative Patio Flooring Ideas Pátio Piso Para Exteriores Com Jardim

11 Fantastic Patio Flooring Ideas To Transform Your Home

Outdoor Flooring Ideas That Will Rejuvenate Your Backyard Space

Outdoor Flooring Ideas Done In A Weekend Projects Exmark

13 Great Diy Outdoor Patio Flooring Ideas On A Budget The Garden Glove

4 Easy Diy Installation Patio Floor Covering Options

Cost Effective Outdoor Playground Flooring Over Grass Or Dirt

Diy Balcony Flooring Wood Plastic Composite Decking Good Wpc Floor Non Slip Outdoor Deck Tile China Made In Com