DIY Laminate Flooring Installation: Essential Tips for a Flawless Finish
Transforming your flooring with laminate can be a rewarding DIY project. With careful planning and attention to detail, you can achieve a professional-looking result that will enhance the aesthetic appeal and functionality of your home. Here are the essential aspects to consider for a successful laminate flooring installation:
Pre-Installation Preparation
Before starting the installation, ensure you have gathered all the necessary tools and materials, including a laminate cutter, spacers, a tapping block, and a vapor barrier. Gather the laminate planks and acclimate them to the room temperature for at least 48 hours. This allows the planks to adjust to the environment, minimizing expansion and contraction after installation.
Subfloor Preparation
A stable and level subfloor is crucial for a successful laminate installation. Inspect the subfloor for any unevenness or damage. If necessary, level the surface using a self-leveling compound or by sanding down high spots. Install a vapor barrier over the subfloor to prevent moisture from seeping up and damaging the laminate.
Underlayment Installation
Use a suitable underlayment to provide cushioning and sound dampening. It also helps conceal minor subfloor imperfections. Unroll the underlayment along the length of the room, overlapping the seams to create a continuous barrier.
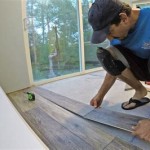
Plank Placement
Start by determining the direction you want the laminate to run. Typically, planks run parallel to the longest wall in the room. Place the first plank at the corner of the room, leaving a small gap from the walls using spacers. Interlock the second plank into the first and continue the process along the length of the wall.
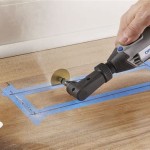
Cutting and Fitting
When you reach the end of a row, measure and cut the last plank to fit the remaining space. Use spacers to ensure consistent gaps between the planks and the walls. For intricate cuts around obstacles like pipes or door frames, use a jigsaw or a handsaw.
Tapping and Securing
Gently tap the planks together using a tapping block and a hammer. Do not strike the laminate directly to avoid damaging it. Continue tapping along the length and width of the rows, gradually expanding the flooring area. Trim any excess underlayment around the perimeter.
Finishing Touches
Once the flooring is installed, remove the spacers and install baseboards and moldings to conceal the expansion gap and give the installation a polished finish. Clean the laminate flooring with a damp mop and a recommended cleaning solution to remove any debris.
Conclusion
By following these essential steps and paying attention to details, you can achieve a professional-quality laminate flooring installation that adds value and beauty to your home. Remember to plan carefully, prepare the subfloor properly, and follow the manufacturer's instructions to ensure a successful and long-lasting result.

How To Install Laminate Flooring Easy Step By Beginners Guide

10 Great Tips For A Diy Laminate Flooring Installation The Happy Housie

How To Install Laminate Flooring Easy Diy Guide

10 Great Tips For A Diy Laminate Flooring Installation Floor Design

How To Install Laminate Flooring The Home Depot

How To Install Laminate Flooring For The 1st Time Easy Tips Room Renovation

Easiest 5 Diy Flooring Solutions Learn To Install On Your Own Inc

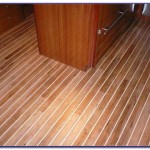
Diy Laminate Flooring Installation

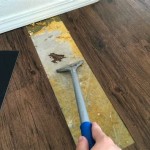
Diy Laminate Installation

How To Install Laminate Flooring The Home Depot
Related Posts