Essential Aspects of Cork Floor Tiles Installation
Cork floor tiles, a sustainable and stylish flooring option, offer a unique blend of comfort and durability. Installing these tiles requires attention to detail and precision to ensure a flawless outcome. Here are some essential aspects to consider:
1. Subfloor Preparation:
A level and stable subfloor is crucial for a successful installation. Remove existing flooring, level uneven surfaces, and repair any cracks or gaps. Cork tiles can be installed over various subfloors such as concrete, plywood, and vinyl.
2. Adhesive Selection:
Choose an adhesive specifically designed for cork tiles. Water-based or low-VOC adhesives are recommended to avoid damage to the tiles or the environment. Follow the manufacturer's instructions for mixing and application.
3. Laying the Tiles:
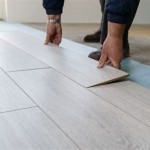
Start by laying out the tiles in a dry fit to determine the required pattern and avoid any cutting mistakes. Use a spacer to maintain consistent gaps between the tiles. Apply adhesive to the subfloor using a notched trowel and press each tile firmly into place.
4. Trimming and Cutting:
Use a sharp utility knife or a laminate cutter to trim the tiles around walls and obstacles. Measure carefully and cut the tiles to the desired size, ensuring a snug fit. For intricate cuts, consider using a jigsaw or a miter saw.
5. Staggering the Joints:
Stagger the joints between adjacent rows of tiles to enhance the durability and stability of the floor. Avoid aligning the joints of successive rows, which can create weak points.
6. Rolling and Compacting:
Once the tiles are laid, use a heavy roller to compact the floor and ensure proper adhesion. Roll in both directions, overlapping the strokes by several inches. This step helps to eliminate air pockets and prevent the tiles from shifting.
7. Sanding and Finishing:
After the adhesive has dried completely, sand the floor lightly using fine-grit sandpaper to remove any unevenness. Apply a sealant or finish to protect the tiles and enhance their appearance.
8. Acclimatization:
Allow the tiles to acclimatize to the room's temperature and humidity for several days before installing them. This helps to prevent buckling or warping due to expansion or contraction.
9. Maintenance:
Regular maintenance is key to preserving the beauty and longevity of cork floor tiles. Sweep or vacuum regularly and use a damp mop for cleaning. Avoid using harsh chemicals or excessive water, as these can damage the tiles.
Conclusion:
Installing cork floor tiles requires meticulous planning, attention to detail, and the use of appropriate materials. By following these essential aspects, you can achieve a durable, comfortable, and visually appealing floor that will enhance your living space for years to come.

Cork Flooring Tiles Or Floating Floor Icork

Complete Guide To Cork Flooring Installation Deerfoot Carpet

How To Install A Cork Floor Young House Love

Advantages Of A Cork Floating Floor Over Glue Down Tiles Cancork

Complete Guide To Cork Flooring Installation Deerfoot Carpet

Cork Tile Installation Guide

Cork Flooring Guide 2024 Pros Vs Cons Installation And Care Tips

Discontinued Cali Cork Flooring Floated Lock Installation

How To Install Cork Tile Flooring Diy Family Handyman

How To Install Cork Tile Flooring Diy Family Handyman
Related Posts


