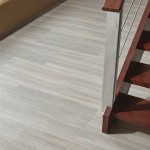
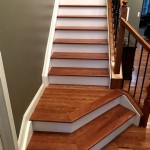
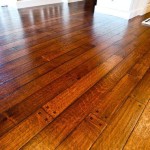
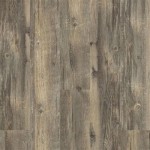
Coretec Plus Flooring Installation Guide: A Comprehensive Guide for a Seamless Installation
Installing Coretec Plus flooring can be a rewarding experience, transforming your space with beautiful, durable flooring. However, it's important to follow the proper installation instructions to ensure optimal performance and longevity.
This comprehensive guide will take you through the essential steps of Coretec Plus flooring installation, covering everything from preparation to finishing. By following these guidelines carefully, you can achieve a flawless installation that you'll enjoy for years to come.
Step 1: Preparation
Before starting the installation, it's crucial to prepare your subfloor. Ensure it is clean, dry, and level. Remove any existing flooring, baseboards, and quarter rounds. If necessary, level the subfloor using a self-leveling compound.
Step 2: Acclimation
Allow the Coretec Plus flooring planks to acclimate to the installation environment for at least 24 hours before installation. Place the planks flat in the installation area, allowing them to adjust to the temperature and humidity.
Step 3: Underlayment
Install a Coretec Plus underlayment on the prepared subfloor. This underlayment will provide sound insulation, moisture protection, and a moisture barrier. Use a utility knife to cut the underlayment to fit the room.
Step 4: First Row Installation
Start the flooring installation in a corner of the room. Align the first plank along the longest wall, with the tongue facing the wall. Tap the end of the plank into the groove of the next plank using a tapping block and a hammer. Continue this process for the entire first row.
Step 5: Subsequent Row Installation
Secure the subsequent rows by inserting the tongue of the plank into the groove of the previous row. Angle the plank slightly and tap it down to engage the locking mechanism. Continue this process until the entire floor is installed.
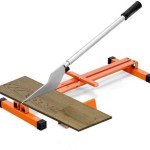
Step 6: Trimming and Cutting
Use a jigsaw or circular saw with a fine-tooth blade to cut the last row of planks to fit the available space. Measure carefully and mark the planks for precise cuts.
Step 7: Wall Trim Installation
Install wall base moldings or quarter rounds to cover the expansion gap between the flooring and the walls. Use a brad nailer or adhesive to secure the trim.
Step 8: Finishing
Clean the installed flooring with a damp mop. Allow the flooring to dry completely before placing furniture or walking heavily on it.
By following these steps carefully, you can successfully install Coretec Plus flooring and enjoy its beauty and durability for many years to come.

Installing Coretec Plus Using Angle Tap Profile

How To Install Coretec Multi Series Flooring Installation Guide

Installing Coretec Plus Using Angle Tap Profile

How To Install Coretec Ceratouch Flooring Installation Guide

How To Install Coretec Multi Series Flooring Installation Guide

How To Install Coretec Multi Series Flooring Installation Guide

Coretec Scratchless Installation Guide

Coretec Scratchless Installation Guide

Coretec Scratchless Installation Guide

Pdms Coretec Pro Spc Installation Guidelines
Related Posts