CoreLuxe Rigid Vinyl Plank Flooring Installation: A Comprehensive Guide
CoreLuxe rigid vinyl plank flooring has gained popularity due to its durability, water resistance, and stylish designs. Installing this flooring requires careful planning and execution to ensure a seamless and long-lasting finish. This article will guide you through the process of installing CoreLuxe rigid vinyl plank flooring, covering essential steps, tools, and considerations.
Preparing the Subfloor
A solid and level subfloor is crucial for a successful CoreLuxe installation. Start by inspecting the existing subfloor for any imperfections, such as unevenness, cracks, or loose boards. If necessary, repair these issues before proceeding. For minor irregularities, use a leveling compound. For more significant problems, consider replacing damaged sections of the subfloor. Ensure the subfloor is clean and free of debris.
Choosing the Right Underlayment
Underlayment serves as a barrier between the subfloor and the CoreLuxe planks, providing cushioning and sound insulation. CoreLuxe recommends using their specific underlayment designed for rigid vinyl plank flooring. This underlayment offers superior moisture resistance, sound absorption, and dimensional stability. Always consult the manufacturer's instructions regarding underlayment requirements.
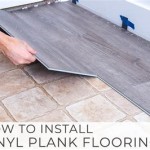
Installing the CoreLuxe Planks
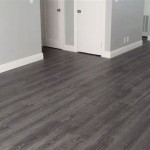
The installation process for CoreLuxe rigid vinyl plank flooring is relatively straightforward. Begin by laying out the planks in the desired pattern, considering the direction of the light and the room's dimensions. Start from a corner and work your way across the room, using a tapping block and a mallet to securely click the planks together. Ensure the planks are tightly fitted and aligned, leaving a small expansion gap around the perimeter of the room.
Cutting and Trimming Planks
You will likely need to cut and trim planks to fit around obstacles, such as doorways or cabinets. CoreLuxe planks can be easily cut using a sharp utility knife or a circular saw with a fine-tooth blade. Measure and mark the planks carefully before cutting to ensure a precise fit. Use a straight edge to guide the blade and avoid chipping the edges.
Essential Tools for Installation
To install CoreLuxe rigid vinyl plank flooring, you will need several essential tools:
- Utility knife or circular saw
- Tapping block and mallet
- Measuring tape and pencil
- Level
- Safety glasses and gloves
- Knee pads
- Sawhorse or work surface
Additional Tips for Successful Installation
Here are some additional tips to enhance the installation process:
- Acclimate the planks to the room temperature for at least 24 hours before installation.
- Use a spacer to maintain a consistent expansion gap around the perimeter of the room.
- Avoid walking on the planks before the adhesive has fully cured.
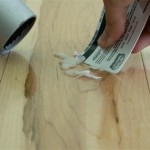
- Clean up any excess adhesive immediately.
- Use a damp cloth to wipe away dust or debris from the planks before installation.
Choosing the Right CoreLuxe Flooring for Your Needs
CoreLuxe offers a wide range of rigid vinyl plank flooring options in various styles, colors, and textures. Consider factors such as your personal preference, the room's size and layout, and the intended use of the flooring when making your selection. Consult with a flooring specialist or review the CoreLuxe website for detailed product information and recommendations.
Maintaining Your CoreLuxe Flooring
CoreLuxe rigid vinyl plank flooring is designed for durability and low maintenance. To maintain its appearance and longevity, sweep or vacuum regularly to remove dust and debris. Use a damp mop with a mild cleaner for deeper cleaning. Avoid using harsh chemicals or abrasive cleaners that can damage the flooring surface.

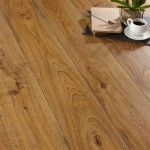
Coreluxe 5mm W Pad Milner Pass Oak Waterproof Rigid Vinyl Plank Flooring 5 75 In Wide X 48 Long Ll

Coreluxe 6 5 Mm W Pad Sanderling Oak Waterproof Rigid Vinyl Plank Flooring 9 In Wide X 60 Long Ll

Coreluxe 5mm W Pad Deer Ridge Maple Waterproof Rigid Vinyl Plank Flooring 5 75 In Wide X 48 Long Ll

Coreluxe Flooring Reviews Is It Worth Floorings

Coreluxe Ultra 8mm W Pad Wagon Wheel Oak Waterproof Rigid Vinyl Plank Flooring 7 13 In Wide X 60 Ll

Rigid Core Luxury Vinyl Plank Flooring Installation

Renature By Coreluxe 6 5mm W Pad Luxembourg Oak Waterproof Rigid Vinyl Plank Flooring 7 9 In Wide X 60 Long Ll

Coreluxe Xd 5mm W Pad Sheffield Oak Rigid Vinyl Plank Waterproof Flooring Floor Ers

Coreluxe 5mm W Pad Shoreway Oak Waterproof Rigid Vinyl Plank Flooring 7 1 In Wide X 48 Long Ll

Diy How To Corelux Vinyl Installation Tips And Tricks Lumber Liquidators Lvp Plank Flooring Install
Related Posts