Congoleum Vinyl Flooring Installation Guide: A Comprehensive Insight
Transforming your living spaces with premium vinyl flooring by Congoleum is an exciting endeavor. To ensure a seamless installation process, it's crucial to follow the manufacturer's guidelines carefully. This guide will provide you with all the essential information you need to successfully install your new Congoleum vinyl flooring.
1. Preparation:
Before commencing installation, ensure the subfloor is flat, clean, and dry. Remove any existing flooring, baseboards, or quarter rounds. Check for and repair any imperfections or moisture issues. An appropriate underlayment can provide additional cushioning and sound insulation.
2. Acclimation:
Allow the Congoleum vinyl flooring to acclimate to the room temperature for 24 to 48 hours before installation. This allows the material to adjust to the environment and minimize expansion or contraction after installation.
3. Measuring and Cutting:
Carefully measure the room and determine the placement of the flooring. Use a sharp utility knife and a straight edge to make precise cuts. The vinyl planks or tiles can be scored and snapped for cleaner cuts.
4. Dry Fit:
Place the cut vinyl flooring pieces in the intended layout without applying any adhesive. This dry fit will help you visualize the final design and make any necessary adjustments before gluing down.
5. Adhesive Application:
Use a trowel with the recommended notch size to spread the Congoleum vinyl flooring adhesive evenly over the subfloor. Follow the manufacturer's instructions for the adhesive type and spread rate.
6. Plank or Tile Placement:
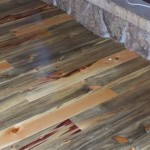
Starting from the center or a designated starting point, press the vinyl flooring planks or tiles into place. Use a rolling pin or flooring roller to apply even pressure and secure the flooring to the subfloor.
7. Finishing Touches:
After the flooring is installed, trim any excess around the perimeter. Install baseboards, quarter rounds, or other trims to complete the finished look. Allow the adhesive to cure completely before walking or placing furniture on the new flooring.
Tips for Success:
- Use a level and straight edge to ensure the subfloor is properly level before installation.
- Stagger the joints between planks or tiles to create a more natural look.
- Apply adhesive sparingly and avoid getting it on the surface of the flooring.
- Use a damp cloth to wipe away any excess adhesive immediately.
- Allow the flooring to cure for the recommended time before heavy use.
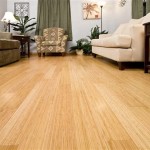
By following these guidelines meticulously, you can achieve a flawless installation of your Congoleum vinyl flooring, creating a beautiful and durable floor that will enhance your living space for years to come.

Professional Installation Guide Congoleum Com

Congoleum Connections Vinyl Plank Flooring Installation

Installation Of Congoleum Timeless Luxury Vinyl Plank

Congoleum S G Carpet And More

Vinyl Sheet Congoleum

Congoleum Endurance Smartlink Rustic Nutmeg Hurst Hardwoods

Congoleum Triversa Prime 9x60 Luxury Vinyl Plank Call Today Woodwudy Whole Flooring

Congoleum Structure 45 Degree Sepia Twill A Hurst Hardwoods

Congoleum Armorcore 7 Luxury Vinyl Plank 50 70 Off Woodwudy Whole Flooring

Northbush Cabin Ap185 Armorcore Pro Congoleum