Brazilian Cherry Wood Flooring Installation: A Comprehensive Guide
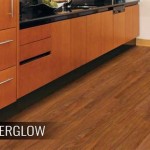
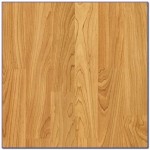
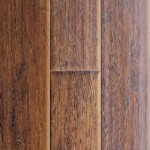
Brazilian cherry wood flooring is a luxurious and durable option that can enhance the beauty and value of your home. With its rich reddish-brown color and distinctive grain patterns, it adds a touch of elegance and sophistication to any space. However, like any flooring installation project, proper preparation and installation are crucial for optimal results. Here's a comprehensive guide to Brazilian cherry wood flooring installation to ensure a successful outcome.
Pre-Installation Considerations
Before embarking on the installation process, there are several essential considerations to make:
- Acclimation: Brazilian cherry wood is a very dense hardwood that requires proper acclimation to the installation environment. Allow the planks to rest in the room where they will be installed for a minimum of 72 hours, allowing them to adjust to the temperature and humidity levels.
- Subfloor Preparation: The subfloor must be clean, dry, flat, and structurally sound. Any unevenness or imperfections can compromise the stability of the flooring.
- Moisture Barrier: A vapor barrier is essential to prevent moisture from seeping into the flooring from below. Install a polyethylene or rosin paper barrier over the subfloor.
Installation Methods
There are two main methods for installing Brazilian cherry wood flooring:
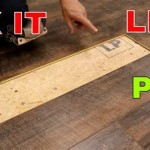
- Nail-Down Installation: This method involves nailing the planks directly to the subfloor using a flooring nailer. It is the most secure and recommended method for areas with heavy foot traffic.
- Floating Installation: This method involves clicking or locking the planks together without attaching them to the subfloor. It is a less labor-intensive option for areas with light foot traffic.
Installation Procedure
Once the necessary preparations are complete, follow these steps for a successful installation:
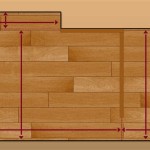
- Starting Row: Begin by installing a starter row along one wall, using spacers to maintain a consistent expansion gap.
- Subsequent Rows: Continue installing rows by clicking or locking the planks together or nailing them down as per the chosen installation method.
- Staggering and Orientation: Stagger the joints of adjacent rows to enhance stability and avoid alignment issues.
- Expansion Gaps: Maintain a 1/4-inch expansion gap around the perimeter of the room to allow for expansion and contraction.
- Trim and Baseboards: Install baseboards and trim to cover the expansion gaps and enhance the finished look.
Finishing and Maintenance
After installation, protect and maintain your Brazilian cherry wood flooring to ensure its longevity:
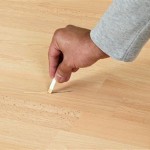
- Sanding and Finishing: Sand the flooring and apply a protective finish, such as polyurethane, to seal and protect the wood.
- Regular Cleaning: Sweep or vacuum regularly to remove dust and debris. Use a damp mop with a pH-neutral cleaner for occasional cleaning.
- Avoid Abrasives: Never use abrasive cleaners or scouring pads on the flooring, as they can scratch the surface.
- Protect from Sunlight: Install blinds or curtains to protect the flooring from excessive sunlight, which can cause fading.
By following these guidelines, you can confidently install Brazilian cherry wood flooring and enjoy its beauty and durability for years to come.

Brazilian Cherry Wood Flooring Napolis In
:max_bytes(150000):strip_icc()/Prefinished-Engineered-Brazilian-Cherry-Flooring-56a49df13df78cf772834981.JPG?strip=all "The Basics Of Brazilian Cherry Wood Flooring")
The Basics Of Brazilian Cherry Wood Flooring

Brazilian Cherry Natural Engineered Select And Better 1 2 X 3 8

Bellawood 3 4 In Select Brazilian Cherry Solid Hardwood Flooring 25 Wide Ll

Brazilian Cherry Unfinished Clear Grade 3 4 X 2 1 7

3 1 4 X 9 16 Brazilian Cherry Prefinished Engineered Hardwood Flooring
:max_bytes(150000):strip_icc()/bellawood-brazilian-cherry-flooring-56a49c8d3df78cf772833f9b.JPG?strip=all "The Basics Of Brazilian Cherry Wood Flooring")
The Basics Of Brazilian Cherry Wood Flooring

Brazilian Cherry Jatoba Hardwood Floors Flooring Liquidators

Brazilian Cherry Jatoba

Brazilian Cherry Flooring By Direct Also Santos Mahogany Teak And Other Exotic Hardwood Floors Accessories
Related Posts