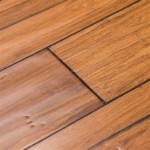
Best Way to Lay Hardwood Flooring on Concrete
Hardwood flooring is an excellent choice to complement the look of your home, offering a timeless and elegant aesthetic. While installing hardwood flooring on concrete may seem challenging, it is doable with the right preparation and techniques. This step-by-step guide will provide you with the essential aspects to ensure your hardwood flooring project on concrete is a success.
Step 1: Prepare the Concrete Subfloor
The success of your hardwood flooring installation largely depends on the condition of your concrete subfloor. Make sure your concrete floor is level, smooth, and dry. Remove any existing flooring, adhesives, or debris, and ensure the surface is free from cracks, holes, or unevenness. Repair any imperfections using a concrete patching compound.
Step 2: Install an Underlayment
An underlayment serves several purposes, including moisture protection, sound absorption, and leveling irregularities in the subfloor. Choose an underlayment that is compatible with your hardwood flooring and the concrete subfloor. Roll out the underlayment over the prepared concrete surface, ensuring there are no gaps or overlaps.
Step 3: Acclimate the Hardwood Flooring
Before installation, allow the hardwood flooring to acclimate to the temperature and humidity of the room where it will be installed. This will prevent the flooring from expanding or contracting excessively after installation due to changes in the environment. Acclimate the flooring for at least 2-3 days before starting the installation.
Step 4: Choose the Installation Method
Depending on the type of hardwood flooring you have, you can choose from several installation methods. Glue-down installation involves adhering the planks directly to the subfloor with an appropriate adhesive. Nail-down installation uses nails to secure the planks to the subfloor. Floating installation, suitable for some types of engineered hardwood, allows the planks to float freely over the underlayment using a click-lock system.
Step 5: Start Installing the Hardwood Flooring
Plan your installation layout carefully to minimize waste. Begin by laying down the first row of planks along a straight line. Align the planks tightly and secure them using the appropriate installation method for your chosen flooring. Continue laying the subsequent rows, ensuring a staggered joint pattern for added stability.
Step 6: Finishing Touches
Once the flooring is installed, add shoe molding or quarter-round molding to cover the expansion gap around the perimeter. This will give your flooring a finished look and allow for expansion and contraction. You can also apply wood filler to any nail holes or gaps, and then sand and refinish the flooring to achieve your desired sheen.
Conclusion
Installing hardwood flooring on concrete requires meticulous preparation and attention to detail, but it is achievable with these essential steps. By following the proper techniques outlined in this guide, you can create a beautiful and durable hardwood floor that will enhance your home's aesthetic appeal for years to come.

Installing Wood Flooring Over Concrete Diy

How To Install A Wood Subfloor Over Concrete Olde Ltd

Installing Engineered Hardwood On Concrete Twenty Oak

Installing Hardwood Floors On Concrete Subfloors

Hardwood Flooring Installation Step By Forbes Home

Installing A Hardwood Floor Over Concrete Slab American Information Center

How To Install Hardwood Flooring For Beginners

Installing Wood Subfloors Over Concrete Hardwood Floors
How To Install Wood Floors On Concrete Quora

Should You Install Flooring On Damp Concrete Construction

