Armstrong Wood Flooring Installation Instructions: Essential Aspects
Installing Armstrong wood flooring can elevate the aesthetics and functionality of any living space. To ensure a successful installation, adhering to the manufacturer's instructions is crucial. Here are the essential aspects to consider:
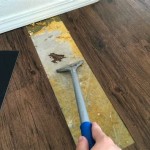
1. Preparation and Subfloor:
Begin by preparing the subfloor. Ensure it is level, flat, and free from defects. For concrete subfloors, a moisture barrier is recommended to prevent moisture absorption into the flooring. For wooden subfloors, additional support may be needed using plywood or underlayment.
2. Acclimation:
Before installation, allow the wood flooring to acclimate to the surrounding environment for 48-72 hours. This process ensures the wood stabilizes, minimizing expansion and contraction issues.
3. Installation Methods:
Armstrong wood flooring can be installed using various methods, including floating, glue-down, and staple-down. Choose the method best suited for the specific subfloor and application.
4. Floating Installation:
For floating installations, the planks are interlocked without attaching them to the subfloor. This method is easy to install and allows for some movement due to temperature and moisture changes.
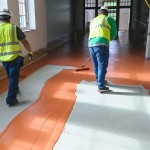
5. Glue-Down Installation:
Glue-down installations involve using adhesive to attach the planks directly to the subfloor. This method provides a more permanent bond and is suitable for areas with heavy foot traffic.
6. Staple-Down Installation:
Staple-down installations involve securing the planks to the subfloor using staples. This method is commonly used in commercial applications and provides a secure and durable floor.
7. Expansion Gap:
Allow an expansion gap of 1/4 inch around the perimeter of the room and around any fixed objects like walls or cabinets. This gap allows the flooring to expand and contract without buckling.
8. Trimming and Cutting:
Trim and cut the planks as needed to fit around obstacles and achieve the desired layout. Use a circular saw or miter saw for precise cuts, and a sharp utility knife for scoring and snapping the planks.
9. Finishing and Maintenance:
After installation, seal the floor with a polyurethane finish or other recommended sealant. This protects the flooring from wear, moisture, and stains. Regular cleaning and maintenance will keep the floor looking its best.
Conclusion:
Following these essential Armstrong wood flooring installation instructions will result in a durable, beautiful, and long-lasting floor. Adhering to the manufacturer's recommendations ensures a successful installation that will enhance the value and comfort of your living space.
Armstrong Flooring Commercial Luxury Installation Instructions Floor Expert

Installing Diagonal Glued Down Engineered Wood Flooring Today S Homeowner

How To Lay Vinyl Flooring Sheets Tiles And Planks Tarkett

Installing Engineered Hardwood On Concrete Faqs Checklist

How To Lay Vinyl Floor

Hardwood Floors Masterpiece Construction And Flooring

How To Install Vinyl Plank Flooring As A Beginner Home Renovation

How To Lay Vinyl Flooring Sheets Tiles And Planks Tarkett

3 Methods For How To Install Engineered Hardwood Flooring

How To Install Vinyl Plank Flooring Quick And Simple
Related Posts