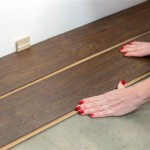
Armstrong Locking Laminate Flooring Installation Instructions
Installing Armstrong locking laminate flooring is an excellent way to update your home with a stylish and durable floor covering. You can achieve a professional-looking finish with the right tools and a little patience. Following the step-by-step instructions below will help ensure a successful installation.
Before You Begin
Plan the layout of your flooring before you begin. Measure the room and determine the number of planks you will need. Allow for some extra planks for cutting and waste. Gather all your tools and materials, including:
- Armstrong locking laminate flooring
- Underlayment
- Tapping block
- Pull bar
- Spacers
- Tape measure
- Pencil
- Utility knife
Preparing the Subfloor
The subfloor must be level, flat, and dry before you install the laminate flooring. Remove any existing flooring and baseboards. Repair any unevenness or damage to the subfloor using a leveling compound or underlayment.
Installing the Underlayment
The underlayment provides a moisture barrier and helps to reduce noise. Roll out the underlayment over the subfloor, overlapping the seams by about 4 inches. Secure the underlayment with tape or staples.
Starting the First Row
Start by installing the first row of planks along the longest wall in the room. Leave a 1/4-inch gap between the planks and the wall using spacers. Use a tapping block and a hammer to tap the planks together. Make sure the planks are flush with each other.
Continuing the Installation
Continue installing the planks by working your way across the room. Stagger the joints in each row by at least 8 inches. Use the pull bar to pull the planks together tightly. Tap the edges of the planks with a tapping block to secure them.
Finishing the Installation
Once you reach the last row, you may need to cut the planks to length. Measure and mark the planks, then use a utility knife to cut them. Install the cut planks and tap them into place. Remove the spacers and install the baseboards.
Tips
- Always allow for expansion by leaving a 1/4-inch gap around the perimeter of the room.
- Use a tapping block to protect the edges of the planks from damage.
- Stagger the joints in each row to create a stronger floor.
- If you need to cut the planks, use a sharp utility knife and a straightedge.
- Clean up any sawdust or debris after the installation is complete.
Conclusion
Installing Armstrong locking laminate flooring is a straightforward process that can be completed with the right tools and a little patience. By following the instructions carefully, you can achieve a professional-looking finish that will last for years to come.

Armstrong Laminate Flooring Installation Instructions

Armstrong Laminate Flooring Installation Instructions

Laminate Floor Installation Armstrong Flooring

Laminate Floor Installation Armstrong Flooring

Laminate Floor Installation Armstrong Flooring

How To Install Laminate Flooring

Engineered Flooring Vs Laminate Everything You Need To Know Forbes Home

Swiftlock Plus By Shaw Review From

Vinyl Plank Flooring Tutorial No Nails Glue Real Estate Kier

Laminate Vs Vinyl Flooring Metro Contractors
Related Posts


