Allure Tile Flooring Installation: A Comprehensive Guide to Professional Results
Allure tile flooring is a popular choice for homeowners due to its durability, ease of installation, and wide range of styles. Whether you're a seasoned DIY enthusiast or hiring a professional installer, understanding the essential aspects of Allure tile flooring installation will ensure a successful and satisfying result.
1. Preparation and Subfloor Requirements
Before installing Allure tile flooring, it's crucial to prepare the subfloor. The subfloor must be flat, dry, and free of any irregularities or debris. If necessary, level the subfloor using a self-leveling compound or plywood underlayment. Allure tile flooring can be installed over most existing flooring surfaces, but it's essential to check the manufacturer's guidelines for compatibility.
2. Acclimation and Laying Out
Before installation, allow the Allure tiles to acclimate to the room for 24-48 hours. This will help prevent warping or buckling. Once acclimated, lay out the tiles to create a plan and determine the number of cuts required. Leave 1/4-inch expansion gaps around the perimeter of the room to allow for expansion and contraction.
3. Adhesive Application
For some types of Allure tile flooring, adhesive is required. Apply the adhesive to the back of the tile and evenly spread it using a notched trowel. Typically, Allure Grip and Lock adhesive is used, ensuring a secure and durable bond.
4. Installation and Locking
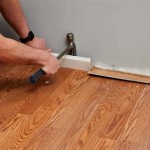
Starting from a corner, press the first tile firmly into place, ensuring the adhesive makes contact. For floating Allure tile flooring, simply click the tiles together using the locking system. Alternate the direction of the tile rows to create a staggered pattern. Use a rubber mallet or tapping block to gently tap the tiles into place for a secure connection.
5. Cutting and Fitting
To fit tiles around obstacles or create custom cuts, measure and mark the cuts. Use a sharp utility knife or tile cutter to score and snap the tiles. For intricate cuts, consider using a jigsaw or wet saw.
6. Grout or Filler
Depending on the type of Allure tile flooring, you may need to apply grout or filler to the joints. Fill the joints with the appropriate material, ensuring no gaps are left.
7. Trim and Finishing
Once the tiles are installed, add baseboard trim or molding to conceal the gaps and provide a finished look. Additionally, consider installing a transition strip if the flooring extends into other rooms or transitions from different flooring materials.
8. Maintenance and Care
Allure tile flooring is relatively easy to maintain. Regular sweeping or vacuuming will remove dust and debris. For deeper cleaning, use a damp mop and a mild cleaning solution specifically designed for resilient flooring. Avoid harsh chemicals or abrasive cleaners.
By following these essential aspects of Allure tile flooring installation, you can achieve professional-quality results that will enhance the aesthetics and durability of your home for years to come.

How To Install Allure Flooring

How To Install Allure Isocore Vinyl Flooring

How To Install Allure Flooring Askmediy

An Rv Flooring Replacement Using Allure By Traffic Master

Allure By Traffic Master Flooring Install

Diy Wood Look Allure Vinyl Plank Flooring Rebecca Propes Design

Trafficmaster Allure Ultra Resilient Flooring Installation Review

Installing Trafficmaster Allure In 4 Simple Steps All About Flooring

20 Tips For A Great Vinyl Plank Flooring Installation

Allure Locking Resilient Flooring Vinyl Floating Floor
Related Posts


