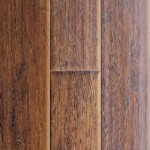
Allure Flooring Installation: A Comprehensive Guide
Allure flooring, renowned for its durability, style, and ease of installation, has become a popular choice for homeowners seeking to enhance their living spaces. Understanding the essential aspects of Allure flooring installation is crucial to ensure a flawless and long-lasting floor.
Pre-Installation Considerations
Before embarking on the installation process, it is essential to ensure that the subfloor meets the manufacturer's specifications. The subfloor should be smooth, level, clean, and dry. Any imperfections must be addressed prior to laying the flooring. Additionally, acclimating the Allure planks to the room's temperature and humidity for at least 24 hours before installation is recommended.
Choosing the Right Adhesive
Selecting the appropriate adhesive is crucial for the longevity of the floor. Allure flooring requires a specific type of adhesive, typically a urethane-based adhesive or a pressure-sensitive adhesive, depending on the specific product and subfloor. It is essential to follow the manufacturer's instructions carefully when selecting and applying the adhesive.
Layout Planning
Planning the layout of the floor is essential to ensure a visually appealing and seamless installation. Begin by measuring the room and determining the center point. This will serve as a reference point for laying the planks in a symmetrical pattern. It is advisable to dry-fit the planks to preview the layout and make any necessary adjustments before applying adhesive.
Installation Process
Starting from the center point, apply the adhesive to the subfloor as per the manufacturer's instructions. Carefully place the first plank in the center and gently press it down to ensure proper adhesion. Continue laying the planks, alternating the joints to create a staggered pattern. Use a rubber mallet and tapping block to firmly connect the planks without damaging them.
Trim and Finishing Touches
Once the flooring is installed, trim and moldings need to be installed around the edges to conceal expansion gaps and provide a finished look. Use a handsaw or miter saw to cut the trim pieces at the appropriate angles. Secure the trim using nails or screws, making sure to countersink the fasteners below the surface of the trim. Finally, seal any gaps around the edges with caulk to prevent moisture intrusion.
Maintenance and Care
Regular maintenance and cleaning will prolong the lifespan and preserve the beauty of the Allure flooring. Sweep or vacuum regularly to remove dust and debris. Use a damp mop with a mild cleaning solution to clean the floor, avoiding harsh chemicals or detergents. Protect the floor from heavy furniture or appliances by placing furniture pads or rugs beneath them.

How To Install Allure Gripstrip Flooring

Installing Allure Flooring Easiest Diy Ever

How To Install Vinyl Plank Flooring As A Beginner Home Renovation

Laying Vinyl Planks The Right Way Expert Guide By Fantastic Handyman

How To Install Vinyl Plank Flooring In A Bathroom Fixthisbuildthat

Installing Vinyl Floors A Do It Yourself Guide The Honeycomb Home

Installing Vinyl Floors A Do It Yourself Guide The Honeycomb Home

How To Install Vinyl Plank Flooring As A Beginner Home Renovation

A Beginner S Guide To Installing Vinyl Plank Flooring Dumpsters Com

Installing Vinyl Plank Flooring For Beginners Anika S Diy Life
Related Posts


