Allen + Roth Hardwood Flooring Installation: A Comprehensive Guide
Installing Allen + Roth hardwood flooring can enhance the aesthetic appeal and value of a home. This guide provides detailed instructions for a successful installation, covering essential preparation steps, the installation process itself, and crucial post-installation care. It is imperative to carefully read and understand these instructions entirely before commencing the project. Failure to adhere to these guidelines may result in flooring failure and void the product warranty.
Before initiating the installation, it is crucial to determine the specific type of Allen + Roth hardwood flooring being installed. Solid hardwood, engineered hardwood, and click-lock systems each have distinct installation requirements. This guide primarily addresses engineered hardwood and click-lock installations, as they are the most common types offered by Allen + Roth for DIY projects. Consult the specific product label and accompanying documentation for any variations or additions to these instructions that are relevant to the particular flooring purchased.
Planning and Preparation: Foundation for a Successful Installation
Proper planning and preparation are paramount to a satisfactory hardwood flooring installation. This phase involves accurately measuring the installation area, assessing the subfloor condition, selecting appropriate underlayment, and acclimating the flooring itself. Neglecting these steps can lead to significant problems during and after installation, ultimately impacting the flooring's performance and longevity.
Measuring the Installation Area: Begin by accurately measuring the length and width of the room(s) where the flooring will be installed. Multiply these dimensions to calculate the total square footage. Add approximately 5-10% to this figure to account for waste due to cuts, miscalculations, and potential defects in some planks. This additional allowance is particularly important for rooms with irregular shapes or intricate patterns.
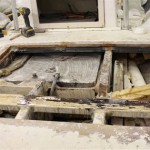
Subfloor Assessment and Preparation: The subfloor provides the foundation for the hardwood flooring. It must be clean, dry, level, and structurally sound. Typical subfloor materials include concrete and plywood. For concrete subfloors, ensure they are fully cured (typically at least 60 days old) and free from any moisture issues. A vapor barrier is typically required over concrete subfloors. Use a moisture meter to verify the moisture content conforms to the flooring manufacturer’s specifications, typically below a certain percentage (e.g., less than 3%). Patch any cracks or unevenness with a self-leveling compound. For plywood subfloors, inspect for any signs of damage, such as warping, rot, or delamination. Replace any damaged sections and ensure the plywood is securely fastened to the joists. Sand down any high spots and fill any gaps or imperfections with wood filler. Vacuum the subfloor thoroughly to remove any debris, dust, or remnants of previous flooring.
Underlayment Selection: Underlayment provides cushioning, noise reduction, and moisture protection. Select an underlayment suitable for hardwood flooring and compatible with the type of subfloor. Some Allen + Roth hardwood flooring options come with pre-attached underlayment, eliminating the need for a separate layer. For installations requiring separate underlayment, choose a product specifically designed for hardwood and follow the manufacturer's instructions for installation. Overlap the underlayment seams and tape them securely to prevent moisture penetration. Consider sound dampening qualities if reducing noise transmission is a priority.
Acclimation: Hardwood flooring is a natural product that expands and contracts with changes in temperature and humidity. Acclimation allows the flooring to adjust to the environment in which it will be installed, minimizing the risk of gaps or buckling after installation. Store the unopened flooring cartons in the room where they will be installed for a minimum of 48-72 hours. Maintain a consistent temperature and humidity level within the recommended range specified by Allen + Roth. Ensure the room is well-ventilated during the acclimation period. Placing spacers between the cartons allows for better air circulation.
Installation Process: Bringing the Vision to Life
The installation process involves careful placement, alignment, and securing of the hardwood planks. The specific method will vary depending on whether the flooring uses a click-lock system or requires adhesive or fasteners. The click-lock system is generally easier for DIY installers.
Tools and Materials: Before beginning the installation, gather all the necessary tools and materials. These typically include: tape measure, pencil, safety glasses, knee pads, tapping block, pull bar, rubber mallet, saw (for cutting planks), spacers, moisture meter (if needed), vacuum cleaner, and appropriate adhesive (if required for the specific flooring product). It is crucial to have all tools readily available to ensure a smooth and efficient installation.
Planning the Layout: Before installing the first row, plan the layout of the flooring to ensure a visually appealing and structurally sound installation. Determine the direction of the flooring, considering factors such as light source, room shape, and personal preference. Typically, flooring is installed parallel to the longest wall of the room. Measure the width of the room and divide by the width of a plank to determine how many rows will be needed. If the last row will be narrower than 2 inches, trim the first row to create a more balanced appearance. Use spacers along the perimeter of the room to create an expansion gap, typically ¼ to ½ inch, allowing for the natural expansion and contraction of the wood.
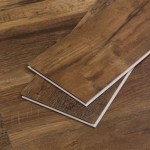
Installing the First Row: Begin installing the first row of planks along the straightest wall, ensuring the groove side faces the wall. Use spacers to maintain the expansion gap. For click-lock systems, simply align the tongue of the first plank with the groove of the adjacent plank and gently tap them together with a tapping block and rubber mallet until they lock into place. For flooring requiring adhesive, apply the adhesive evenly to the subfloor according to the manufacturer's instructions and carefully position the planks. Clean any excess adhesive immediately.
Continuing the Installation: Continue installing subsequent rows, staggering the end joints of the planks to create a visually appealing pattern and enhance structural stability. Aim for a minimum stagger of 6 inches between end joints in adjacent rows. Use a tapping block and pull bar to ensure tight seams and proper alignment. When cutting planks to fit around obstacles or at the end of a row, use a saw to make precise cuts. Remember to account for the expansion gap when cutting planks for the perimeter of the room. Vacuum the floor periodically to remove any debris that may accumulate during installation.
Post-Installation Care and Maintenance: Preserving the Beauty
Proper post-installation care and maintenance are essential for preserving the beauty and longevity of Allen + Roth hardwood flooring. This includes regular cleaning, protection from scratches and dents, and controlling humidity levels.
Initial Cleaning: After completing the installation, vacuum the floor thoroughly to remove any dust, dirt, or debris. Use a hardwood floor cleaner specifically designed for the type of finish on the flooring. Avoid using harsh chemicals, abrasive cleaners, or excessive water, as these can damage the finish. Mop the floor with a damp (not wet) mop, following the cleaner manufacturer's instructions.
Regular Cleaning: Sweep or vacuum the floor regularly to remove loose dirt and debris. Use a microfiber mop for dry cleaning. For wet cleaning, use a hardwood floor cleaner and a damp mop. Avoid using steam mops, as they can damage the finish and cause the flooring to warp. Clean up spills immediately to prevent staining or damage.
Protecting the Flooring: Place mats or rugs at entrances to trap dirt and moisture. Use felt pads under furniture legs to prevent scratches and dents. Avoid wearing shoes with cleats or sharp heels on the flooring. Keep pets' nails trimmed to minimize scratches. Use area rugs in high-traffic areas to protect the finish. Avoid dragging heavy objects across the floor.
Humidity Control: Maintain a consistent humidity level in the home to prevent excessive expansion or contraction of the flooring. Use a humidifier during dry winter months and a dehumidifier during humid summer months. Aim for a relative humidity level between 35% and 55%. Avoid excessive humidity fluctuations, as these can cause cupping or gapping in the flooring.
By following these comprehensive Allen + Roth hardwood flooring installation instructions and implementing proper post-installation care, homeowners can enjoy a beautiful and durable floor for years to come. Remember to consult the specific product documentation for any additional recommendations or requirements related to the chosen flooring product.

Allen Roth Lx56104006 Varying Length Smooth Traditional Engineered Hardwood Flooring Installation Guide

Allen Roth 816281000475 Water Resistant Laminate Floor Instruction Manual

Installing Allen Roth Swiftlock Wood Laminate Flooring

Allen Roth Nutmeg Hickory 5 In W X 3 8 T 48 Handsculpted Engineered Hardwood Flooring 32 29 Sq Ft Carton The Department At Com

Installing Our Laminate Flooring Diy House The Mommy

Lowe S Allen Roth Water Resistant Laminate Install

Allen Roth Natural Oak 3 1 4 In W X T Varying Length Smooth Traditional Solid Hardwood Flooring 27 Sq Ft Carton The Department At Com

Allen Roth Laminate Review

Installing Our Laminate Flooring Diy House The Mommy

Allen Roth Laminate Review
Related Posts