Engineered Wood Flooring Instructions: A Comprehensive Guide
Installing engineered wood flooring adds warmth, elegance, and value to your home. Understanding the process and following the instructions carefully is crucial for successful installation. Here is a comprehensive guide to engineered wood flooring instructions:
1. Acclimation
Before installation, allow the engineered wood flooring to acclimate to the indoor temperature and humidity levels for at least 48 hours. This ensures that the wood adapts to the environment, reducing potential issues like buckling or gaps.
2. Subfloor Preparation
Ensure the subfloor is clean, flat, and free of any debris or imperfections. If the subfloor is uneven, use a leveler to create a smooth surface. For concrete subfloors, a vapor barrier may be necessary to prevent moisture from damaging the flooring.
3. Installation Method
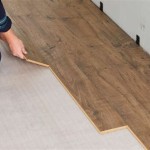
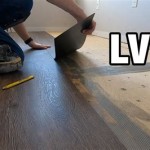
Engineered wood flooring can be installed using various methods, including floating, glue-down, or nail-down. For floating installations, the planks are connected using a locking system. Glue-down installations require adhesive to bond the planks to the subfloor, while nail-down installations involve nailing the planks directly to the subfloor.
4. Starting Point and Layout
Plan the layout and determine the starting point to ensure a balanced and aesthetically pleasing appearance. Start from the center of the room and work outwards to create symmetry. Use spacers to maintain uniform gaps between the planks.
5. Cutting and Fitting
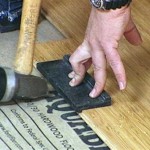
Use a miter saw to cut the planks to the desired length. Ensure accurate measurements and precise cuts for seamless transitions. Some planks may need to be cut or trimmed to fit around obstacles such as walls, doorways, and pipes.
6. Joining the Planks
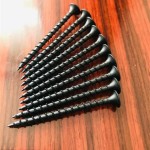
For floating installations, connect the planks using the locking mechanism. Apply pressure to the sides of the planks to ensure a secure joint. For glue-down installations, apply adhesive to the subfloor and the underside of the planks, then press them into place. For nail-down installations, drive nails into the planks at an angle to secure them to the subfloor.
7. Trim and Moldings
Once the flooring is installed, trim and moldings are added to conceal any gaps or transitions to other floor surfaces. Baseboards cover the gap between the flooring and the wall, while transition moldings connect different flooring types or areas with varying elevations.
8. Finishing
After installation, engineered wood flooring requires a protective finish to enhance durability and protect against wear and tear. This can be in the form of a polyurethane, oil, or wax finish applied according to the manufacturer's instructions.
9. Maintenance and Care
Proper maintenance ensures the longevity of engineered wood flooring. Regular cleaning with a microfiber mop or broom removes dirt and debris. Use recommended cleaning products and avoid excessive water to prevent damage. Avoid wearing shoes with sharp heels or moving heavy objects on the floor without proper protection.

How To Install Lock Engineered Hardwood Flooring

Installing Engineered Hardwood On Concrete Twenty Oak

How To Install Lock Engineered Hardwood Flooring

Engineered Wood Floor Laying Flooring Installation Method

Engineered Wood Flooring Installation Instructions And Beyond Blog

How To Install Engineered Hardwood Floors 4 Easy Installation Options

How To Lay Engineered Timber Floor Guide Fantastic Handyman Au

Engineered Hardwood Floors Installation Floor Refinishing New Jersey Repair Sanding

How To Install Lock Engineered Hardwood Flooring

How To Install Engineered Hardwood Floors A Erfly House
Related Posts