Allure Locking Vinyl Flooring Installation: A Comprehensive Guide
Allure locking vinyl flooring is renowned for its durability, ease of installation, and stylish aesthetics. Whether you're a seasoned DIYer or a first-timer, understanding the essential aspects of the installation process is crucial to ensure a successful and satisfactory outcome.
Planning and Preparation
Before embarking on the installation, it's essential to meticulously plan and prepare. Begin by accurately measuring the area to be covered and purchasing sufficient flooring material, accounting for potential waste. Ensure the subfloor is level, dry, and free of debris or imperfections. Leveling compounds or underlayment may be necessary to create a smooth and stable base.
Tools and Supplies
Gather all the necessary tools and supplies before starting. These typically include a utility knife or flooring cutter, a measuring tape, a chalk line or pencil, a rubber mallet or tapping block, a pry bar or crowbar, and a straight edge or guide. Additionally, a vacuum cleaner or broom and dustpan will be required for cleaning throughout the installation process.
Acclimation
Proper acclimation of the vinyl flooring is essential to prevent buckling or expansion issues later on. Store the flooring in the room where it will be installed for at least 48 hours before commencing installation. This allows the flooring to adjust to the temperature and humidity levels of the space.
Layout and Installation
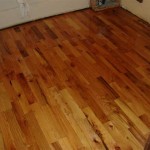
Start by determining the layout of the flooring, ensuring that the planks run parallel to the longest wall or natural light source. Begin installing the first row from a corner, aligning the planks with the walls and tapping them together using the rubber mallet. Continue adding rows, staggering the end joints for added stability. Use a pry bar or crowbar to gently lift and angle the planks into place as needed.
Trim and Finishing
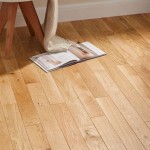
Once the flooring is installed, carefully trim the edges along the walls and obstacles using a utility knife or flooring cutter. Install transition strips or molding to cover any expansion gaps and create a finished look. Allow the flooring to fully cure for at least 24 hours before walking or placing furniture on it.
Care and Maintenance
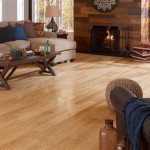
Allure locking vinyl flooring is relatively easy to maintain. Regular sweeping or vacuuming removes dust and dirt, while occasional mopping with a damp mop and a mild cleaning solution can remove spills and stains. Avoid using abrasive cleaners or scrubbing pads that could damage the flooring's surface.

How To Install Allure Isocore Vinyl Flooring

Learn How To Install Allure Ultra Simplefit Flooring Official

Allure Locking Resilient Flooring Vinyl Floating Floor

How To Install A Lock Vinyl Floor

How To Install A Lock Vinyl Floor

Allure Locking Resilient Flooring Vinyl Floating Floor

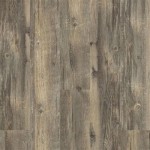
Allure Wellton 6 Mil X 7 In W 48 L Lock Waterproof Luxury Vinyl Plank Flooring 23 3 Sqft Case S132010 The Home Depot

Allure Locking Resilient Flooring Vinyl

How To Install Your Own Floating Vinyl Plank Flooring In Home Interior Design Wonderhowto

Reviews For Allure Turlock 6 Mil X 7 In W 48 L Lock Waterproof Luxury Vinyl Plank Flooring 23 3 Sqft Case Pg 1 The Home Depot
Related Posts